Create a new holiday tradition this year with an advent tree

Tuesday 29 October 2013

advent tree diy from Creative Bag

I have been waiting to share this project with you for a while. I know that Halloween is this week but I just can't wait any longer to start posting holiday ideas using our fabulous holidays packaging products. 

For all of those customers who shop in our Toronto store and have already purchased the materials to make one of these advent tree after seeing it on display ... this one is for you!

We have sold these trees in our wedding section for years but I have always thought that they would make a modern looking display for the the holidays. I used a white tree but they come in two sizes and there are some colour options so do whatever suits your holiday decor.

advent tree diy from Creative Bag

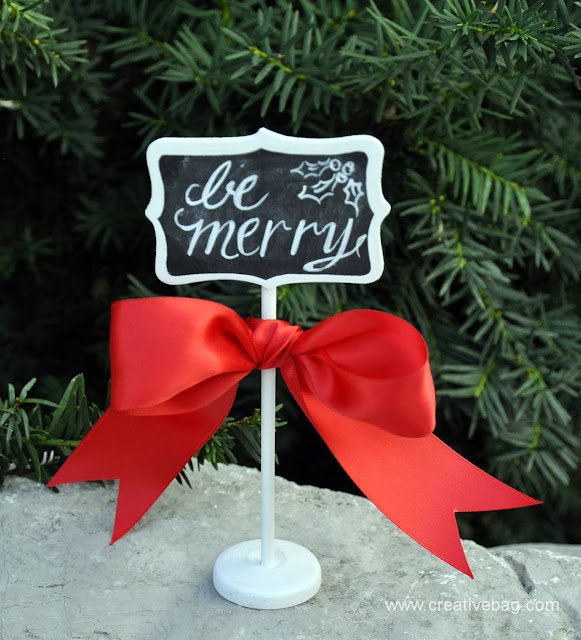
 I tied mini red and white boxes and bags to the bendable branches of the tree with the help of some red and white baker's twine. Our chalkboard sticker labels are perfect for numbering the tiny packages and I used chalkboard markers so that the numbers would not rub off easily. 

advent tree diy from Creative Bag

The tree base is white but I painted it with chalkboard paint for a fun detail. I added white sizzle wrap to the base of the tree to cover the white stones.  

I used four different packaging containers on my tree. These products all come in different colours so if you are not really into red check out the other colour options for these products. You can also recreate this advent tree using only one kind of packaging, for example all mini take out boxes, if you prefer a simpler look.
advent tree diy from Creative Bag
These are the supplies and tools that I used to create the packaging products for the tree: mini take out boxes, mini boxes, pillow boxes, mini paper bags, chalkboard stickers, chalk marker, baker's twine, scissors and hole punch.

advent tree diy from Creative Bag

Our rectangular chalkboard stickers are not the right size for the mini packaging for this project but they are very easy to cut into squares as you can see from my picture above. Hold onto those small pieces because I'm sure that they will come in handy in another project! 

Tip: it is easier to write the numbers on the chalkboard stickers with chalk markers BEFORE you add them to the finished packages. 
advent tree diy from Creative Bag
The mini take out box is perfect if you want to fill it with some mini candy bars or small toys. To make the mini take out box into ornaments to hang you will need to tie a piece of baker's twine to the wire handle. I tied a knot and then created a loop for hanging with the ends of the twine. If you cut the twine long enough you can tie a bow at the top. Add a chalkboard label to the side of the box as shown above.
advent tree diy from Creative Bag
I love pillow boxes and these ones are a great size for small candy bars or treats. I wrapped baker's twine around the pillow boxes a few times and then tied a knot at the top before creating a loop for hanging. I didn't tie a bow on top of my loop on this package because I didn't want all of the packages to have the same detail ... you could add a bow if you want! Add the chalkboard label over top of the twine on the side of the box as shown above.
advent tree diy from Creative Bag
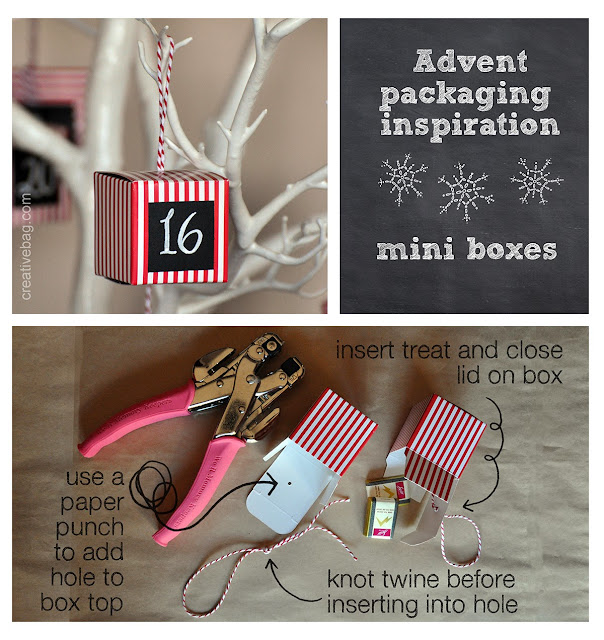
I designed these packages with the idea that this advent tree could be reused for years to come. So with that in mind I decided to punch a hole in the top of the mini box so that I could hang the box and the lid could easily be opened and closed. You will need to punch the hole in the middle of the box top so that it hangs straight ... I used my crafting hole punch with a long reach. Create a loop for hanging with a long piece of baker's twine using a bulky knot that is larger than the hole in the box. Insert the loop of the baker's twine through the back of the hole and pull until you reach the knot. Insert a small toy or treat and close the lid on the box. Add the chalkboard label to the side of the box as shown above. 
advent tree diy from Creative Bag
I adore these mini paper bags ... they come in so many great colours and although the other packing products have red and white stripes I think that the chevron pattern co-ordinates works here. These bags don't hold a lot but my idea on these were to add little love notes inside telling your child to look some where special for a surprise. Maybe a new book tucked away in their bedroom closet. Or maybe it's a message telling them that you are going to watch a holiday show with them on tv tonight. To hang the paper bags I punched two holes near the top of the bag. I created a loop with the baker's twine and tied a knot leaving two long ends to attach to the bag. Important note: you will have to add the note or treat into the bag before you go onto the next step. Pull one end of the baker's twine through each hole starting at the back of the bag and ending up in the front. Tie a simple bow to hold and you are ready to hang. Add the chalkboard label to the front of the bag as shown above.

advent tree diy from Creative Bag

Once you have made all 25 packages, hang them on your tree and just wait for the kids to start jumping up and down! Looking for more great advent ideas? Check out our Pinterest Christmas boards for more inspiration. 

And as promised, in this post I am happy to announce the winner of our first ever PIN IT TO WIN contest. Thanks to everyone that is now following us on Pinterest and a special thanks to everyone that entered the contest. Our winner is May C. and her winning pin can be seen here


Have a great week everyone!

Creative Bag products featured in Style at Home Magazine's November Holiday edition

Thursday 24 October 2013


I picked up a few holiday magazines earlier this week and was totally blown away by the new (November 2013) Style at Home magazine. I read every article - some twice. There are so many great ideas for the holidays. Between working with all of the Christmas products in our stores and reading a few holiday magazines like this one I can hardly wait for Halloween to be over so I can get started with my Christmas holiday decorating! 


 I knew that a number of our products were going to be featured in Style at Home but as I started flipping through the pages I found myself getting more and more excited about all of the beautiful photos and inspiring ideas. One of my favourite regular column in the magazine is the "high or low?". Our Rosanna cake stands and domes, ribbons and tags were featured in the "high or low?" column. Yeah!!! Aren't these pictures beautiful? Wouldn't you feel like a kid in a candy shop if your kitchen looked like this for the holidays?! 


 I started to collect some of these white cake stands for my kitchen already. My daughters bought me my first one as a Mother's day gift and I'm hoping to have enough to use for a holiday display this year.  I have always avoided buying the glass domes but now that my children are older I think that I may invest in a few. Non-perishable display items would look great under glass and I can see setting up a few of them on the dining room table on the days that we are not using the cake stands and domes for entertaining. 

Note: We don't have any of the Rosanna cake stands on our website. They are only available in our stores. Many of our customers have told us that our regular prices on these products are lower than the regular prices at other Canadian retailers selling the exact same product.


There are lots of diy projects that I have marked in the magazine and have to try myself. I especially love the cookie packaging ideas (lots of great ideas for pot lucks and hostess gifts), the salt dough ornaments made with cookie cutters and baker's twine and the holiday wreathes. I especially liked the one featuring gift tags that have been stamped with holiday images, portrait silhouettes and family member names. You can find more diy projects on the Style at Home website too!


Our kraft lunch boxes were featured on page 62 with the cookie packaging ideas. They painted the box with turquoise paint. One of the girls in the office came up with the idea of painting the kraft lunch boxes with our Martha Stewart chalkboard paint. So of course, yesterday I had to paint one of the lunch boxes I bought for my daughter to use in her bedroom. I have the turquoise blue MS chalkboard paint as well so I may have to paint the other one with blue chalkboard paint. I still need to add some wrapping paper to the inside of the box like they did in the magazine. My daughter and I can't wait for the black chalkboard paint to "cure" so we can start adding a design with chalk markers!


There are four pages of inspiring gift wrapping ideas by the Style at Home design team. The "Paper Divas" all had very different styles and there are multiple ideas from each Diva. Check out the ideas and then shop with us for wrap, ribbon, gift tags, paper punches and more to recreate many of these yourself.  


I always love it when we are "on trend" with products that we sell and when I see magazine articles with products that we carry it makes me happy! Cardinals, red and white packaging, glass containers for food presentation, chalkboards and burlap stockings are a few of the items that stood out for me. 

By the way, I was pleasantly surprised to see that most of the Etsy artisans featured in the "Hung by the Chimney with Care" article were Canadian Etsy artists. 


I hope that you get a chance to pick up a copy of Style at Home's November 2013 magazine and can find a few hours to yourself to curl up in a comfy chair with a warm cup of tea (or coffee)  and just read.

********************************************************************************************


I'm going to be pinning lots of these ideas to our Creative Ideas for Christmas Pinterest board. Our "Pin It To Win" Contest is still going on. 
If you are interested in entering you have until end of day on October 27th, 2013!

**********************************************************************************************


Pin It to Win Holiday 2013 Contest!

Saturday 19 October 2013

Creative Bag's Pin It To Win Contest - enter before end of day October 29, 2013

Everyone at Creative Bag loves Pinterest and we hope that you do too! 
Pinterest is a great place to learn how to make things, plan a wedding, party or home décor project, organize photos of  items you want to purchase and to just be inspired. I pin projects and products from our blog and website but I also try to spend a little bit of time on Pinterest everyday to be inspired and find ideas to add to our boards.
We recently had a small programming error that resulted in me having to rebuild our Creative Bag Pinterest boards from scratch. We are now up and running again but unfortunately, we “lost” all of our followers during the process. So if you thought that you were following us … you’re not!  
I am hosting a “Pin It To Win” contest in the hopes that you will take the time to follow us - again or for the first time! 
Sign up to follow our “Creative Ideas for Christmas” Pinterest board (and as many of our other Pinterest boards as you'd like) and  you will have a chance to win a prize package that I have put together just in time for the holidays.
Have I got your interest? Please see the contest rules below for more details on how to enter and Good Luck!!
 Creative Bag's Pin It To Win Contest - enter before end of day October 29, 2013
The "Pin It To Win" prize is a package for one lucky winner filled with all of the Creative Bag supplies that you need to create my stamped canvas bag project. You can find my tutorial here
The prize package includes: an assortment of different sizes of drawstring canvas bags, a black permanent ink pad, a package of Christmas themed stamps, a set of three acrylic stamping blocks and a spool of baker’s twine.
If you don’t have a Pinterest account yet you can create your own (it’s free) by clicking onto this link.
Happy Pinning!
***************************************************
OFFICIAL RULES FOR CREATIVE BAG’S PIN IT TO WIN CONTEST:
step 1. To enter the contest you will need to pin one of the two photos above. 
step 2. Then head over to our Pinterest boards and follow our “Creative Ideas for Christmas”board. Please feel welcome to follow any other boards that interest you while you are there!!
Creative Bag's Pin It To Win Contest - enter before end of day October 29, 2013

step 3. Once you have completed steps 1 & 2, come back here to the blog and post the link to your pin in the comments below! 
The contest starts now and you will have until the end of day on October 27 2013 to enter.
 A winner will be drawn at random on October 28, 2013. 
Check back here on the blog on October 29, 2013 to see who won! I will also post the winner’s name on our “Creative Ideas for Christmas” Pinterest board.
The winner will be asked to contact me by email with their mailing information so I can ship out the prize package. The winner will have one month to get back to me to claim the prize. If the prize is unclaimed by November 29, 2013 I will select another random winner. The prize (as shown and described below) will be shipped by standard mail to one lucky winner.
Creative Bag's Pin It To Win Contest - enter before end of day October 29, 2013
The prize package will be awarded to one winner. Package includes: an assortment of different sizes of drawstring canvas bags, a black permanent ink pad, a package of Christmas themed stamps, a set of three acrylic stamping blocks and a spool of baker’s twine.
***********************************************************
UPDATE: The contest is now over. Thanks to everyone that entered the contest and is now following us on Pinterest. We will be selecting a winner and posting the name on Tuesday October 29, 2013.


Chalkboard art inspired packaging ideas for the holidays using tin containers

Thursday 17 October 2013

chalkboard art inspired packaging ideas for the holidays using tin containers by Creative Bag

The holidays are coming and I'm really excited to share with you some holiday packaging ideas that I hope will inspire you to break out the chalk markers and try some of these yourself. Chalk boards art is everywhere and I love the look of chalkboard paint and chalkboard stickers on our tin containers. I hope that you will agree.

chalkboard art inspired packaging ideas for the holidays using tin containers by Creative Bag

I was thinking about food gift packaging when I was creating most of these projects but I'm sure that these packaging ideas will work for items that are not edible as well! You can see from the pictures above that the contents of the gifts are not going to be a surprise. Homemade oatmeal chocolate chip cookies, hot chocolate mix and peppermint chocolate bark packaged in tin containers would all make great holiday hostess gifts. 

chalkboard art inspired packaging ideas for the holidays using tin containers by Creative Bag

My "eat, drink and be merry" theme continues on these next few packaging ideas. All of these projects are a great idea if you want to keep the contents of your gift a secret. I used kraft wrapping paper inside our clear tin containers to keep the contents under wraps. 

chalkboard art inspired packaging ideas for the holidays using tin containers by Creative Bag

Chalkboard paint was added to the side of one of our round tins and finished off with lace tape and baker's twine. 

Here's my general directions for using chalkboard paint on tin containers :

Step 1.  Use painter’s tape to mask off any areas that you do not want paint to be applied.

Step 2.  I used Martha Stewart’s multi-surface chalkboard acrylic paint and a small paint 
brush. Apply 2 to 3 coats of paint directly onto metal surface , allowing paint to dry between 
coats of paint. Let the paint dry for 24 hours before using chalk markers

You can find my tips and tricks on how to use chalk markers in this post

chalkboard art inspired packaging ideas for the holidays using tin containers by Creative Bag

I painted the lids of these clear tin containers with chalkboard paint. I wanted to hide the contents of the containers so I cut kraft wrapping paper to fit the inside of each container. We now carry a great paper cutter that makes cutting wrapping paper a breeze.

Lace tape covered the edge of the oval container's lid. The lace tape is a decorative element that looks great and hides paint imperfections on the side of the lid! I added a wide satin ribbon for a little pop of colour.

Scraps of ribbon and twine along with a frosted branch and burlap bird were used to decorate the handle on one of our clear metal pails. I kept the chalkboard element on this gift simple by just painting the inside of the pail's lid. 

Note the product # for the oval container is 6LP0402.

chalkboard art inspired packaging ideas for the holidays using tin containers by Creative Bag

We have lots of great decorative holiday ornaments and decorating elements in the stores and online right now. I especially like these burlap flowers and thought that it would make a great accent on our tall tin containers Kraft wrapping paper, white burlap ribbon, red satin ribbon and red twine were wrapped around the container. I decorated the lid with chalkboard paint and wrote "eat, drink and be merry" just along the edge of the lid.

Note the product number for the tall (bottle) tin container is 6U35.

chalkboard art inspired packaging ideas for the holidays using tin containers by Creative Bag

Running short on time? Don't have time to use chalkboard paint but want the look? Try our chalkboard stickers! These stickers come in three different shapes and can be dressed up quickly and easily using our chalk markers. Made a mistake with the marker? Don't worry. Just erase using a damp cloth and start again. The best part about using chalk markers is that after they have dried the design will not rub off like regular chalk so your "art" will always look great. 

chalkboard art inspired holiday decorating ideas by Creative Bag

Our small chalkboard signs look extra festive when you add a wide satin bow to the stem!
I can see these being used as escort cards at a holiday dinner party. 

Love the look of chalkboard art and want some more inspiration? Want more holiday inspiration? Follow our chalkboard and holiday themed Pinterest boards. I'm always adding new pins.