

I have been making tissue paper flower pompoms for a number of years. The basic one colour pompoms are nice ... the multiple colour pompoms are cute ... but I think that these new ones that I have been creating are just adorable! The secret is to cut the ends into different lengths and shape the edges.
These tissue paper flower pompoms are not for hanging, they are meant to be flat on the back to hang on walls or place on table tops.
Here's how to make them ...

1. You will need eight sheets of tissue paper to create these medium and large tissue paper pompoms. I used three colours ... two blue (flower centre) , four purple (flower) and two green (leaves).
2. Along the shortest edge, start making accordion folds about 1" wide. Crease the tissue with each fold. When all of the tissue has been accordion folded, fold the tissue in half to mark the centre.
Note: 8 full sheets (20" x 30") of tissue paper will made one large pompom. Cut the tissue in half (15" x 20") to create two medium pompoms. My samples are all medium.

3. Now comes the fun part ... shaping the different layers of the flower. You can see above on the left that I separated the three colours of tissue and then folded each colour stack back together. I cut the green tissue first - both ends now have a pointed edge. Next I cut the purple tissue with a rounded edge - notice that it is now much shorter in length than the green tissue. Last I cut the centre blue tissue with a fringe edge (the fringes are about three inches long) -notice the blue tissue is much shorter in length than the purple tissue.
4. Once all of the edges are trimmed you need to open the three tissue paper groups and using the accordion fold as your guide layer the tissue into a single stack as shown above on the right.
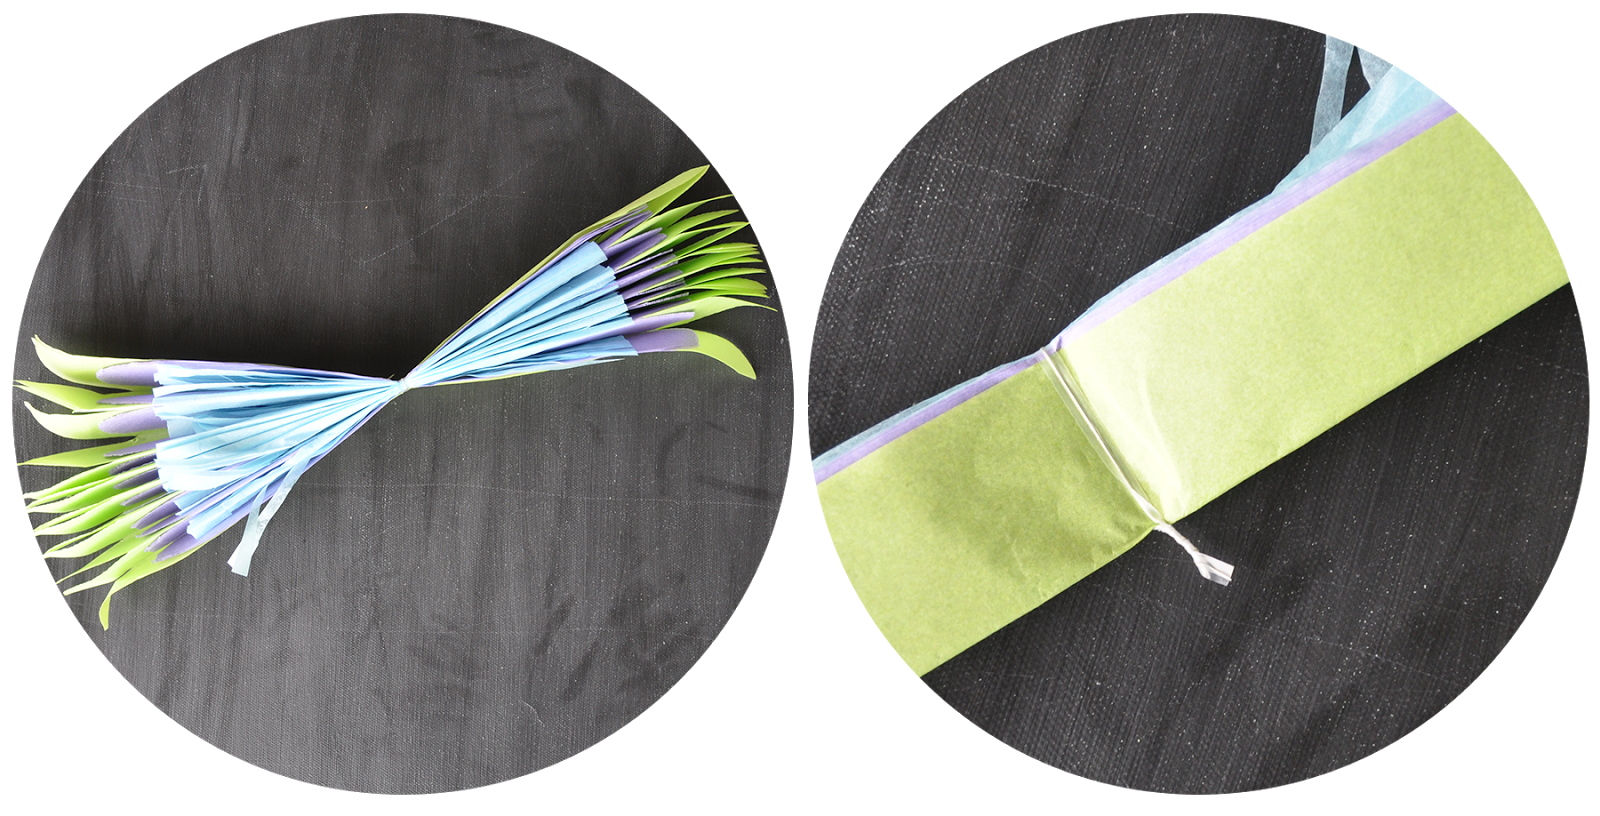
5. Re-fold the tissue papers as shown above on the left and find the centre fold of the tissue stack.
6. At the centre fold, add a twist tie to hold the tissue together.

7. Starting with the blue tissue, separate the layers gently by pulling away from the centre one layer at a time. Do this with all of the tissues on one side and repeat on the other side.
I told you these were adorable! And they are really not that difficult to create. Experiment and make some yourself. Mix these with traditional hanging tissue paper flower pompoms when you are planning your decorations. You can find my tutorial for making hanging tissue paper pompoms here and if you want to buy our tissue paper pompom kits you can find them here.

I think that these tissue paper flower pompoms would be fabulous at a party, shower or wedding. These colours look great with the free printables I created on this post - just in case you missed it.
Find it here: blue ball mason jars, striped paper straws, tissue paper packages, tissue paper pompom kits.


⋅No comments
Post a Comment