Coming Soon! Do-It-Yoursself YouTube videos with Elle Daftarian from Petite & Sweet

Friday 28 March 2014


Elle Daftarian from Petite & Sweets | coming soon ... diy sweet table videos

I had a great week at work this week ...well, to be honest, I usually have a great week at work (I LOVE working at Creative Bag!) ... but this week was exceptional. Creative Bag has teamed up with the very talented Elle Daftarian of Petite & Sweet and together we are creating a series of DIY YouTube videos that we know you are going to want to watch. 

Elle Daftarian is the owner and creative director of Petite & Sweet a lifestyle and event planning company. Elle creates one of a kind dessert table and stylized events. 

You may also recognize Elle as one of the stars of Sugar Stars - a very popular reality show that airs on the Food Network. Sugar Stars exposes the details, deadlines and drama behind Petite & Sweet's event planning empire. 

The first video will be up in another week or so. I'll add the link here on the blog as soon as it is available. So stay tuned!!!


Sweet table supplies - some of our favourites!

Tuesday 25 March 2014

Fabulous diy sweet table supplies for parties, weddings and special events | creativebag.com

A party without cake is just a meeting. Add a beautiful sweet table to your party and you've got a celebration that will have everyone talking long after the party ends.

Just in case you didn't know already - we have EVERYTHING that you need to create your own sweet tableLet me show you some of my favourites ... 

Fabulous diy sweet table supplies for parties, weddings and special events | creativebag.com

Glassware. Whether you are looking for candy jars or mason jars we've got a great selection in store for you. Most of our glassware is only available in store (or pick up from our warehouse) but we do have a few glassware options at Creative Bag Wedding that can be shipped out and you can see them here.

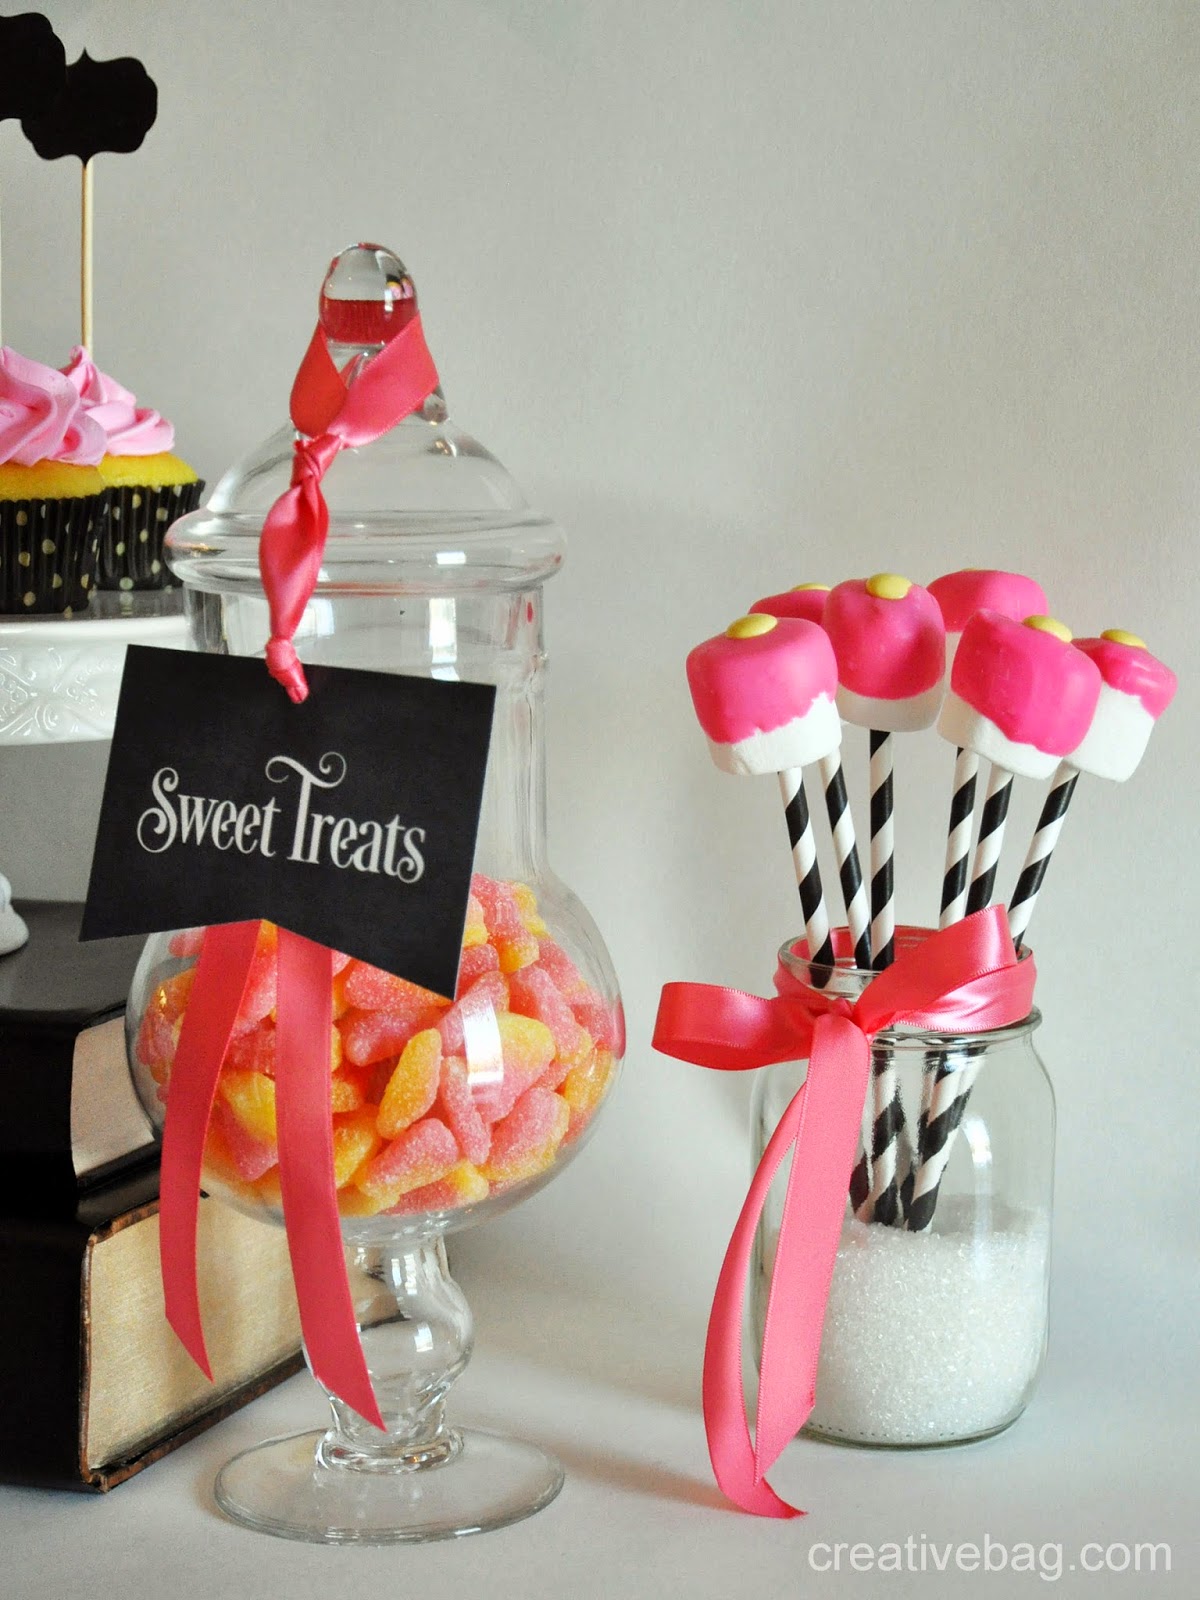
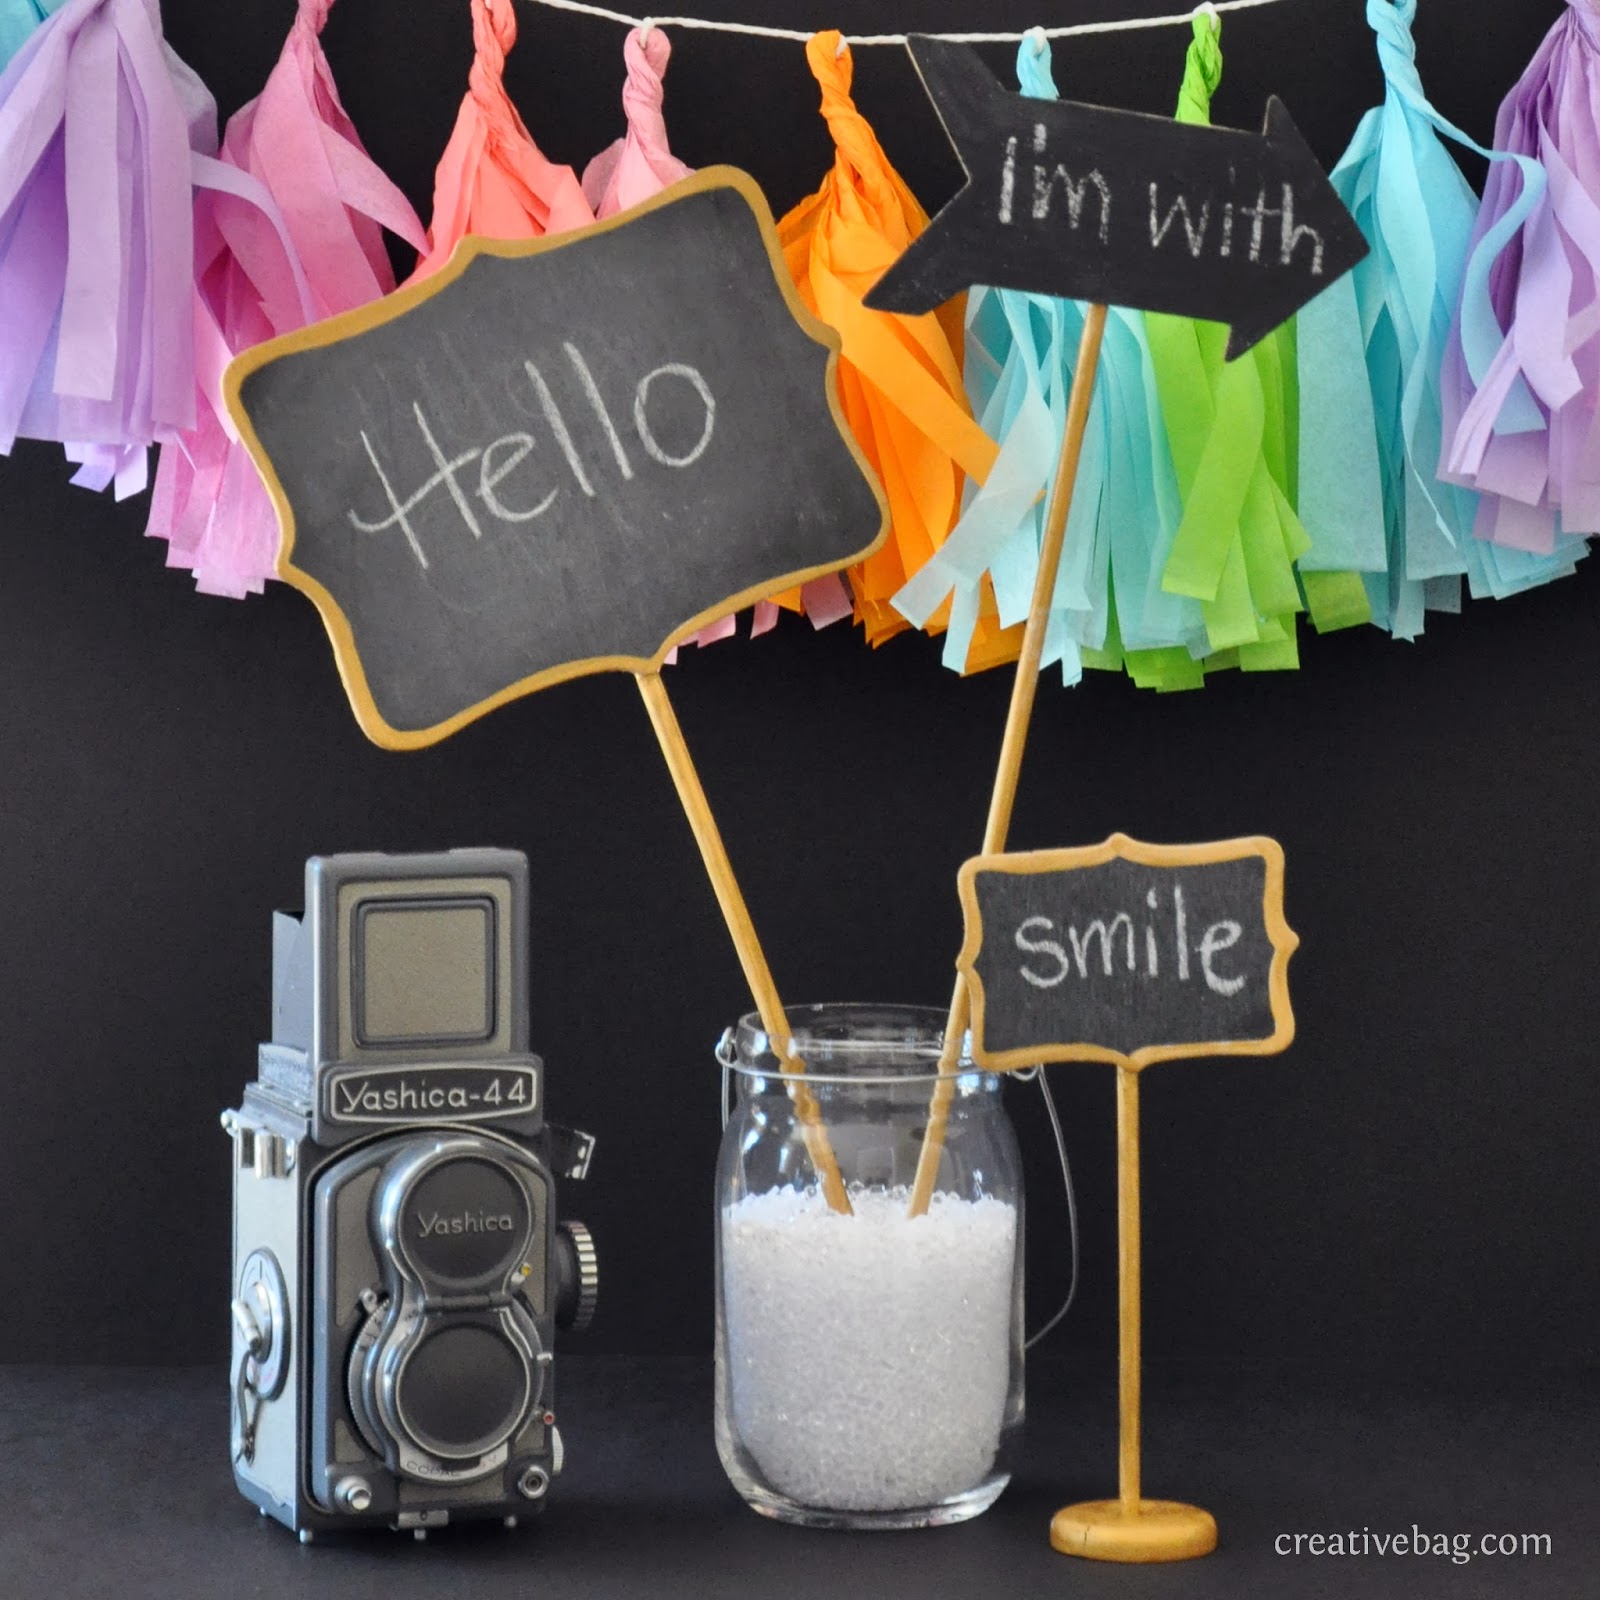
Ribbon. We have a large selection of ribbons and I'm sure that you will find something to match your colours and theme. Tie ribbons onto glassware to hold signage or to just add a little colour pop!

Paper Straws. These fun and colourful classics are not just for drinking! Use them to create marshmallow treats - you can find my tutorial for making them here.

Candy Scoops. Add some candy scoops inside each jar so that guests can serve themselves. 

Fabulous diy sweet table supplies for parties, weddings and special events | creativebag.com

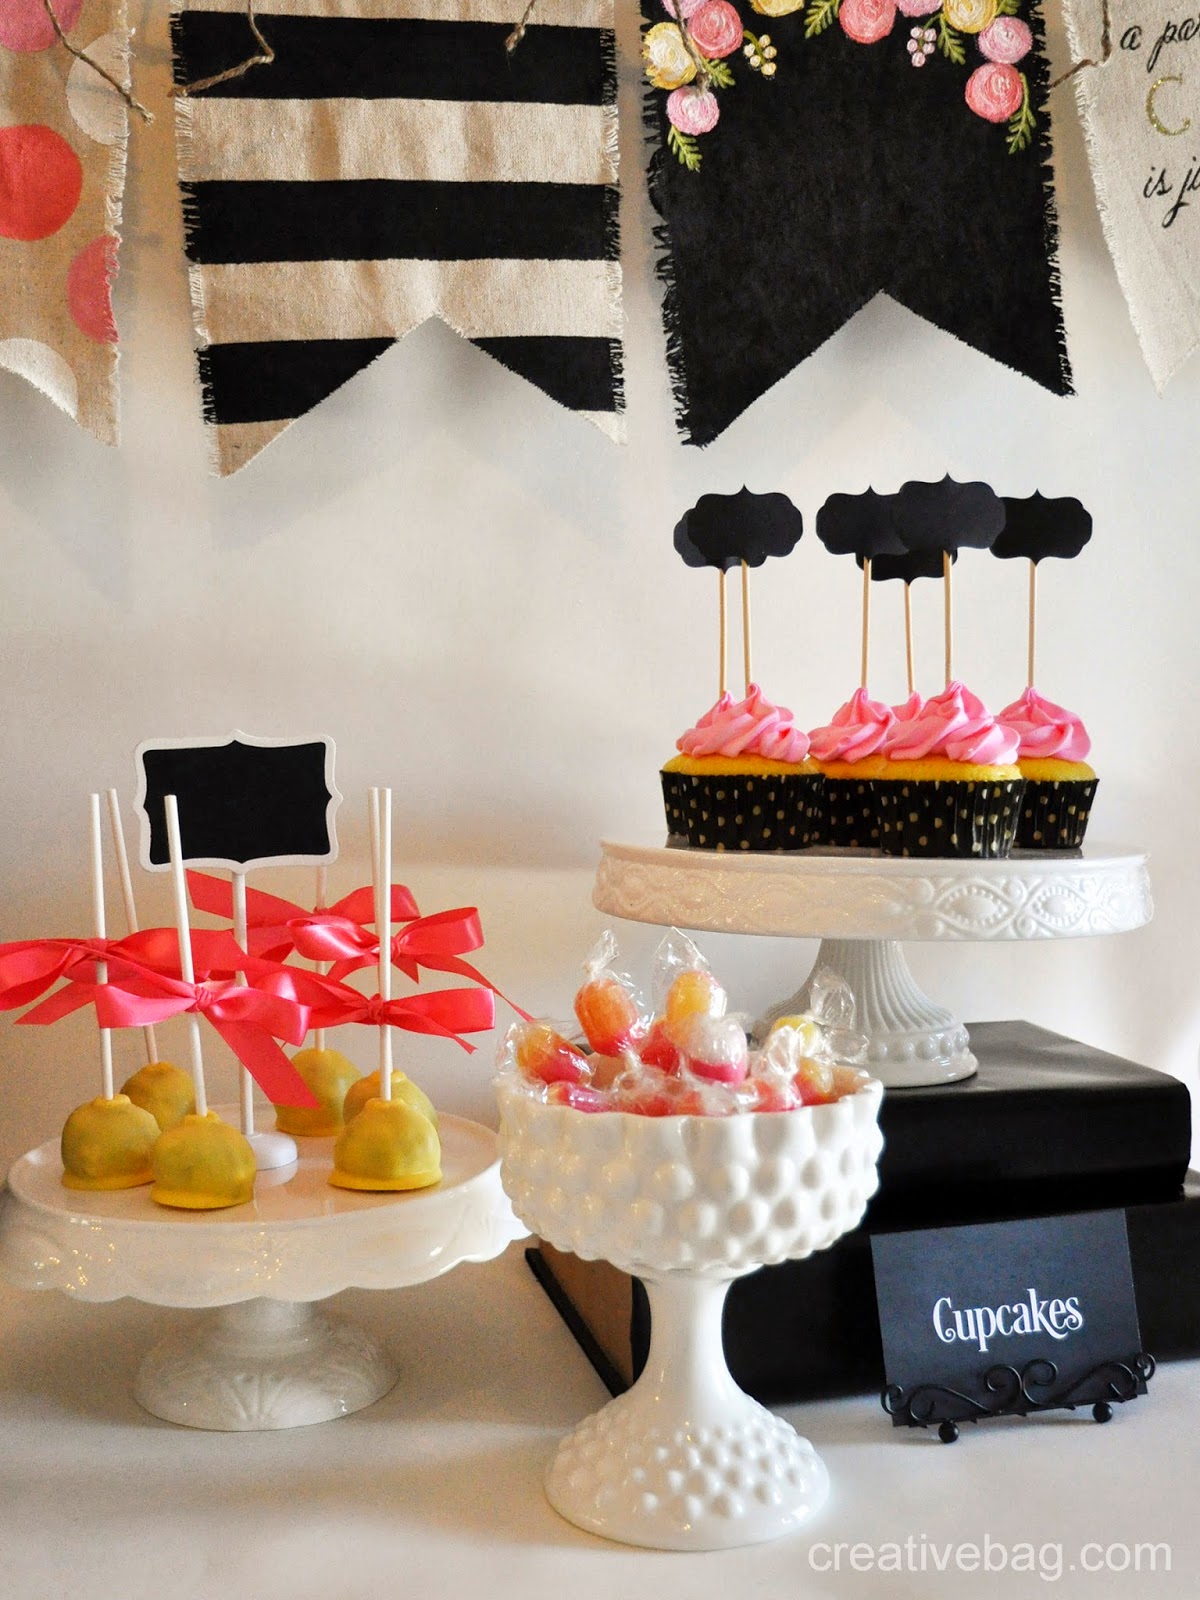
Rosanna Cake Stands and Bon Bon Footed Bowls. Unfortunately, we don't have these on our website but we do carry them in all of our stores. We have a great variety of different sizes and shapes and we are always adding new styles. 

Lollipop Sticks & Cupcake Liners. Add ribbon or washi tape to lollipop sticks for a fun detail on your cake pops. We have a variety of different cupcake liners and our selection is always changing.

Chalkboard Stickers. Add chalkboard stickers to wood skewers and create your own cupcake decorations. Tip: Use chalk markers on the stickers before adding them to the wood skewers.
Fabulous diy sweet table supplies for parties, weddings and special events | creativebag.com

Card Holders. Escot card holders can also be used on a sweet table to hold signage. We have a large selection of card holders like this one and you can find them here  at Creative Bag Wedding.

Wrapping Paper. Use wrapping paper to create book covers and then use the books to elevate your cake stands and glassware.

Fabulous diy sweet table supplies for parties, weddings and special events | creativebag.com

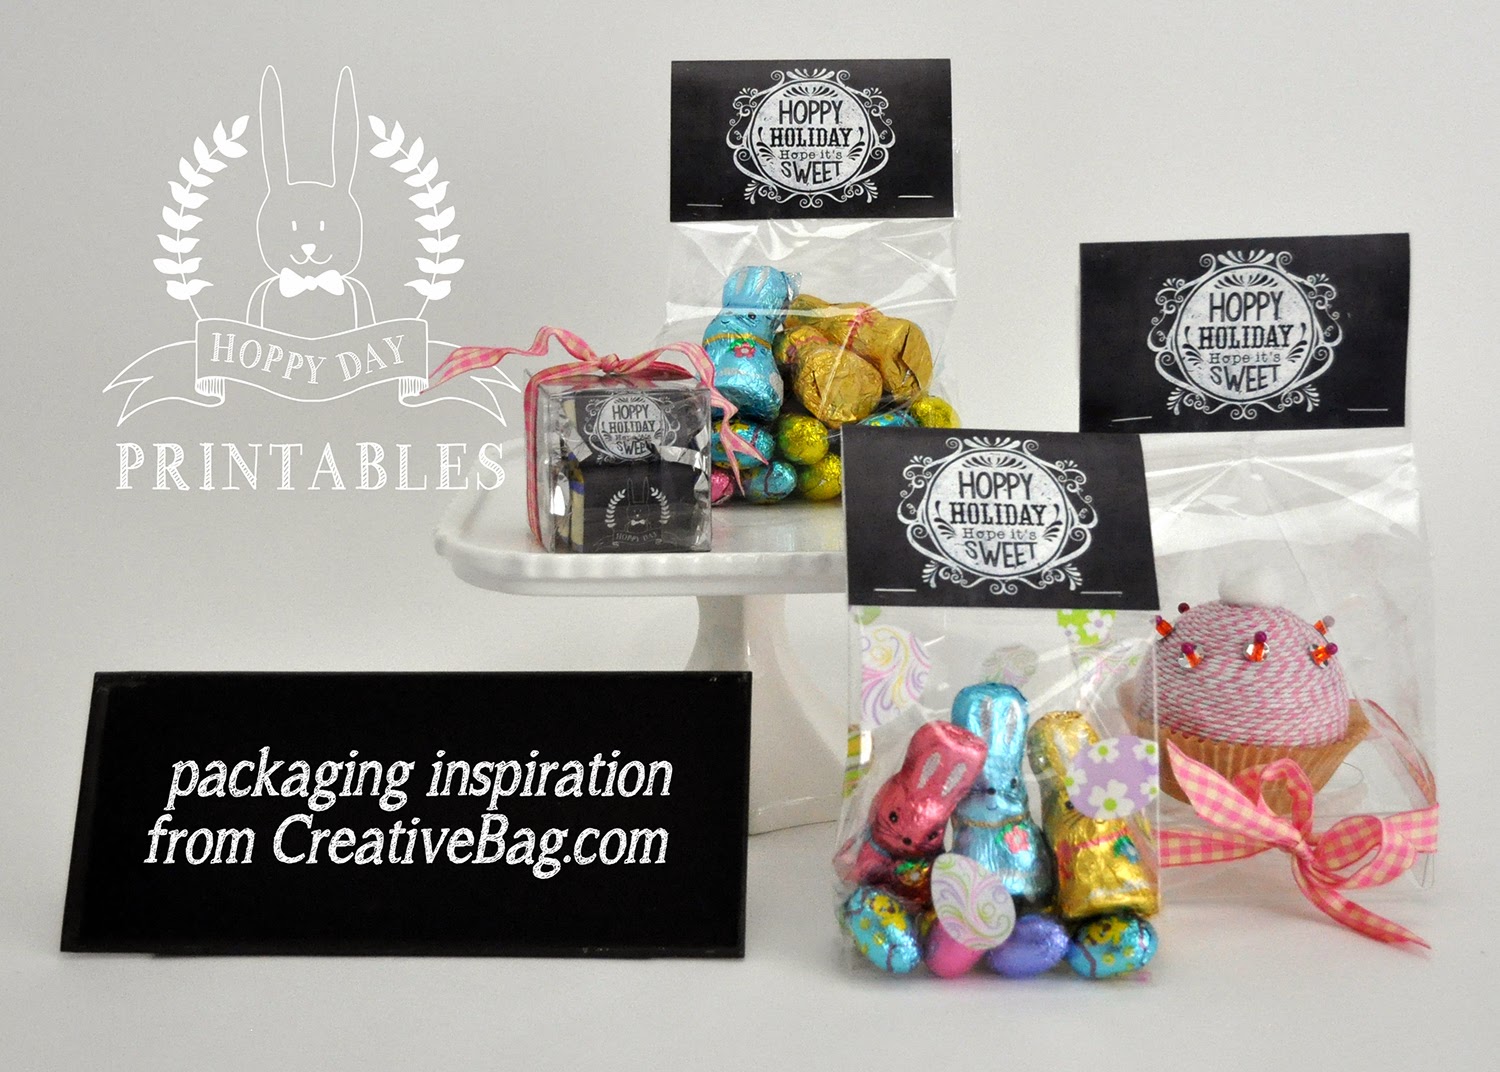
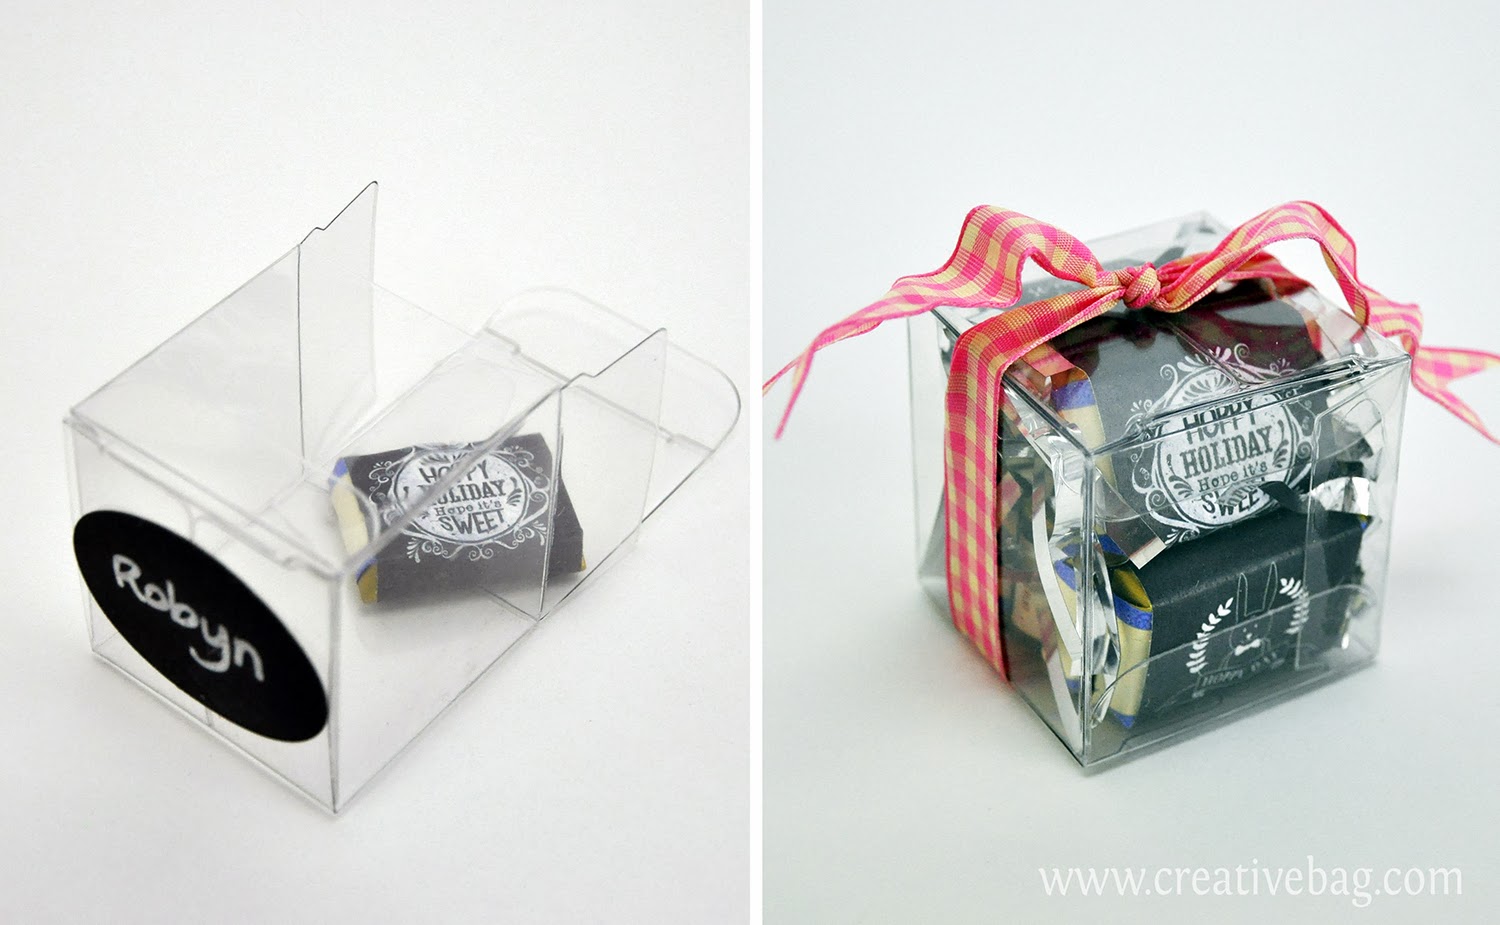
Candy Bags. Whether you use candy bags to package take home favors or just want to set out the bags for guests to fill themselves, you are sure to find lots of candy bag options to add to your sweet table decor. Bags with flat bottoms can be set up as you see them in neat little rows.

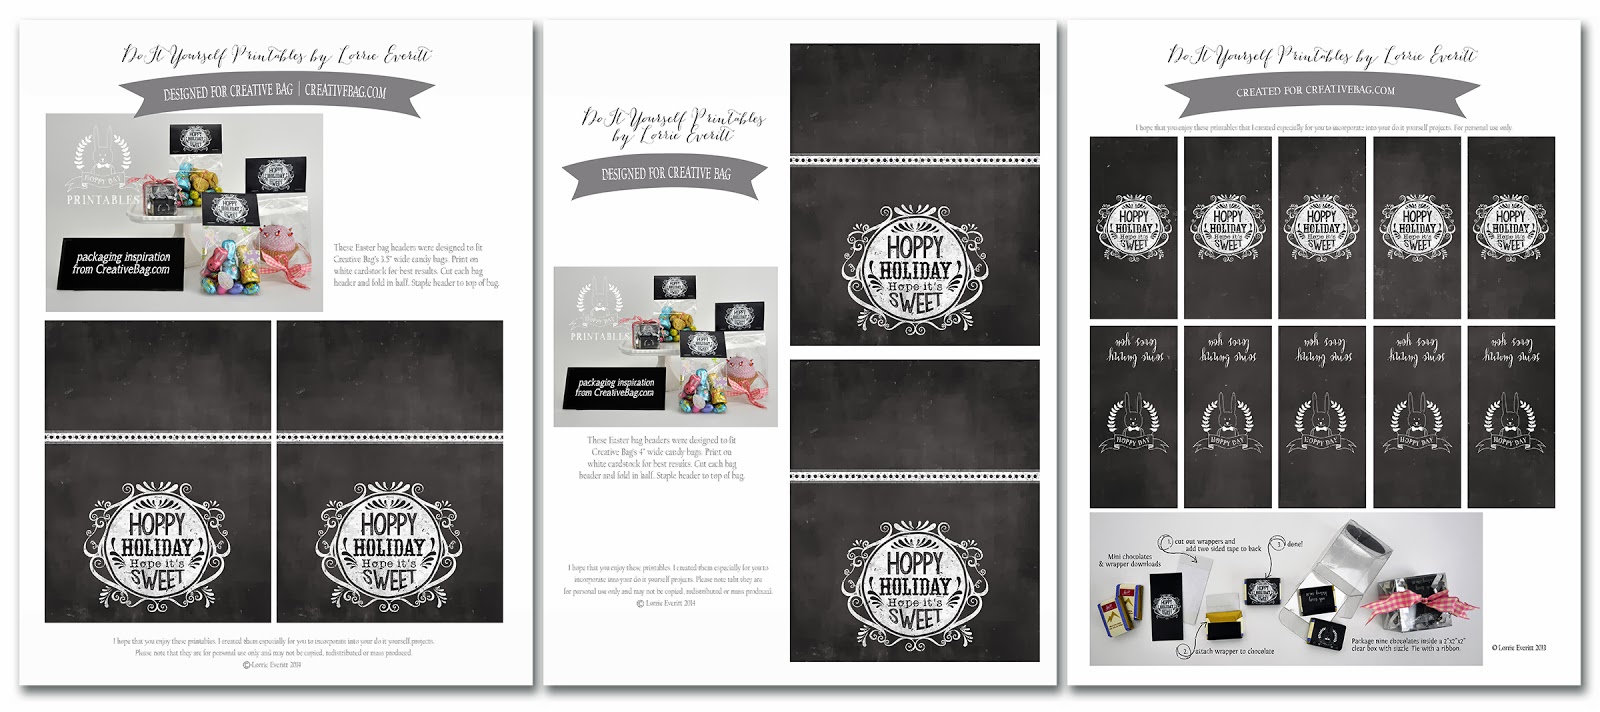
Baker's Twine & Chalkboard Tags. Use these to decorate plain candy bags and make them your own. Baker's twine is available in many different colours and new colour combinations are always being added. We have a variety of different chalkboards with clips that are easy to add to bag tops ... add a name or thank you message to each bag to personalize!

Fabulous diy sweet table supplies for parties, weddings and special events | creativebag.com

Linen Favor Bags. These ones have been embellished with glitter (find my tutorial here) and filled with more take home treats. If you are thinking about using any of our fabric bags to package candies it is best to use wrapped candies as these are not food safe.

Lunch Boxes. Display favor bags in a lunch box styled container. Our kraft lunch boxes can be painted to match your colour theme. I used black chalkboard paint on the one pictured above.

Market Trays. The wood market trays are perfect for presenting and organizing treats on the table. I turned a small one over here to elevate the lunch box filled with favor bags.

Mason Jars, Daisy Lids and Paper Straws. Fill them with milk or juice for little guests or something a little more "grown up" for your adult guests! Everyone will love them.

cute diy bunting inspiration for parties, weddings and special events | creativebag.com

Linen Bunting. Give your sweet table some height by hanging a fun bunting above. In my last post I gave you some tips and tricks on how to decorate our plain linen and burlap banners. 
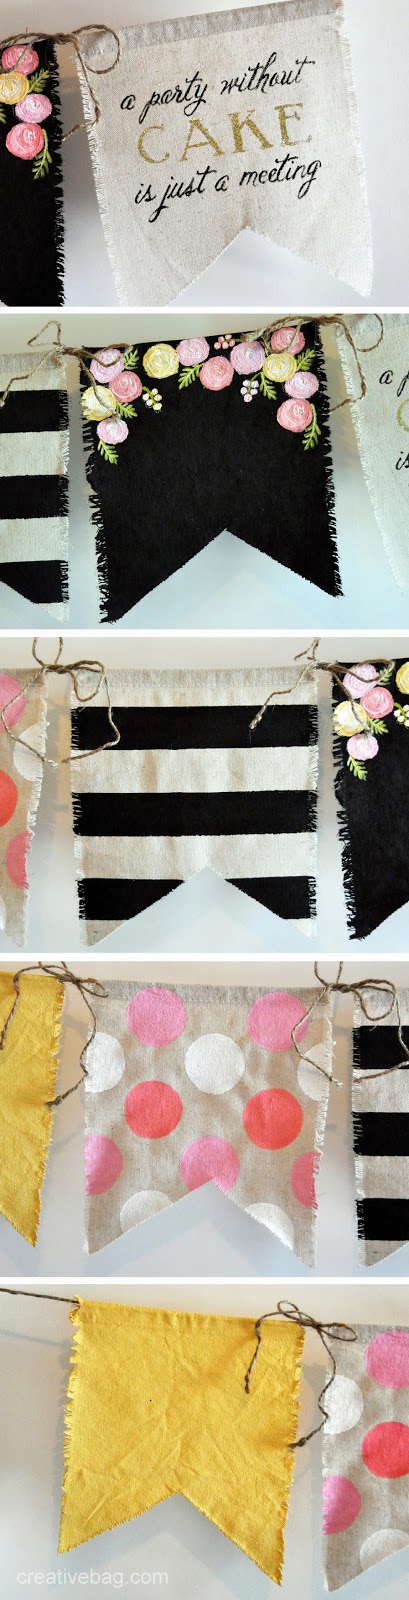
Here's how I painted the banners above using inexpensive acrylic craft paint:
1. Trace a saying onto the bunting using a disappearing ink fabric pen and then use paint to write out your saying. I used a mix of black and gold sparkle paint in my example.
2. Paint the banner black - I used black chalkboard paint on mine. Then paint a few colourful flowers or whatever you want to add a decorative element. I can add a letter or number to the blank space to personalize this banner over and over again with chalk markers
3. Use painter's tape to create stripes. Tip: I covered the entire banner with rows of painter's tape and removed select strips of tape to create the stripes.
4. Using a glass as a template and a disappearing ink fabric pen, I drew out a polka dot pattern. Tip: I wrote what colour to paint each dot so I could work out my pattern before painting.
5. Paint each banner a solid colour if you want to keep this simple!

Ok, are you in the mood for some sweets? I am!!

Fabulous diy sweet table supplies for parties, weddings and special events | creativebag.com

We are working on a special sweet table project with Petite & Sweet. Stay tuned for more details!


Bunting inspiration using our burlap and linen banners

Friday 21 March 2014


Our linen and burlap banners are easy to customize to suit your wedding, party or event. 
Here's some creative ideas to make these your own!


In this first sample I used glitter paint to add letters to this burlap bunting. 
Tip: You can use a fabric marker that disappears after a few hours to mark out your letters before you paint them on.


Add chalkboard paint to burlap banners to create a bunting that can be reused with different messages. I used chalk to condition the chalkboard paint and chalk markers to write the letters. Make it your own: Chalkboard paint is available in a number of different colours so don't limit yourself to just black!


Dress up your bunting with ribbons and decorative elements. It's a great way to add colours to a bunting that has been embellished with black chalkboard paint
Make it your own: I glued the burlap flowers to wood clothespins and clipped them onto the bunting so that I could easily remove the flowers later.


Our linen banners are like mini painter's canvases. They are easy to paint on and because the fabric more see through than canvas it is easy to trace elaborate letters onto the fabric before you paint. Simply create your letters in a word document, print them out on paper and trace the letters onto the banners using a pencil (or fabric pen with disappearing ink).
Make it your own: Our linen triangle banners come with a ribbon for hanging. I removed the ribbon and used our lace ribbon and fabric tape to hang the bunting above.


This style of linen banner is a little larger and I was able to add words not just letters. This bunting design would be cute pinned on the back of two chairs at a sweetheart table.
Make it your own: Gold glitter paint and wide lace ribbon give this linen bunting a romantic vintage vibe.


Want to add a little more colour to your bunting project? Paint our linen banners using acrylic craft paint! It's inexpensive to do and a craft paint is available in so many colours.
Tip: Paint one side first and allow it to dry completely before turning over to paint the other side. The paint will bleed through the fabric so make sure you cover up your work area. 


I did a lot of experimenting with paints and colours on the banners. Here's my burlap tester!


Above are some shots that I took while I was experimenting with different products and techniques. 
Top left: Trace lettering on linen banners using fabric markers with disappearing ink. Use a ruler to mark out where to place your letters before you start tracing.
Top right: Use clear plastic or glass containers to trace out circle shapes on burlap banners. Painter's tape works if you want shapes with straight lines but remember to remove the tape before your paint dries. 
Bottom left: Use disappearing ink fabric markers to sketch out lettering on burlap banners.
Bottom right: Martha Stewart glitter paint works well on both linen and burlap. One coat of glitter paint is often all you need.


Love this idea using a single linen banner. I added a saying to a single banner that I could use in a store display. I think that this would be fun element to add to chair backs for a party. 


Here's an assortment of linen and burlap bunting that we have in stock right now. Not into diy?Check out the David Tutera pre-made burlap bunting. Each kit contains lots of letters so you can spell out what you want!


Packaging inspiration and free downloads for Easter sweets

Tuesday 11 March 2014


Easter packaging inspiration and free downloads | creativebag.com

In today's post I am going to share a few Easter packaging ideas and some more of my free printables that you can download. Easter candies and sweets are usually very colourful and for that reason, I prefer to package Easter treats in clear candy bags and boxes. I designed the bag headers and candy wrappers using a chalkboard background so that the colours in the packaging would not take away from the items being packaged inside. 

Easter packaging inspiration and free downloads | creativebag.com

The bag toppers are available in two sizes: 3.5" wide and 4" wide to fit some of our clear candy bags and clear cupcake bags. Our clear printed candy bags are available year round with assorted printed patterns - I especially like these headers with the Easter egg patterned bag (shown above middle).

I didn't have a real cupcake on hand when I was shooting these photos so I used a cupcake that was crafted using baker's twine and a styrofoam ball (see clear cupcake bag above on the right). These cupcake bags are a nice option if you are looking for something unique to package cupcakes. The best thing about these bags is that you can personalize them with custom headers to match your colours/theme. I also found that the cupcake holder insert makes it very easy to add ribbon to the outside of the bag.  

Note: The back of these bag headers can be personalized with a chalk marker if you want to customize these packages yourself.

Easter packaging inspiration and free downloads | creativebag.com

It is so easy to add personalized wrappers to mini chocolate bars and I do it all of the time. I buy these mini chocolate bars at Costco because they are available all year long and are available in milk or dark chocolate. Our 2"x2"x2" clear boxes will hold 8 or 9 mini bars. A little sizzle on each side keep the chocolates from moving around.  I often tie baker's twine around the boxes but this time I used ribbon that worked with my Easter theme.

Easter packaging inspiration and free downloads | creativebag.com

I've shown you how to add the wrappers to the mini chocolate bars before on the blog but I'll repeat it again here because it's so simple.
1. Print the download for the wrappers on plain white text paper. Cut out the wrappers and add two pieces of two sided tape to the back top and bottom edges. 
2. Attach the wrapper to the chocolate bars as shown above and you are done! 

Easter packaging inspiration and free downloads | creativebag.com

I added a chalkboard sticker to the bottom of the box - a nice option if you want to add a name or message to your packaging. Place the chalkboard sticker on the top of the box and use these as part of your table decor by placing one of these favors on everyone's plate for Easter dinner.

Easter packaging inspiration and free downloads | creativebag.com

Photo booth supplies for weddings and parties!

Thursday 6 March 2014


photo booth supplies from Creative Bag | creativebagwedding.com

Photo booths are still a popular choice for weddings and parties. They are a wonderful idea to keep guests of all ages entertained. All you really need is a backdrop and a few fun props. If you are thinking of adding one to an event that you are planning we have lots of photo booth supplies that will help you to get the party started! Here's some of my favourites ....

I recently created some props for a photo booth using our wood chalkboards on sticks. I wanted the chalkboards to match the gold and black colour theme of the party so I painted the chalkboards (pictured above) with metallic gold paint. 


2. Tissue paper tassel garland backdrop.


photo booth supplies from Creative Bag | creativebagwedding.com

Tissue paper tassel garlands make an cool diy backdrop. I love this one that I spotted at the WedLux Wedding Show in January. If you are thinking about creating one of these, we carry tissue paper in lots of different colours. You can find my tutorial for making tissue paper tassel garlands here.

3. Custom photo booth backdrops.


photo booth supplies from Creative Bag | creativebagwedding.com

Not into diy? Looking for something that is uniquely your own? Our photo backdrops can be personalized and with lots of design and colour options you are sure to find something that works with your colours and theme. 

Here's a quick look at the design options:
photo booth supplies from Creative Bag | creativebagwedding.com
Tip: Mount the backdrops to a wall surface using "removable" poster tape or suspend from a wood dowel or light weight curtain rod.


photo booth supplies from Creative Bag | creativebagwedding.com

Add our single-use cameras and you can save the photographer fees while guests play photographer for the night, capturing candid photos that can often turn out to be among your favorite shots.


photo booth supplies from Creative Bag | creativebagwedding.com


We carry directional signs that can be easily be personalized with wording options that are suitable for photo booths. 
photo booth supplies from Creative Bag | creativebagwedding.com
We also have table signs that can be personalized and work well with the single use cameras if you are planning to put a camera on each table. 

Smile! :)