

Let your love grow with these lovely mason jar succulent wedding favours.
Mini mason jars are the perfect size to hold smaller succulent plants and it's oh so easy to personalize them with colours that match your wedding decor using paint and ribbon. I added metallic gold and distressed white paint to the favour pictured above to match a boho inspired styled wedding.

Mini mason jars filled with succulents were included in the sweet table set up and on the guest table featured above. The gold painted mini mason jars not only compliments the gold cutlery and vintage china but they also add another personal DIY detail to the wedding.
Here's the steps for making these succulent mason jar favours yourself:

Gather your supplies: mini mason jars (remove the lids), ribbon, spray paint, chalk paint, a small succulent for each jar, small stones, indoor potting soil, paint brush, sand paper and scissors. Optional - water mister.
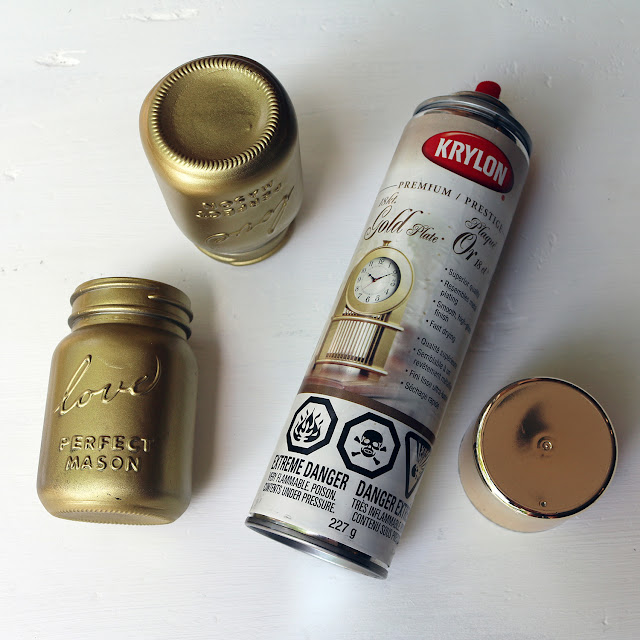
Step 1. It will take a couple of light coats of spray paint to cover the mini jars. Start by turning the jars up side down and paint the bottom first. Once dry, turn the jars right side up and spray again.
Note: If you are going to leave the mason jars gold, you may need to add an extra coat of paint to some areas to make sure the container is completely covered in gold. If you are going to add chalk paint you don't have to worry if there are a few areas that are not completely covered in gold.

Step 2. Once the gold paint is completely dry you can add a thin coat of chalk paint using a soft dry paint brush. You want some of the gold paint to show through so you don't want to paint more than one coat of chalk paint.
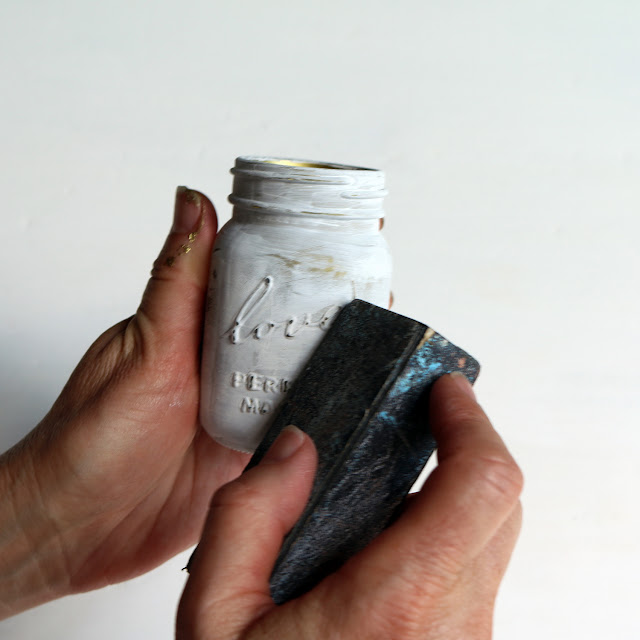
Step 3. Once the chalk paint is dry it's time to do a little sanding using a soft sand paper block. You just want to remove some of the chalk paint to reveal the gold paint below so don't sand too much. The raised lettering on the mason jar is one area that you want to sand so the words will stand out.
Note: If you sand off too much of the gold finish it's easy to fix by just adding a little more chalk paint to the area using a dry brush.

Step 4. Before you prepare the jars for the succulent add your ribbon. It's easier to do it now especially if you are using custom ribbon or tying a bow.
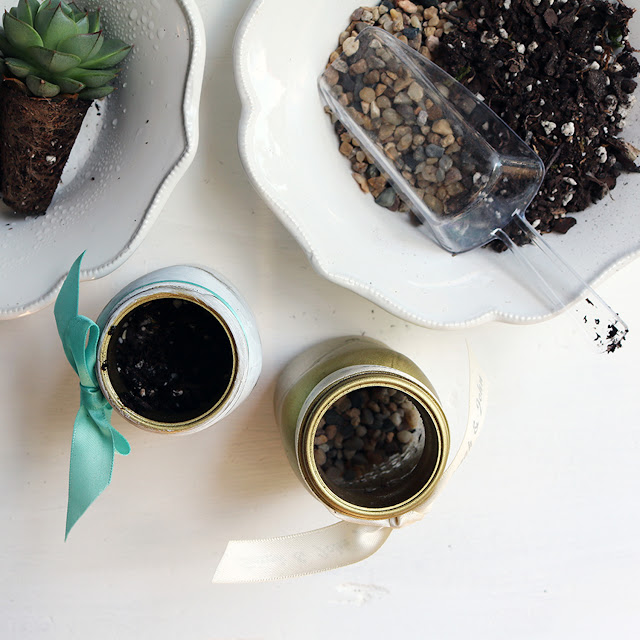
Step 5. Mist the succulents well with water before planting. Add some small stones to the bottom of each jar for drainage followed by a small scoop of indoor potting soil. Move the soil around in each jar to create a space for a little succulent.
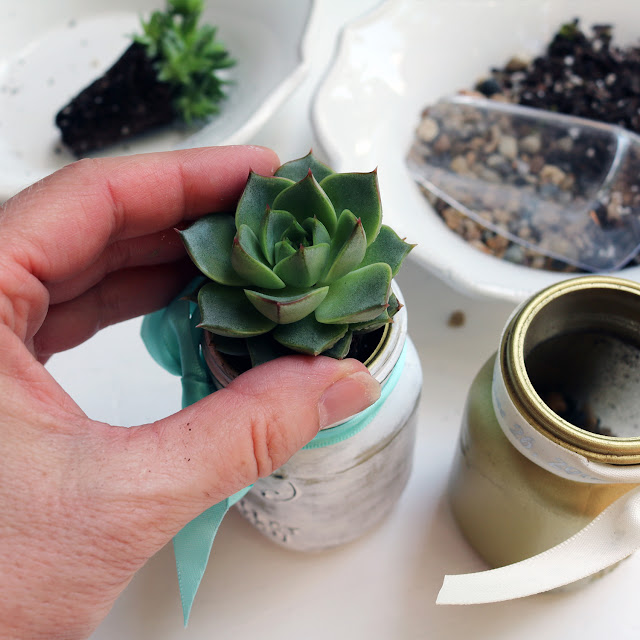
Step 6. Place one succulent in each jar and, if necessary, add a little extra soil to fill.

If you make these favours a few days or weeks before the wedding, remember to water them. It might be a good idea to keep them in a humid area until your wedding day.
We love to see your completed projects. If you try this project yourself, post your pictures on Instagram and use the hashtag #creativebaginspire so we can find them.

Styled boho wedding vendors -
Photography by Kat Williams of Attakat
Floral arrangements by Periwinkle Flowers
Vintage tableware from The Perfect Table
Baked goods by Cakelaine
Hand lettering by Love Lettering
Invitations by Alicia's Infinity
Paper flower backdrop by Confetti and Bows
Shot on location at The Warehouse Event Venue
Favor packaging and decor products from Creative Bag
Styled shoot creative direction by Lorrie Everitt


⋅No comments
Post a Comment