I've had a number of requests for the art to create the paper bows that were featured in our Creative Living Magazine. I've made and shared printables to create paper bows before in patterns to co-ordinate with wedding and party themes. I could not resist making some to co-ordinate with three of our holiday collections and today I'm going to give you the printables to make them yourself.
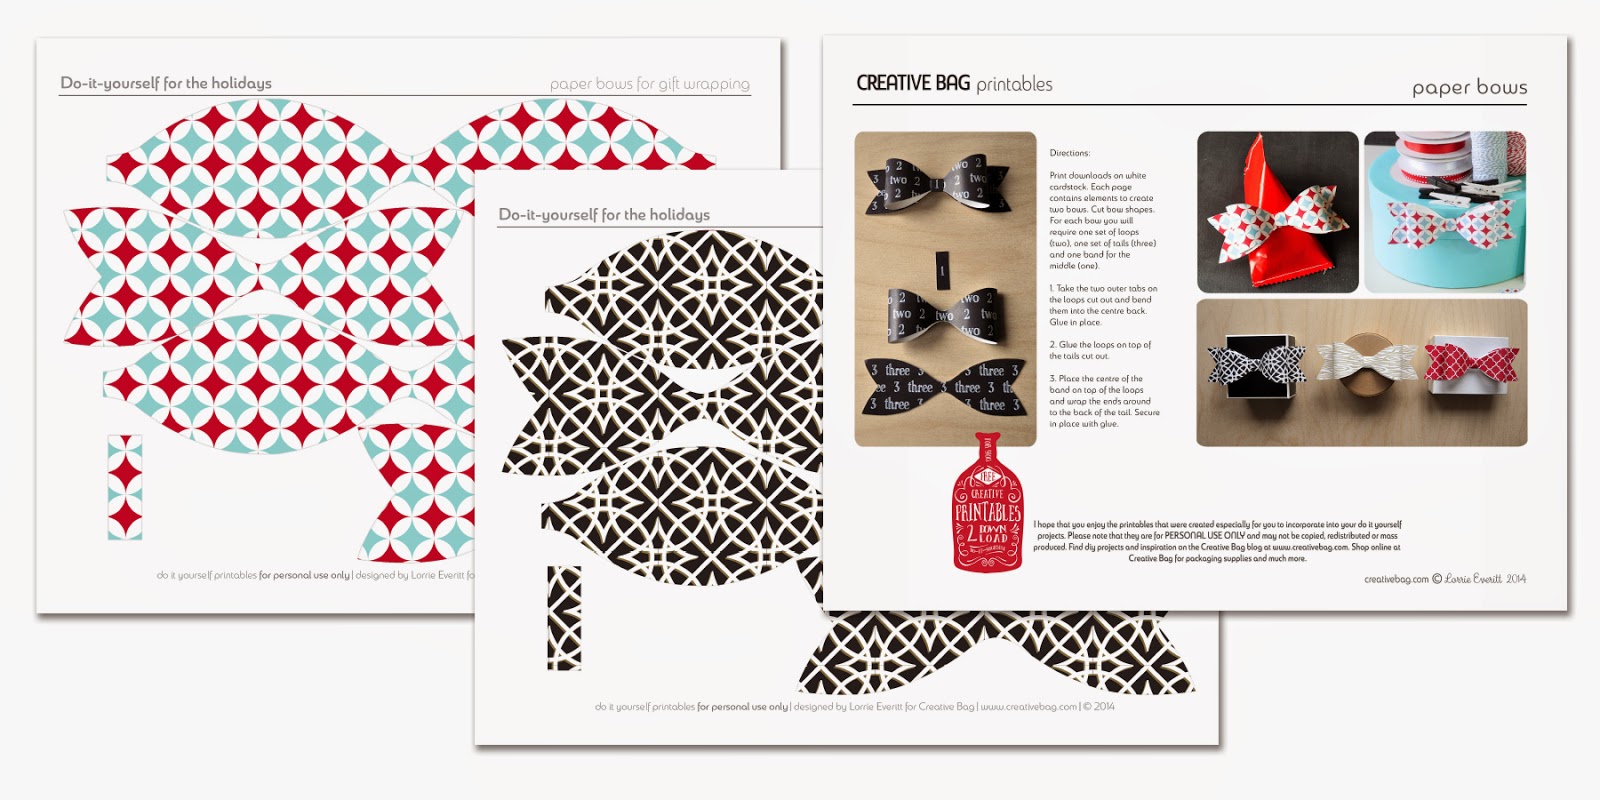
Here's a really quick tutorial for making these. Please note that I numbered the individual pieces that you will cut out and glue on my "tutorial bow" so that you could easily see what I am describing in my directions ...
Here's a really quick tutorial for making these. Please note that I numbered the individual pieces that you will cut out and glue on my "tutorial bow" so that you could easily see what I am describing in my directions ...
Directions: Print downloads on white cardstock. Each page contains elements to create two bows. Cut bow shapes. For each bow you will require one set of loops (two), one set of tails (three) and one band for the middle (one).
1. Take the two outer tabs on the loops cut out and bend them into the centre back. Glue in place.
2. Glue the loops on top of the tails cut out.
3. Place the centre of the band on top of the loops and wrap the ends around to the back of the tail. Secure in place with glue
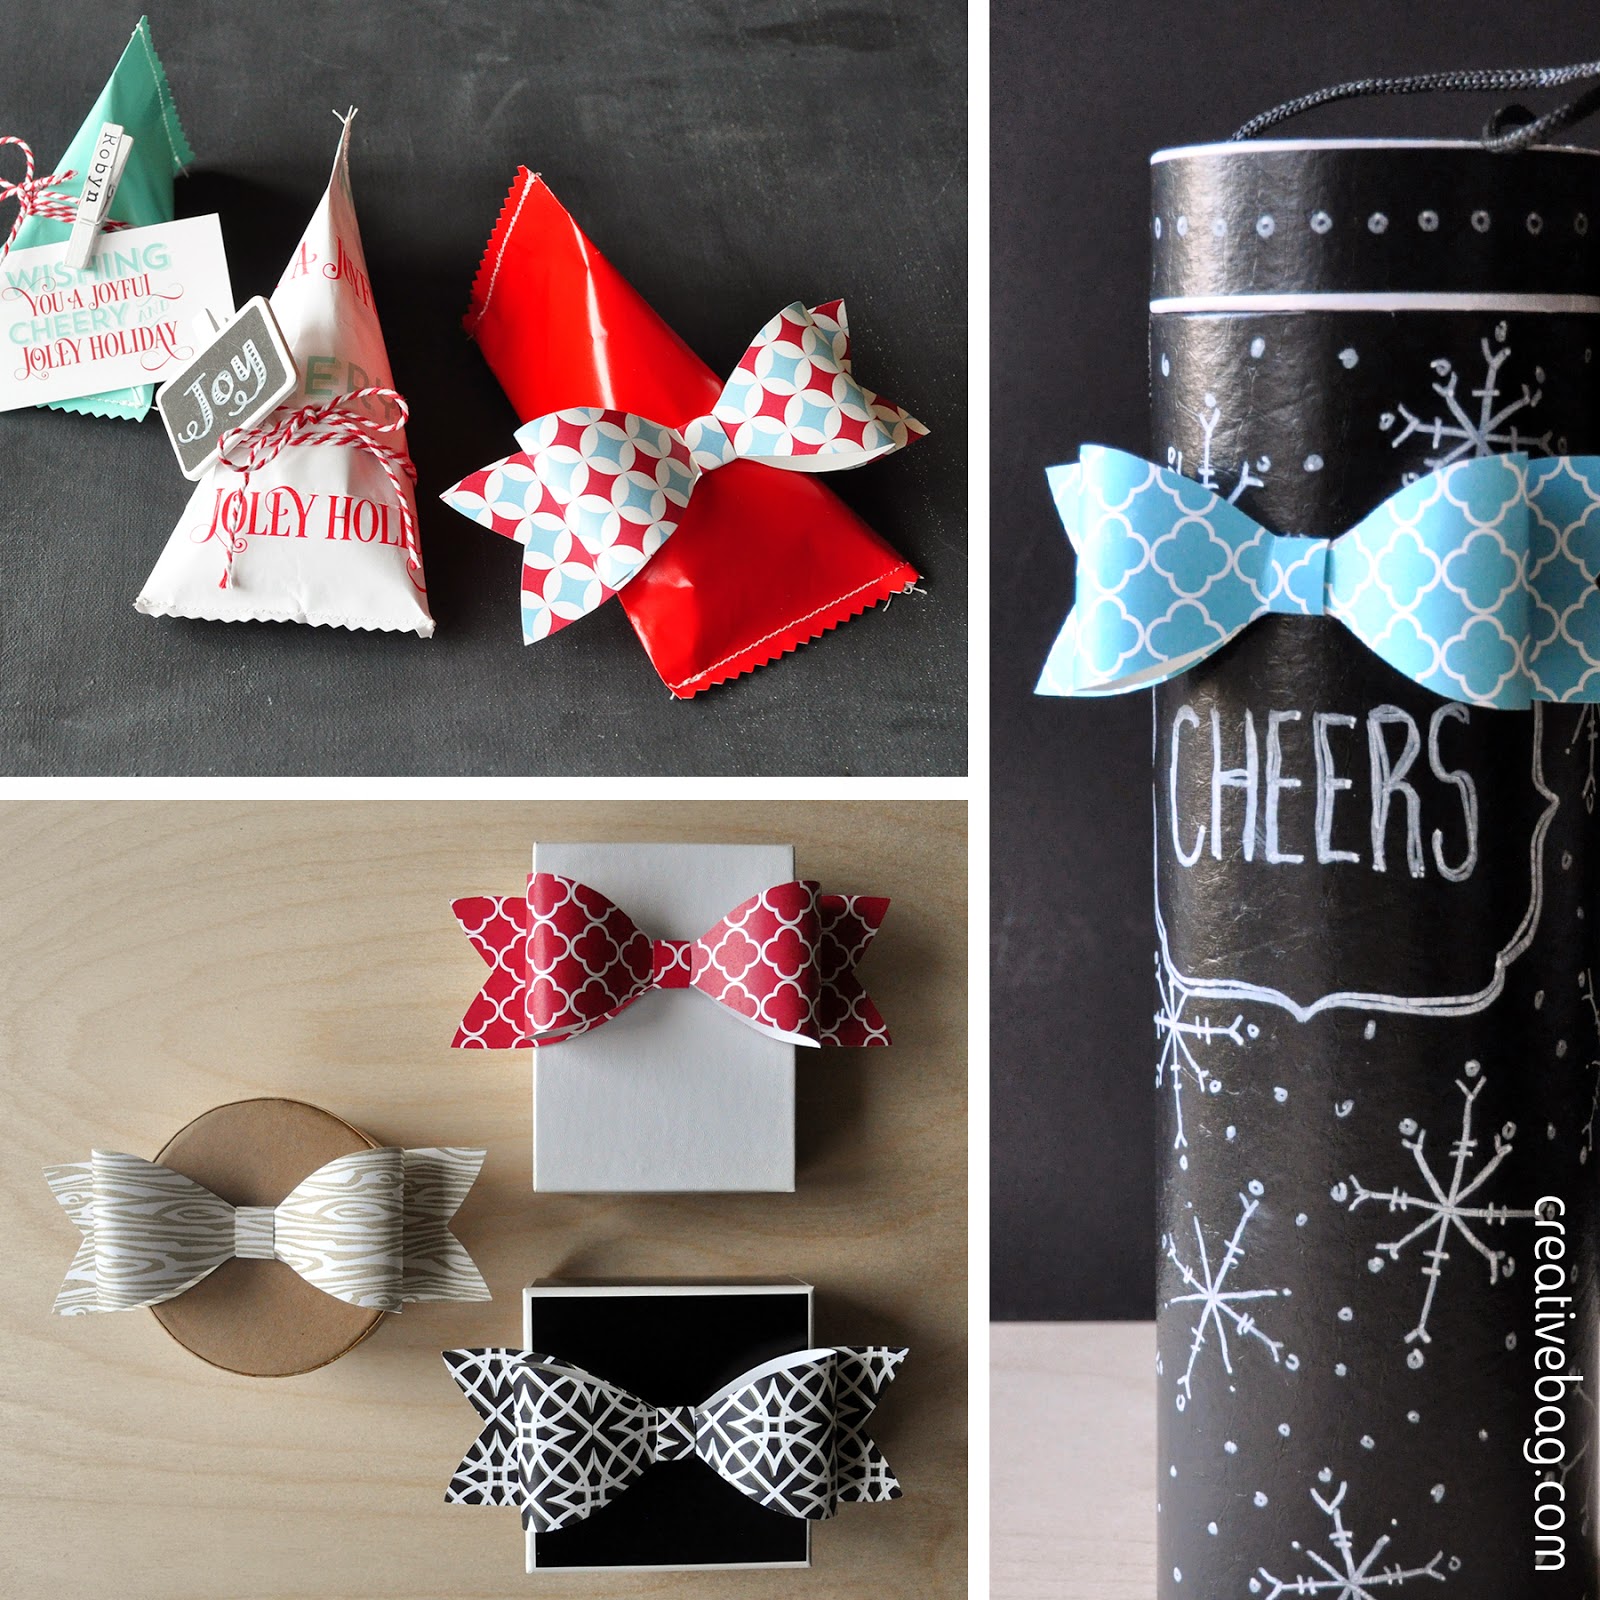
Here's a look at some all of the bows included in the printables package. The three red, blue and white bows go nicely with our Holly Jolly collection, the wood grain bow matches our Into the Woods collection and the black, white and gold bow co-ordinates with the Glitz and Glam collection. Attach these bows to boxes and bags ... if you are not very good at tying a ribbon bow - try these instead!!
