summer entertaining inspiration

Monday 27 July 2015


summer entertaining serving products | Creative Bag

Next to holiday entertaining, summertime is our favourite time of year to entertain family and friends. Whether you are planning to entertain outside on the deck, in the backyard or inside at home or the cottage, let us help you to make summer entertaining a breeze with our packaging and serving products!


Our creative friend, Elle Daftarian, from Petite and Sweet has just launched her new online magazine called "She Entertains" and it's filled with summer party recipes and summer entertaining inspiration. You can read it (for free!) here.

She Entertains online magazine by Elle Daftarian

Have a wonderful week - the weather is going to be beautiful!


you can do it yourself - throw an anniversaryparty part three of three

Thursday 23 July 2015


diy anniversary party part three | Creative Bag

This is my third and last post for the diy anniversary party. I've already shown you the sweet table and drink station and today I'm going to share with you some of the extra party details that I set up. 

diy anniversary party part three | Creative Bag

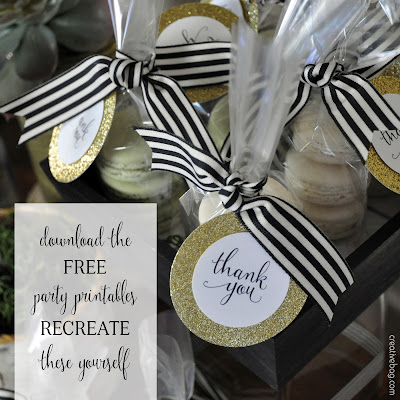
I set up a table with macaron favors and an alternative guest book idea for guests before they leave to go home.

diy anniversary party part three | Creative Bag

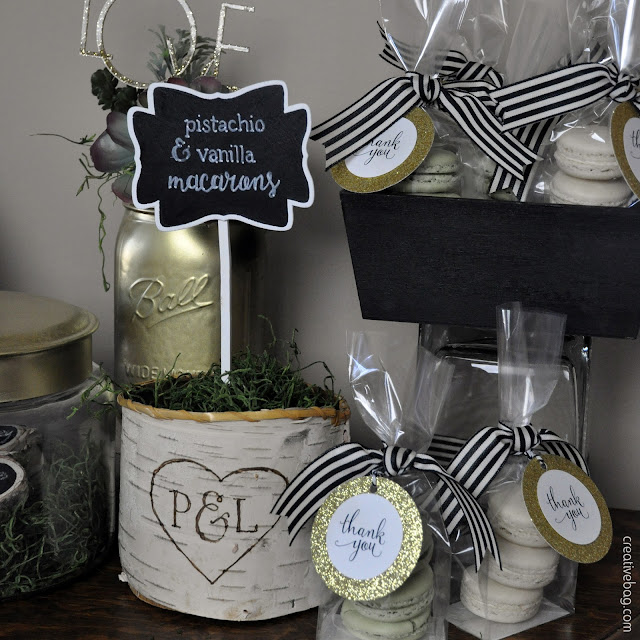
Our vanilla and pistachio macaron favors were created by Bake Sale

I could have added the macarons to the sweet table but I thought that it would be nice to have a little something to offer guests with a long drive home - especially if the party is at the cottage! I packaged three macarons in our 2-5/8"x1-7/8"x11" econo hard bottom candy bags

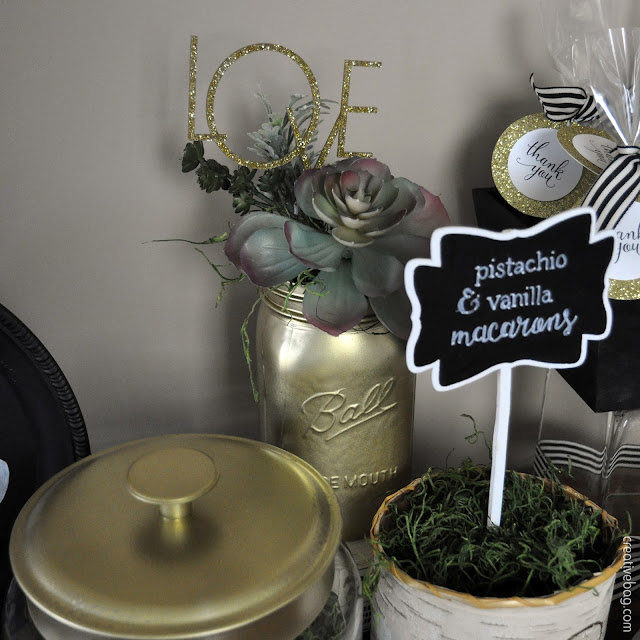
I placed a chalkboard sign by the macarons similar to the ones I created for the sweet table. The sign was inserted into a birch container filled with moss. I drew a design with pencil on the birch container and then used a wood burner to complete the project. If you don't have a wood burner, use a brown sharpie marker to create a similar effect on a birch covered vase.

diy anniversary party part three | Creative Bag

 The favor packages were embellished with black and white ribbon. The gift tags were created using graphics from the party printables that were printed on white card stock and glued to glitter paper circles. Black baker's twine was used to tie the gift tag to the bag.

Lorrie's tip: Our new econo flat bottom candy bags are a cost effective option for packaging favors. There are a number of size options so it's easy to find a size to suit your needs. If the bags are too long it is easy to cut the tops down to fit whatever you put inside.


diy anniversary party part three | Creative Bag

diy anniversary party part three | Creative Bag

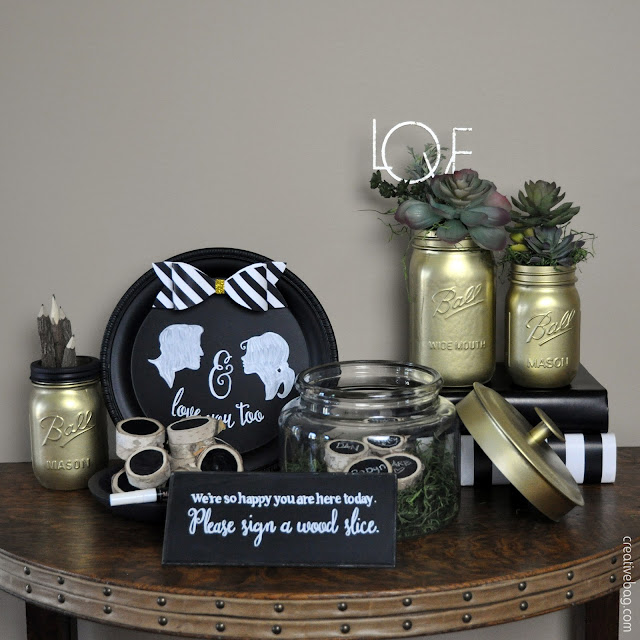
I'm sure that you had a guest book at your wedding ... so why not set up a guest book alternative at your anniversary party. To co-ordinate with the party theme I wanted guests to sign mini wood slices that I painted on one side with chalkboard paint

Guests can sign the blank wood pieces with a chalk marker and then place them inside a glass container. I lined the bottom of the glass container with moss and spray painted the lid with gold paint.


diy anniversary party part three | Creative Bag

You can find the tutorial for making paper bows from the party printables here.


diy anniversary party part three | Creative Bag

Chalkboards signs let guests know what to do ... a great idea if you are doing something a little different!!


diy anniversary party part three | Creative Bag

Spray paint is an easy way to add colour to pretty much anything to match your party theme.


diy anniversary party part three | Creative Bag

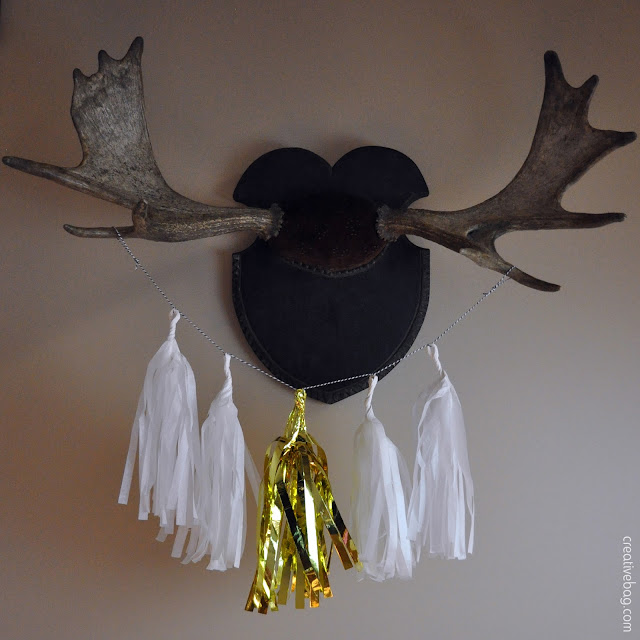
Tissue paper tassel garlands are still one of my favourite party decor items. These ones were made from the same David Tutera tissue and mylar tassel kit that I used for the balloons by the drink station.


diy anniversary party part three | Creative Bag

One last detail - I like to keep a supply of take out boxes on hand for party leftovers. They are way less expensive than giving away your plastic food containers and guests can fill them up without feeling obligated to return the containers later.

I hope that I have inspired you to throw a party whether it is an anniversary party or just an excuse to get together with family and friends.

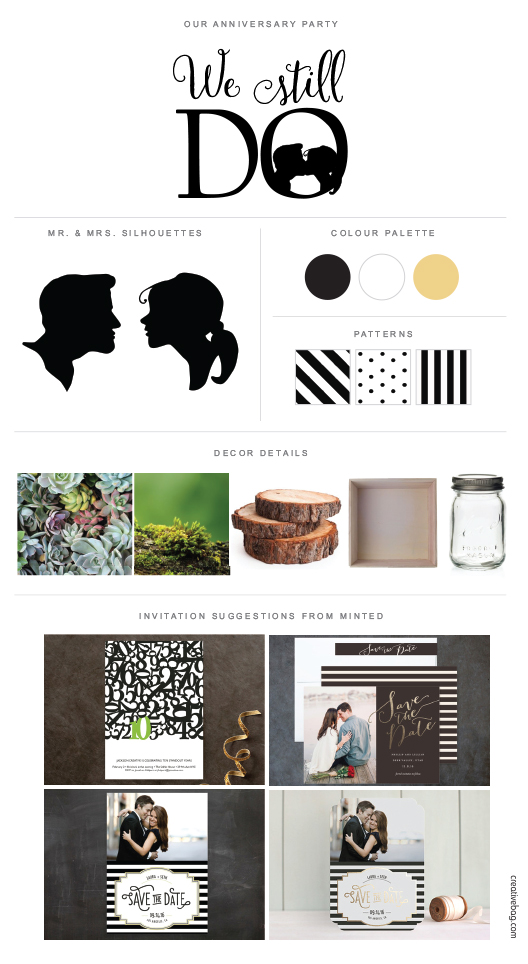
Here's my party mood board -
diy anniversary party part three | Creative Bag

I did not design invitations for this party so I quickly looked to see if Minted had any that I thought would co-ordinate with the look of my party theme and party printables. Above is what I came up with ... top left, bottom left, top right, bottom right.  I especially like the designs on the right with the gold foil details.


diy anniversary party part three | Creative Bag

Here's the downloads for the party printables again!

Special thanks again to Bake Sale for supplying all of the baked goods for the photo shoot!


you can do it yourself - throw an anniversary party (part 2 of 3)

Monday 20 July 2015


drink station at anniversary party by Lorrie Everitt for Creative Bag

This is part two of my diy anniversary party and today is all about the drink station.

I think that you should be able to enjoy your party so unless you plan hire someone to tend bar, a self serve drink station is my favourite way to go. 

drink station at anniversary party by Lorrie Everitt for Creative Bag

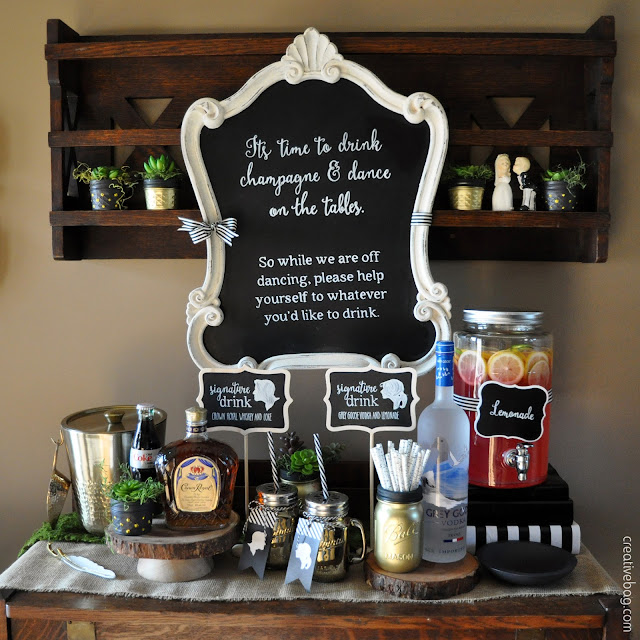
I created this blackboard sign and hung it above the drink station so that everyone would know it was a self serve bar. I glued the same ribbon I used on the sweet table to the frame.

 The art to recreate the sign is included in the printables you can download for free in my last post. You may recognize this blackboard sign from another party set up.

drink station at anniversary party by Lorrie Everitt for Creative Bag

Signature drinks are a nice way to personalize your drink station. I created the signature drink signs on larger blackboard signs on sticks.

More gold spray painted mason jars spray were added to the set up to display paper straws and succulents. I used the birch paper straws to decorate the cake pops on the sweet table so it made sense to use them again at the drink station. Another decorative detail from the sweet table set up that I incorporated into the drink set up is the use of rustic wood slabs.

Lorrie's tip: Don't set up complicated signature drinks at a self serve bar. Make it something personal that is easy for guests to mix themselves.

drink station at anniversary party by Lorrie Everitt for Creative Bag

We have an assortment of mason jar mugs with a metallic finish daisy lid and plastic straw in select stores (until quantities last). I tied gift tags from my party printables to two of the metallic mugs to add to the signature drink theme.

drink station at anniversary party by Lorrie Everitt for Creative Bag

I filled one of our drink dispensers with lemonade and placed it on top of a stack of books that I covered with wrapping paper book jackets. I placed a bowl under the spout to prevent lemonade spills on the burlap table runner and furniture.

Lorrie's tip: The lemonade chalkboard sign was attached to the ribbon on the drink dispenser using magnets. I glued a magnet on the back of the chalkboard sign and used a second magnet behind the ribbon to keep the sign in place.

drink station at anniversary party by Lorrie Everitt for Creative Bag

Our mason jar mugs are perfect for parties and they make great favors. Guests take them home and you don't have dirty dishes to wash in the morning - bonus!

We will have marquee letter signs arriving soon. Marquee signs are a great way to light up a drink station at night.

drink station at anniversary party by Lorrie Everitt for Creative Bag

Here's a closer look at the mason jar mugs. I added blackboard sticker labels for the guys and added their names using a chalk marker. For the girls I added gold glitter letter stickers to co-ordinate with my black, white & gold colour theme.

The chalkboard sign lets guests know that they can keep the glasses and reminds them that they can serve themselves!

drink station at anniversary party by Lorrie Everitt for Creative Bag

I also set up a small snack table beside the drink station with peanuts, pretzels and popcorn.

drink station at anniversary party by Lorrie Everitt for Creative Bag

drink station at anniversary party by Lorrie Everitt for Creative Bag

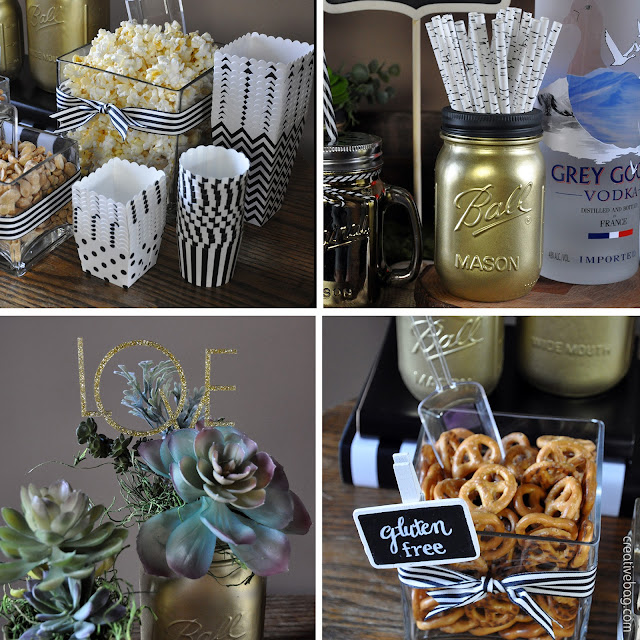
Square glass containers were filled with snack foods. Ribbon decorated the glass containers and small chalkboard signs with clothespins helped identify food for people with allergies. Our new line of party food containers are the perfect size for guests to fill (and refill) with snacks.

Above are some more close ups of the gold spray painted mason jars. I added this gold sparkle cake topper to the succulent floral arrangement.

Lorrie's tip: If you have room to serve lemon and lime slices to your drink bar use additional   square glass containers to display them.

drink station at anniversary party by Lorrie Everitt for Creative Bag

I hung an ornate vintage inspired frame and filled it with black and white photos. After the party you can use the frame as it is or as a way to display whatever you want.

Lorrie's tip: Convert all of your photos to black and white to co-ordinate with the colour theme. I considered spray painting the frame gold as well to work with the party colour theme but ended up leaving it white to match my home decor for after the party. 


I added black and white balloons filled with helium to the drink station. The gold mylar tassel is from this tassel kit . If you want to add a long strand of tassels to the balloons you need to have lots of small balloons (way more than three) or one giant helium filled balloon to hold up the additional weight of the tassels. 

I tied the balloons to a mason jar to keep them from floating away and so I could position the balloons wherever I wanted.


Here's one last look at the drink station. If you missed my anniversary party sweet table post you can find it here. Check back later this week for the third and last post about this diy party.


BTW - you can grab the party printables here.


you can do it yourself - throw an anniversary party (part one of three)

Thursday 16 July 2015


throw an anniversary party - you can do it yourself ... part one of three posts | Lorrie Everitt for Creative Bag

Are you thinking about hosting an anniversary party? Looking for some inspiration? Would you like to include some easy diy projects to make the party a little more personal? How about some party printables that you can download for free? If you've answered yes to any or all of these questions keep reading! 

For the next few blog posts I'm going to share my ideas for hosting an anniversary party. I designed a number of printables for my party that you are welcome to use and personalize for your own party. 


Inspired by my 2016 Kate Spade daytimer, the colour palette is black & white with gold accents. Since the summer months are the most popular time of year to get married, I decided to plan the summer anniversary party at the cottage. Succulents, moss and natural wood elements added a rustic vibe to the contemporary the black, white and gold theme.

Today's post is all about the sweet table. (yum!)

throw an anniversary party - you can do it yourself ... part one of three posts | Lorrie Everitt for Creative Bag

Who doesn't love a sweet table? For this anniversary party I wanted to have a variety of different baked goods and a small cake. So I set up a small table and used wood market trays to organize the sweet treats.

All of our sweets were created especially for us by Bake Sale. They were amazing to work with and all of the baked goods looked (and tasted) great. I gave the Bake Sale team my ideas about the party decor, my printables and what kinds of baked goods I wanted and left the rest up to them. I was so excited to see all of the baked goods come together the day of the set up.

Lorrie's tip: Save time and a lot of work by ordering baked goods for the party instead of making them yourself. Use the time you saved baking on making chalkboard signs and decor elements for the sweet table. 

throw an anniversary party - you can do it yourself ... part one of three posts | Lorrie Everitt for Creative Bag

I really wanted a mini naked cake for the party to display on a birch cake stand that I made. The cake is sitting on a cake pad - not directly on the birch slab. Bake Sale added the mini faux succulents and a gold "x" and "o" cake topper

The cake is the focal point of the table so I used a variety of things to give it height. I started at the bottom by using two small, deep wood market trays to hold up one extra large shallow wood market tray that was lined with moss. Black and black & white striped wrapping papers were used to create book jackets for old books that I then stacked in the middle of the tray. The birch cake stand was placed on top of the stack of books. 

 The art in the white frames are part of my party printables. The Mr. and Mrs. silhouettes can easily be personalized with your names before or after printing. I spray painted a metal "&" in gold to match the other gold elements on the table.

Lorrie's tip: If you want to use a patterned wrapping paper for your book covers try to add a few book covers in a co-ordinating solid paper so when you stack them they don't look too busy.

throw an anniversary party - you can do it yourself ... part one of three posts | Lorrie Everitt for Creative Bag

Bake Sale created three different sugar cookies to fit our square glass containers. The glass containers were placed on a long wood market tray lined with moss. The Mr. and Mrs. silhouettes from my printables were the inspiration for two of the cookies. I didn't want numbers on the third cookie, so it features the saying from my graphics (minus the kissing Mr. & Mrs.). 

Lorrie's tip: You don't have to put all of the baked goods on the sweet table when you are setting up. For example, if you have 45 cookies just put out 15 to 20 cookies and keep refilling the containers so the table presentation looks full for most of the evening. This is a great idea especially if you are serving food outside. 

throw an anniversary party - you can do it yourself ... part one of three posts | Lorrie Everitt for Creative Bag

Cupcakes were lined up in a shallow wood market tray  lined with black wrapping paper.
Bake Sale made the cupcakes in white cupcake liners for me and I doubles each cupcake with black and white polka dot cupcake liners on the tray to match the party decor. Small gold heart cupcake toppers that match the "x & o" cake topper were inserted into most of the cupcakes. Two of my printable tags were made into cupcake toppers with the help of some gold paper straws and glue. 

Chalkboard signs are both decorative and functional.

throw an anniversary party - you can do it yourself ... part one of three posts | Lorrie Everitt for Creative Bag

throw an anniversary party - you can do it yourself ... part one of three posts | Lorrie Everitt for Creative Bag

Bake Sale created cake pops with polka dots to co-ordinate with my printables. I cut up our birch paper straws and used them to cover the cake pop sticks before placing them in the deep wood market tray filled with floral foam and moss. These birch straws have a two little hearts in the paper and make a nice detail for a rustic anniversary party or wedding.

 I also added chocolate bars to the sweet table. I wrapped regular size chocolate bars in gold metallic tissue paper before adding the wrappers from my party printables.

throw an anniversary party - you can do it yourself ... part one of three posts | Lorrie Everitt for Creative Bag

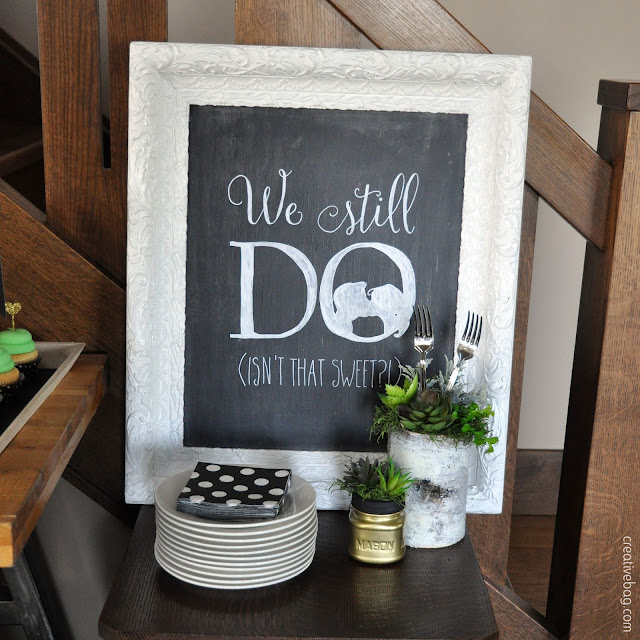
This large chalkboard sign was an easy diy project. The frame was found at a second hand store and painted white. I purchased a wood panel to fit the frame opening and painted it with chalkboard paint. You can enlarge the saying from my party printables to fit any size of chalkboard. I prefer using chalk markers instead of chalk on these kinds of signs so that my artwork does not rub off easily. You can find my tutorial for writing on chalkboards like a chalk artist here.

I used succulents and moss to create all of my floral arrangements for the party. Mason jars were spray painted with gold and black paint. I added Mr. and Mrs. forks and gold cake toppers into some of the floral arrangements as decorative elements.

throw an anniversary party - you can do it yourself ... part one of three posts | Lorrie Everitt for Creative Bag

The cottage ceiling above the sweet table was too high to hang paper lanterns and tissue paper pompoms easily so to keep things simple I arranged them underneath the table. Everything was placed far enough under the table that no one was stepping on them. 

I hung a gold glitter "happy" banner on the front edge of the table and added diy paper bows from my printables.

throw an anniversary party - you can do it yourself ... part one of three posts | Lorrie Everitt for Creative Bag

Details, details and more details. 

I used Krylon's 18 kt gold plate spray paint on glass and metal elements for the party. 

Gold glitter tape was added to paper bows to give them a little extra sparkle. 

I thought about spray painting the imprinted Mr. and Mrs. forks that I used in this floral arrangement gold but I held off so that they could be re-used after the party. 

throw an anniversary party - you can do it yourself ... part one of three posts | Lorrie Everitt for Creative Bag

You can make your own wood cake stand using a birch slab, a small wood bowl and a couple of screws. The screws need to be large enough to go through the bowl and about half way through the wood slab. Tip: I pre-drilled the holes for the screws in the bowl. 

We sell birch slabs and birch vases in stores only - while supplies last.

throw an anniversary party - you can do it yourself ... part one of three posts | Lorrie Everitt for Creative Bag

The chocolate bar wrappers are included in my party printables. 


You can download all of the printables for the party here.


throw an anniversary party - you can do it yourself ... part one of three posts | Lorrie Everitt for Creative Bag

Here's a final look at the sweet table set up. I've also created a new Pinterest board for anniversary party ideas you may want to check out too!

My next post will be all about the refreshment station ... 

throw an anniversary party - you can do it yourself ... part one of three posts | Lorrie Everitt for Creative Bag

I hope that you'll check back for more inspiration. Cheers!


our cake toppers in Weddingbells magazine

Tuesday 7 July 2015

cake topper on oreo inspired tower as seen in Weddingbells magazine

The new Weddingbells magazine is available this week. Here's a sneak peak of one of our cake toppers that was featured in the magazine ... isn't it adorable on this oreo inspired tower by Delica Kitchen amazing!

The best thing about this cake topper is that it can be used at the wedding and reused years from now at an anniversary party and it doesn't take up a lot of storage space.


Creative Bag Wedding


Lorrie Everitt for Creative Bag