Showing posts with label take out boxes. Show all posts

you can do it yourself - throw an anniversaryparty part three of three

Thursday, 23 July 2015


diy anniversary party part three | Creative Bag

This is my third and last post for the diy anniversary party. I've already shown you the sweet table and drink station and today I'm going to share with you some of the extra party details that I set up. 

diy anniversary party part three | Creative Bag

I set up a table with macaron favors and an alternative guest book idea for guests before they leave to go home.

diy anniversary party part three | Creative Bag

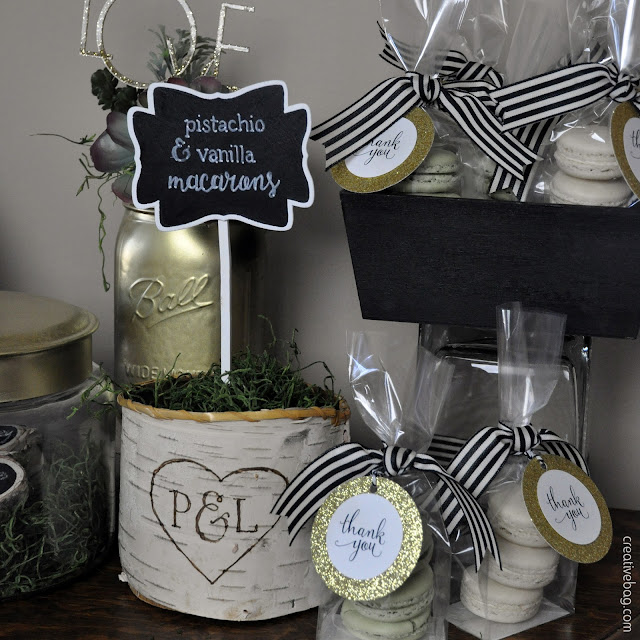
Our vanilla and pistachio macaron favors were created by Bake Sale

I could have added the macarons to the sweet table but I thought that it would be nice to have a little something to offer guests with a long drive home - especially if the party is at the cottage! I packaged three macarons in our 2-5/8"x1-7/8"x11" econo hard bottom candy bags

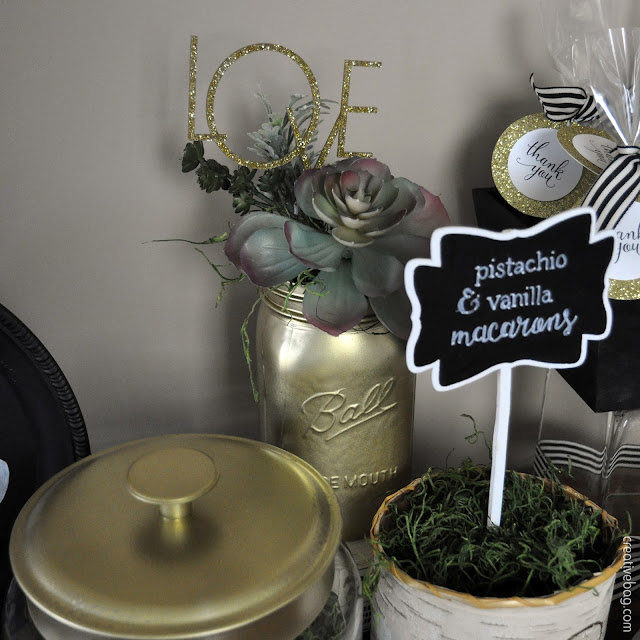
I placed a chalkboard sign by the macarons similar to the ones I created for the sweet table. The sign was inserted into a birch container filled with moss. I drew a design with pencil on the birch container and then used a wood burner to complete the project. If you don't have a wood burner, use a brown sharpie marker to create a similar effect on a birch covered vase.

diy anniversary party part three | Creative Bag

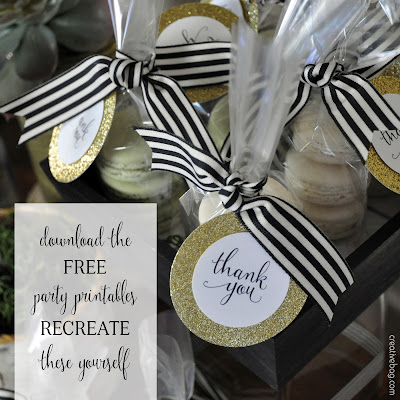
 The favor packages were embellished with black and white ribbon. The gift tags were created using graphics from the party printables that were printed on white card stock and glued to glitter paper circles. Black baker's twine was used to tie the gift tag to the bag.

Lorrie's tip: Our new econo flat bottom candy bags are a cost effective option for packaging favors. There are a number of size options so it's easy to find a size to suit your needs. If the bags are too long it is easy to cut the tops down to fit whatever you put inside.


diy anniversary party part three | Creative Bag

diy anniversary party part three | Creative Bag

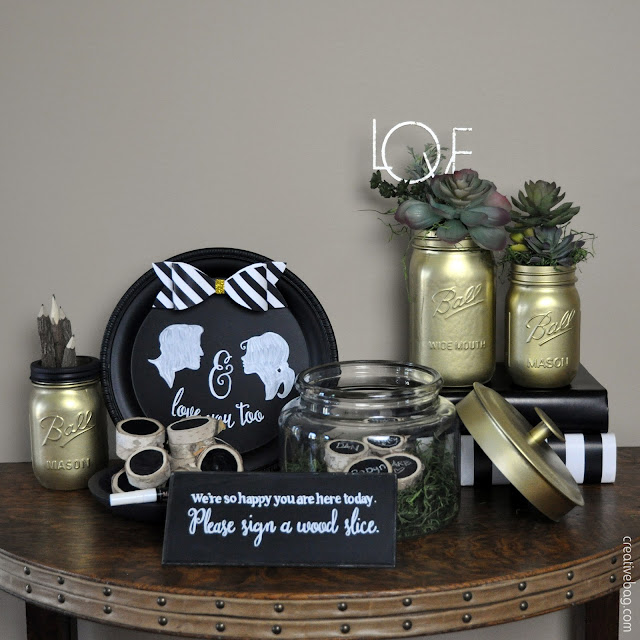
I'm sure that you had a guest book at your wedding ... so why not set up a guest book alternative at your anniversary party. To co-ordinate with the party theme I wanted guests to sign mini wood slices that I painted on one side with chalkboard paint

Guests can sign the blank wood pieces with a chalk marker and then place them inside a glass container. I lined the bottom of the glass container with moss and spray painted the lid with gold paint.


diy anniversary party part three | Creative Bag

You can find the tutorial for making paper bows from the party printables here.


diy anniversary party part three | Creative Bag

Chalkboards signs let guests know what to do ... a great idea if you are doing something a little different!!


diy anniversary party part three | Creative Bag

Spray paint is an easy way to add colour to pretty much anything to match your party theme.


diy anniversary party part three | Creative Bag

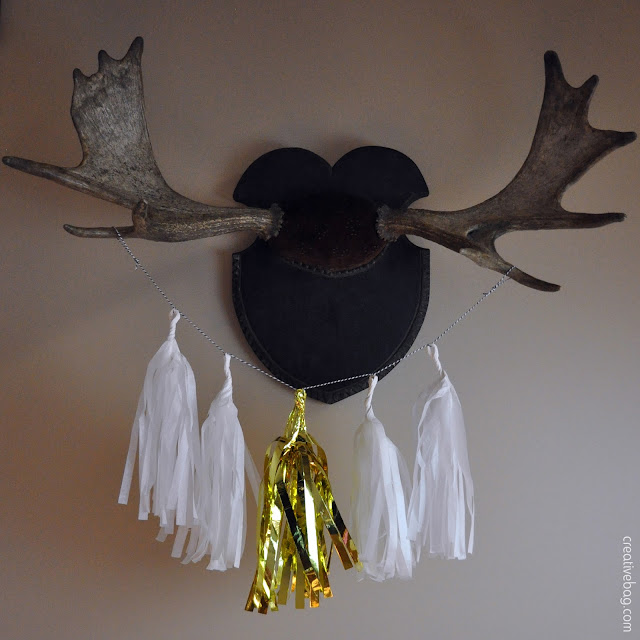
Tissue paper tassel garlands are still one of my favourite party decor items. These ones were made from the same David Tutera tissue and mylar tassel kit that I used for the balloons by the drink station.


diy anniversary party part three | Creative Bag

One last detail - I like to keep a supply of take out boxes on hand for party leftovers. They are way less expensive than giving away your plastic food containers and guests can fill them up without feeling obligated to return the containers later.

I hope that I have inspired you to throw a party whether it is an anniversary party or just an excuse to get together with family and friends.

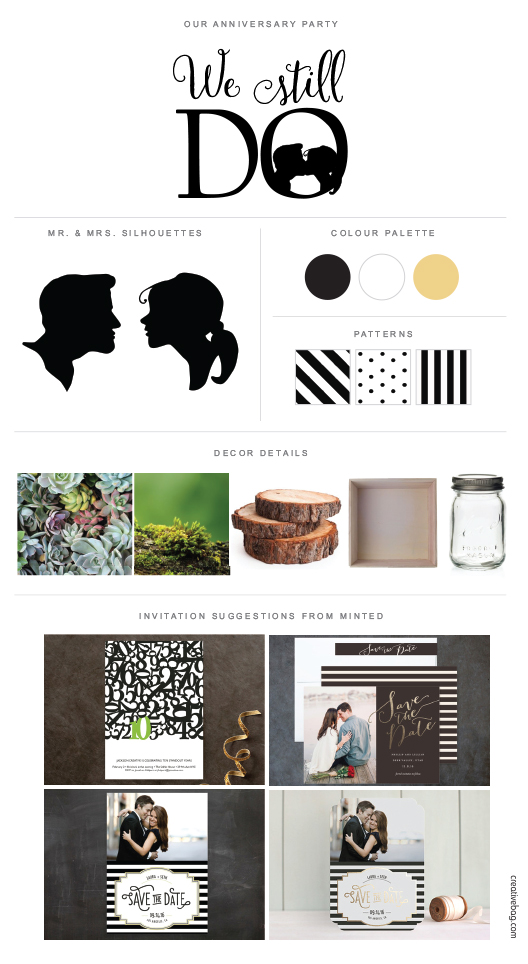
Here's my party mood board -
diy anniversary party part three | Creative Bag

I did not design invitations for this party so I quickly looked to see if Minted had any that I thought would co-ordinate with the look of my party theme and party printables. Above is what I came up with ... top left, bottom left, top right, bottom right.  I especially like the designs on the right with the gold foil details.


diy anniversary party part three | Creative Bag

Here's the downloads for the party printables again!

Special thanks again to Bake Sale for supplying all of the baked goods for the photo shoot!


S'more favor packaging inspiration and a new way to make these sweet treats using chocolate melts

Friday, 4 July 2014


diy s'more favor packaging by Lorrie Everitt | Creative Bag

Are you planning to use s'more favors for a wedding, party or event this summer? I've come up with a few more packaging ideas using our clear take out boxes and another way to create these yummy treats.

After arriving home with a bag full of melted chocolate bars (never leave chocolate bars in your purse in July), I came up with the idea of using chocolate melts instead of chocolate bars for a new twist on these fun favors. I was really happy with the results and I'm going to share how to make these with you today. 
diy s'more favors | Creative Bag

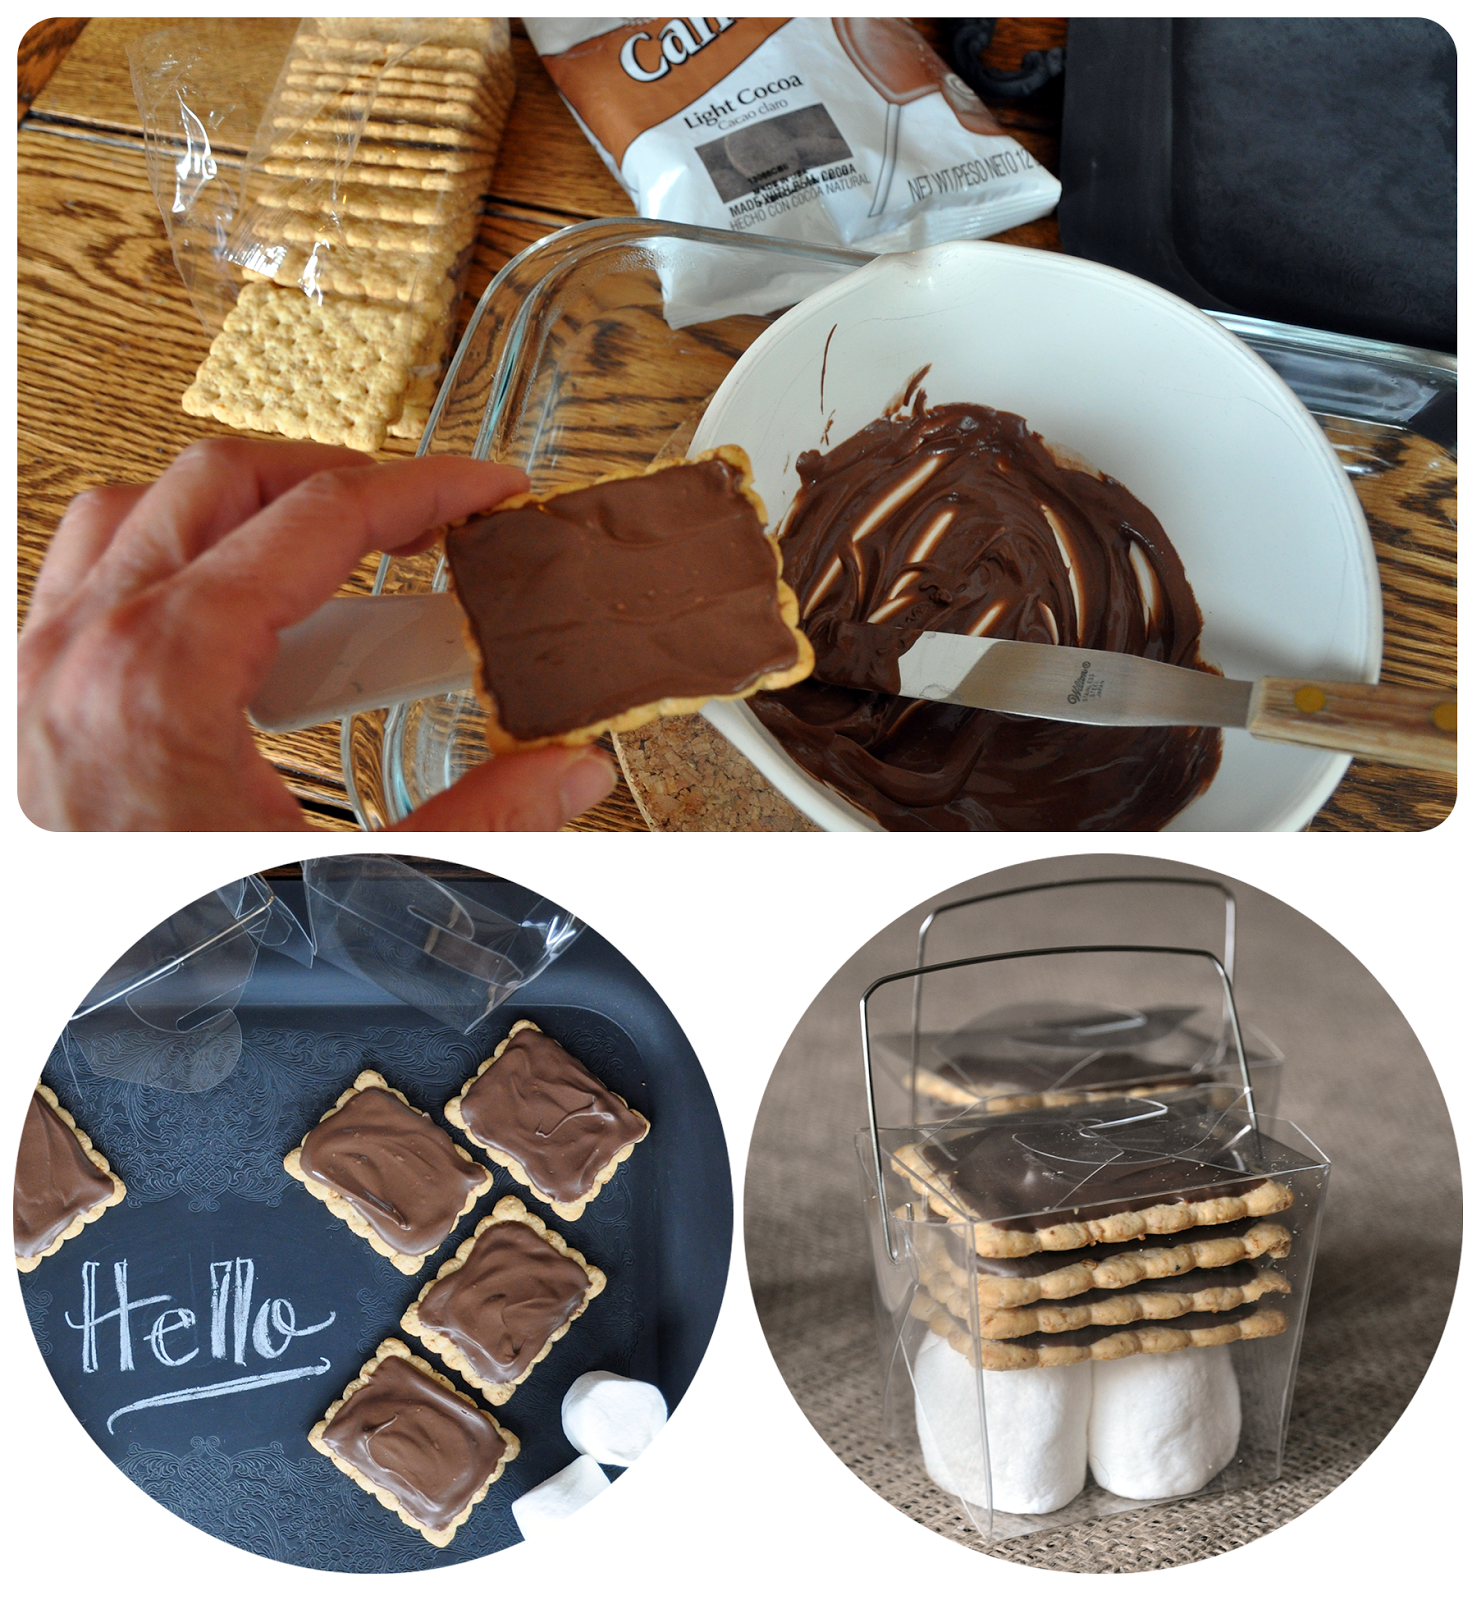
Here's what you need to make the s'mores: 
Wilton light cocoa chocolate flavoured candy melts, graham crackers, marshmallows.

Heat up candy melts in the microwave following the instructions on the package. Once the candy has melted spread it onto your graham crackers with an icing knife or frosting spatula. Allow the candy to harden completely before you start to stack the graham crackers in the take out boxes. 

I used Wilton light cocoa candy melts to create more "traditional looking" s'mores but you could certainly do this using any colour of candy melts for a fun twist to this classic treat. Want to make these even more unique? Try making homemade marshmallows! Just remember to cut them so they will fit the bottom of the take out boxes. You can find a great recipe here at Petite & Sweet.
To package the s' mores in our small clear 8oz take out boxes:
Place two regular size marshmallows in the bottom of each box followed by four candy coated graham crackers. 

diy s'more favors | Creative Bag

I thought I'd share how these look with the chocolate coated graham crackers (on the right) and  chocolate bar pieces (on the left). Either way the box looks full and the treats are yummy!

And now for my favourite part ... the packaging. We have so many great ribbons, chalkboard elements and embellishments that it was hard to stop at four but here's some ideas to get you started if you are thinking about making s'more favors. 

diy s'more favors | Creative Bag

Burlap ribbon, lace ribbon and chalkboards with clothespin backs were used in this sample. Simply tie the lace ribbon over the burlap ribbon to keep it in place. Chalk markers are simple to use ... I created the extra details on this one by using two different sizes of chalk markers.

diy s'more favors | Creative Bag

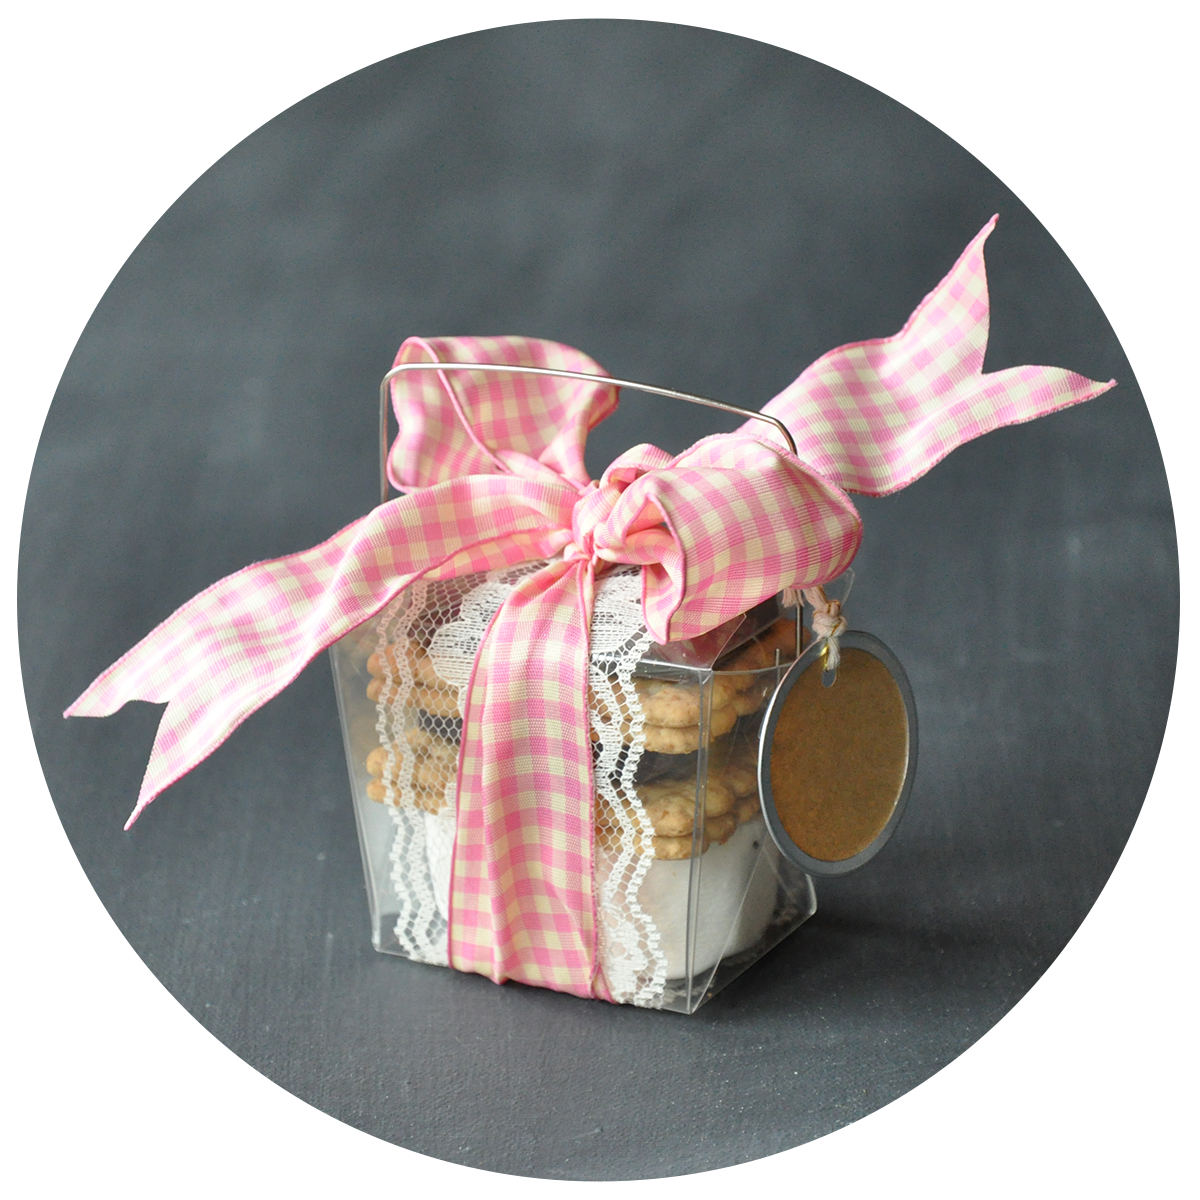
 Lace ribbon, wired ribbon in a pretty gingham print, metal rimmed tags and baker's twine were used to create this pretty packaging. The wired ribbon makes it easy to create bows that will keep their shape.

diy s'more favors | Creative Bag

 Striped ribbon and chalk labels make packaging these s'more favors a breeze. 
Tip: If you want to use chalk markers on the chalk labels write on the labels BEFORE you stick them on the box and WAIT for the chalk marker to dry completely.

diy s'more favors | Creative Bag

Organic cotton striped ribbon, linen flowers on twine and die cut feather gift tags. I added some glitter to the tip of the paper feather gift tag because every girl likes a little sparkle now and then. I showed you how to add glitter here.

diy s'more favors | Creative Bag

I think that this favor would be sweet for an party at the cottage this summer along with our birch covered vases (available in stores only) and chalkboard signs. What do you think?


"chalkboard" take out boxes for holiday leftovers

Tuesday, 26 November 2013

chalkboard take out boxes for holiday leftovers | Lorrie Everitt for creativebag.com

We have recently repackaged our 8oz, 16oz and 32oz coloured chinese take out boxes in smaller packages of 10! This is great news if you don't need 50 boxes or you want to buy a variety of different colours to match your party or holiday decor. 

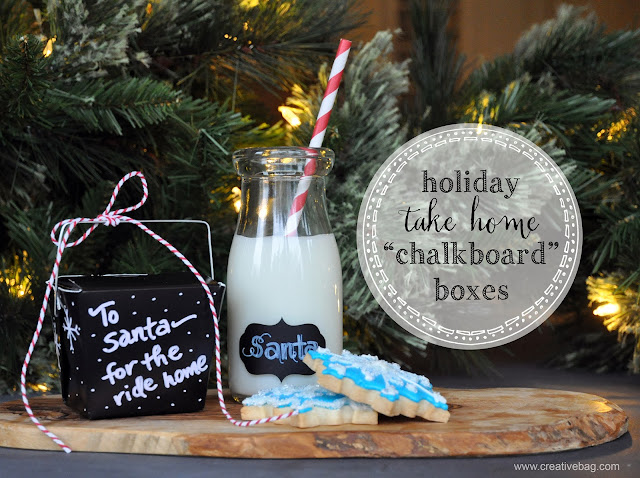
I thought that it would be interesting to see if you could use chalk markers on the black take out boxes like I did here with our black wrapping paper. So I tried it out this week and hey, it works!! I used the Bristo chalk markers on my samples. Aren't they adorable?

These would be a great idea for the holidays. No more looking around for extra plastic containers and bags. Send family and friends off with these "take home" boxes with leftovers. Long distant guests will think you are the hostess with the mostess when you give them these take out boxes filled with small cookies as a treat for the ride home! 

chalkboard take out boxes for holiday leftovers | Lorrie Everitt for creativebag.com

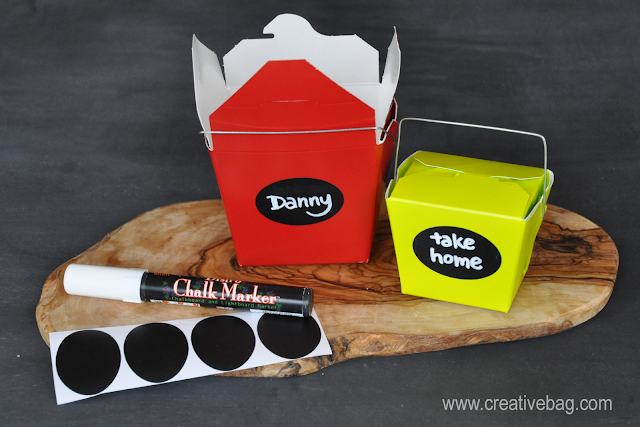
If you want to use the coloured take out boxes you can simply add chalkboard stickers for a fun detail. We have three shapes of chalkboard stickers and you can write on them with chalk markers or regular chalk. 

chalkboard take out boxes for holiday leftovers | Lorrie Everitt for creativebag.com

Here's another look at my funky little "take home" boxes.


chalkboard take out boxes for holiday leftovers | Lorrie Everitt for creativebag.com

Here's one for Santa! The beautiful snowflake sugar cookies that I used in my photos were purchased from Cupids Gourmet Bakery. Cupids is a nut free bakery with a locations in Oakville & Burlington and they make the most amazing (and beautiful) cupcakes and cookies!


Chinese Take Out Boxes and Customer Inspiration from Jacquee of "I Sugar Coat It"

Wednesday, 29 May 2013

I love Mondays. 

I know that a lot of people don't like Mondays but I do because it is the day that I'm at the Toronto store. I get so excited when I walk around the store and get to see all of the amazing new products that have arrived on the shelves. This week the staff were setting up an incredible display featuring many of our new kraft, burlap and lace products. They are still loading many new products onto the website and I will share them with you in another post. If you are planning a vintage or rustic themed wedding or party this summer you have to visit our stores soon.

The other reason that I love Mondays is that when I'm in the store I get to talk to many of our customers and see what products they are loading into their shopping carts. This week I noticed a number of people with our Chinese take out boxes in their carts. 

Chinese take out boxes are always a popular product at this time of year as many brides like to use these for wedding favors and packaging for sweet tables. We have the traditional white take out boxes in a variety of different sizes ...
and we also carry a number of unique takeout boxes as well. The clear and kraft take out boxes (shown in the top photo) are two of my favourite take out boxes to decorate for wedding and party favors. Our Chinese take out boxes are also available in many different colours and patterns and you can see them all on our website here.

I especially love to see what our customers have been doing with our products and I was blown away this week when I received an email from one of our very talented customers - Jacquee from "I Sugar Coat It".  Jacquee packages and photographs her beautiful sweets in our products and I just have to share some of my favourites with you today. 
 
This beautiful cake was created for a friend's bridal shower and was cleverly packaged in one of our new Parisian collection bakery boxes.

I love Jacquee's photography. You really want to have a (big) slice of that cake! The cake stand in this picture is from our new Rosanne line of dessert servingware. I over heard a customer the other week say that this area of our Toronto store was her "happy place" and I have to agree. 
Check out how Jacquee packaged her macarons in our macron boxes. I love the way that she added her logo to the tiffany blue macaron box. 
Again, the photography for these sweet treats is both beautiful and yummy!  The patterned paper behind the macarons is from our new Dahlia Collection.
And one last photo from Jacquee's blog that I just had to share. I pinned this picture of her strawberry glazed mini doughnuts as soon as I saw it. I loved the use of the paper straws, the colours and the way the doughnuts were styled. But what I loved the most is that these mini treats are lactose-free!! I'm lactose intolerant and so I'm always on the look out for lactose-free recipes - especially desserts. I can't wait to try this recipe out. I just need to find an excuse to make them and present them like this on the paper straws ... maybe for a late night treat  at the cottage this summer!

Jacquee's blog is a chronicle of her successes (and failures) as she explores sugar in all it's forms. She has lots of great recipes and I love how she shares her stories on her blog.I hope that you will pop over to check out Jacquee's website. Tell her Lorrie sent you over!

If you are looking for more inspiration for your packaging projects please check out and follow our Creative Bag Pinterestboards. I am adding new pins daily and always on the look out for new ideas using our products!