Showing posts with label chalkboard. Show all posts

Countdown to the holidays - part one of three

Tuesday, 14 November 2017

countdown to the holidays with hand lettered pin-back buttons on linen drawstring bags | creativebag.com

Make every day a treat this holiday season with interactive countdown displays.

This do-it-yourself countdown calendar was created using 4"x5" linen drawstring bags, chalkboard pin-backed buttons, clothespins and a wood canvas display board.

countdown to the holidays with hand lettered pin-back buttons on linen drawstring bags | creativebag.com

countdown to the holidays with hand lettered pin-back buttons on linen drawstring bags | creativebag.com

You can find the instructions for turning a large 24" x 36" wood canvas into a countdown display board here.

countdown to the holidays with hand lettered pin-back buttons on linen drawstring bags | creativebag.com

Pin-back buttons were spray painted with chalkboard paint and attached to each of our linen drawstring bags. You can use chalk markers or paint pens to number each button.

countdown to the holidays with hand lettered pin-back buttons on linen drawstring bags | creativebag.com


Doris Wai hand lettered each pin-back button for this project. She approached each number a little differently for a whimsical twist. If you are interested in learning more about hand lettering - what tools to use, how to get started and project ideas - Doris shares all of her hand lettering secrets in her recently published book "Extraordinary Hand Lettering".

Stay tuned for more countdown to the holiday inspiration.


Styled Shoot Credits:

photography  Heidi Lau Photography 
hand lettering  Love Lettering   
florals Flowerly 
cake and sweets  Cakelaine   
nutrition specialist  Simply Nic Nutrition 
craft beer  Hometown Brew Co. 
packaging & entertaining supplies  Creative Bag  
creative direction  Lorrie Everitt  
& the handcrafted artisans:
Gather 33    


countdown to the holidays with hand lettered pin-back buttons on linen drawstring bags | creativebag.com
Sources: handcrafted rabbit and bear and reindeer felted ornament by Milo and Ben

holiday entertaining inspiration: hot chocolate and sweets bar

Monday, 6 November 2017

holiday entertaining inspiration: hot chocolate and sweets bar | creativebag.com

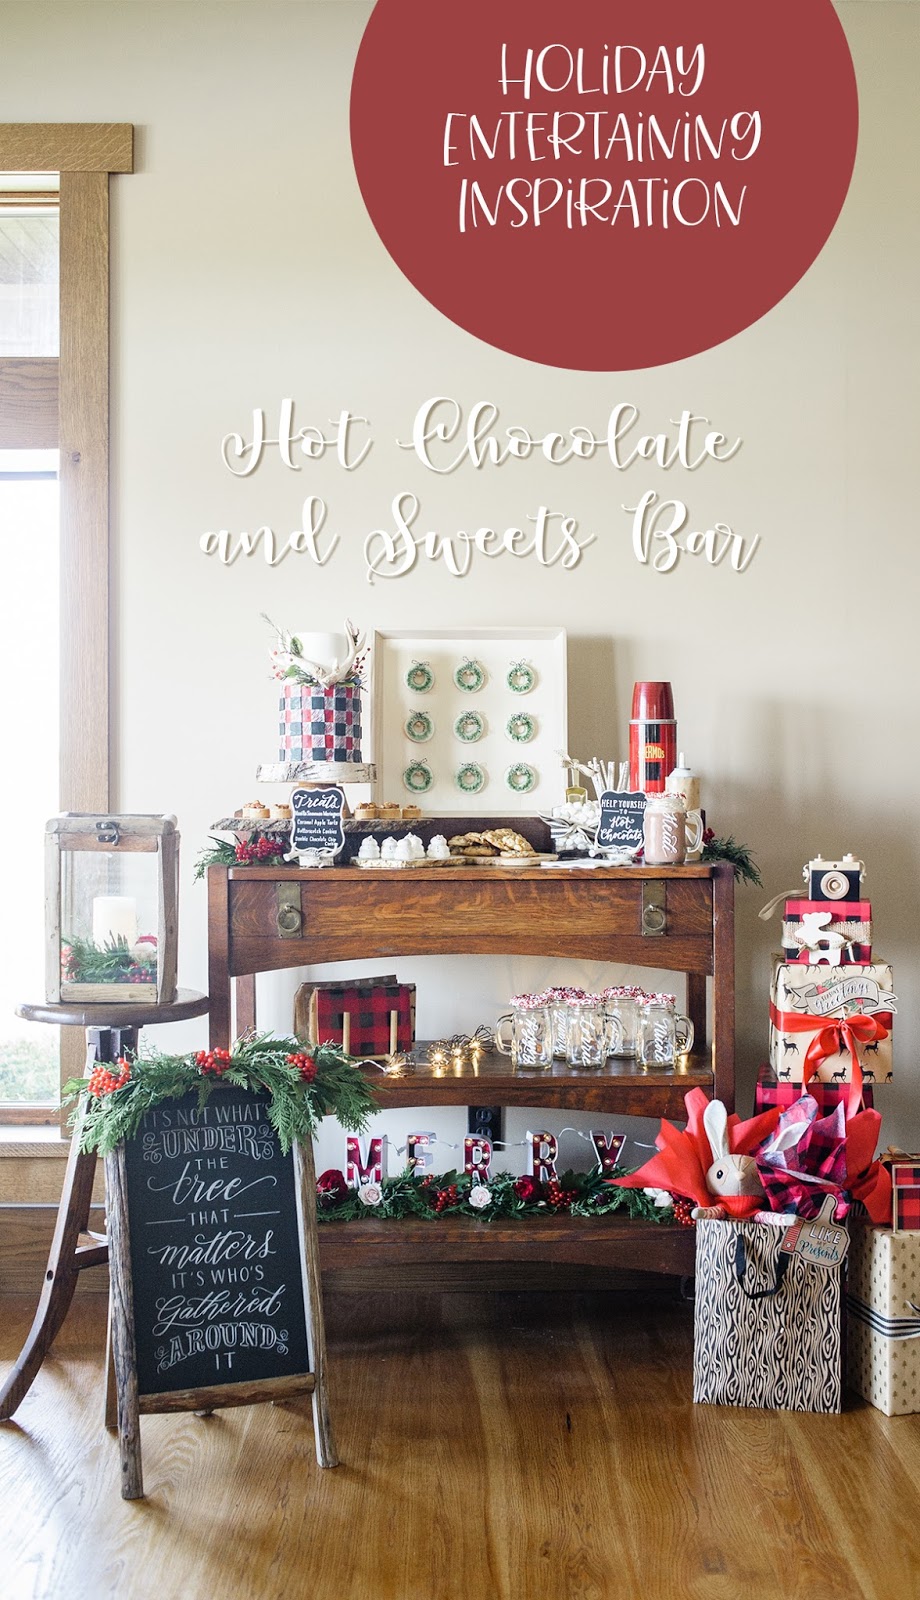
The most merry time of the year is almost here. Entertaining with family and friends is one of our favourite things to do during the holidays and over the next few weeks we are going to share some of our party ideas. 

Bring the outdoors in with this cottage wilderness inspired hot chocolate and sweets bar.

holiday entertaining inspiration: hot chocolate and sweets bar | creativebag.com

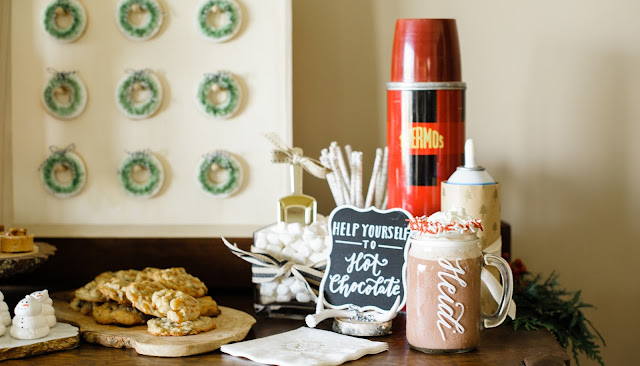
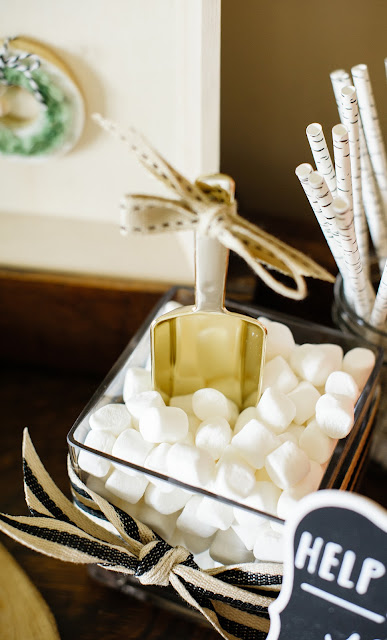
A hot chocolate bar is a great idea for young and old alike. Wood slabs, fresh greenery garlands and a vintage buffalo plaid thermos gave our set up a woodland vibe.

holiday entertaining inspiration: hot chocolate and sweets bar | creativebag.com

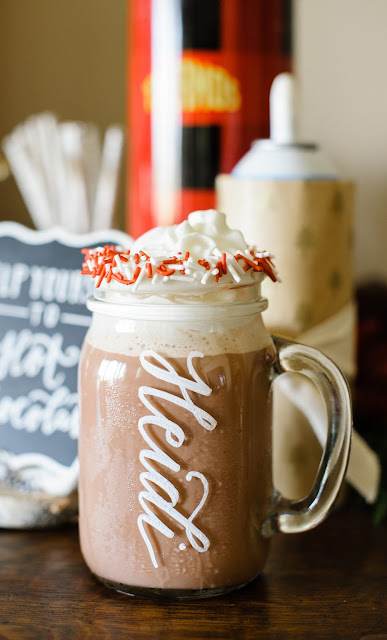
Mason jar mugs were rimmed with melted chocolate & candy sprinkles and personalized with guest names. Wrapping paper and ribbon made whipped cream dispensers look a little more festive.

holiday entertaining inspiration: hot chocolate and sweets bar | creativebag.com

holiday entertaining inspiration: hot chocolate and sweets bar | creativebag.com


holiday entertaining inspiration: hot chocolate and sweets bar | creativebag.com


holiday entertaining inspiration: hot chocolate and sweets bar | creativebag.com

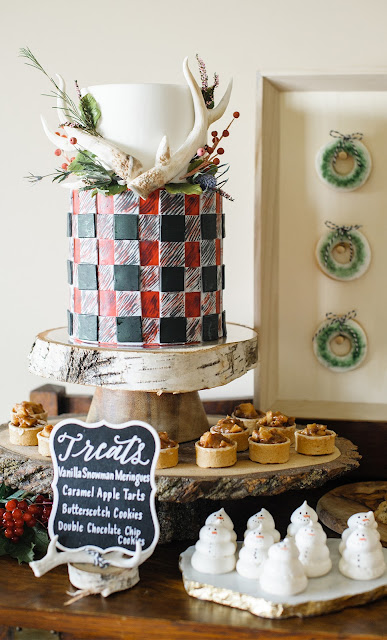
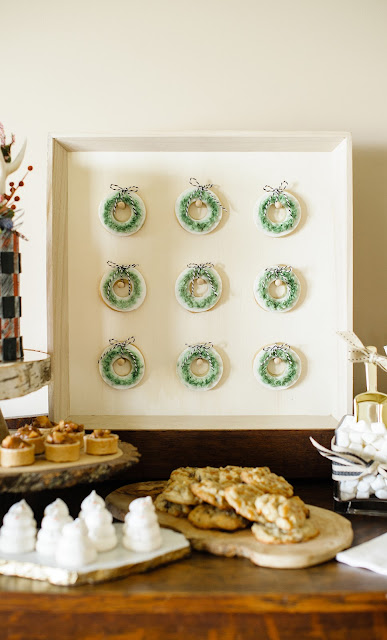
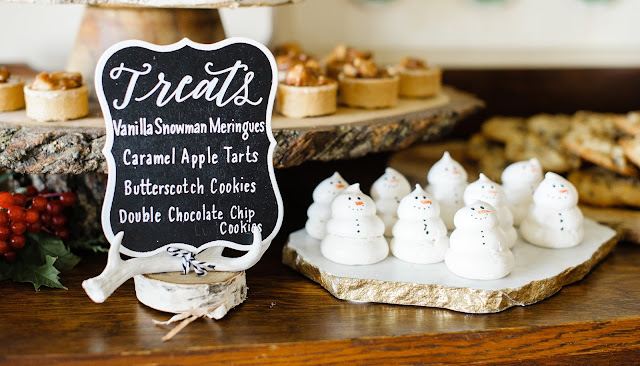
Sweet treats become part of the party decor especially when they are as beautiful as these ones that were designed and created by Cakelaine

holiday entertaining inspiration: hot chocolate and sweets bar | creativebag.com

holiday entertaining inspiration: hot chocolate and sweets bar | creativebag.com


Here's a few more festive details from our set up ...

holiday entertaining inspiration: hot chocolate and sweets bar | creativebag.com

self standing rustic wood frame chalkboard sign was embellished with fresh greenery garland from Flowerly and a hand lettered holiday message by Love Lettering

holiday entertaining inspiration: hot chocolate and sweets bar | creativebag.com

Fresh greenery and a battery operated candle were placed inside this rustic wood and glass box.

holiday entertaining inspiration: hot chocolate and sweets bar | creativebag.com

Gifts were stacked in the shape of a tree as holiday decor. Wrapping papers and gift bags from our Everitt Cottage Collection worked perfectly for our wilderness themed party. Posecards and handcrafted toys were added as decorative details to the gift wrapping. 

Stay tuned for more holiday entertaining inspiration!


Styled Shoot Credits:

photography  Heidi Lau Photography
hand lettering and Posecards  Love Lettering
florist  Flowerly
cake and Sweets  Cakelaine
handcrafted gifts - 
bunny  Milo and Ben
toy camera  Little Rose & Co
moose teether  Sweetie Pie Design Co

·       
holiday entertaining inspiration: hot chocolate and sweets bar | creativebag.com

Hand Lettering on our chalkboards. Do It Yourself or hire an hand lettering artist!

Wednesday, 28 September 2016


Earlier this year, I organized a boho inspired styled wedding shoot with a number of local wedding vendors that were taking part in ReBash 2016


Today I am excited to tell you that this beautifully hand lettered chalkboard by Doris Wai has been featured here along with my DIY hand lettering on chalkboards tutorial.   


In my DIY tutorial, I created a free download to recreate the hand lettering on this ornate chalkboard ... 


... and a free download to recreate the hand lettering on these smaller chalkboard signs.

Our chalkboard markers and chalkboard signs can be used for more than just weddings - they are perfect for parties, home decor and retail displays.

By the way, if you are looking to hire a hand lettering artist, we highly recommend Doris Wai.


 We think Doris is pretty talented. So talented, that we hired Doris to design this beautiful white and gold holiday print. It's available now as wrapping paper and tissue paper!


fall decorating inspiration using tissue paper, chalk markers and a little bit of glitter

Thursday, 8 October 2015


October is here and it's time for fall entertaining. Are you hosting Thanksgiving dinner or planning a Halloween party or both?! Here's a couple of ideas for fall decorating with pumpkins that can easily be incorporated into your Thanksgiving decor and last right through to the end of the month. 

With a little bit of imagination, some tissue paper, glue, glitter and chalk paint and chalk markers you can diy these pumpkins in an evening. Have little ones? These are simple enough to make with the kids too!

You can use real pumpkins for these projects but let's face it, plastic pumpkins look very realistic, they can be reused year after year and they came in a large variety of sizes, shapes and colours.


I purchased some white pumpkins and decorated them with orange and pink tissue paper to co-ordinate with the colours I was using for an October birthday celebration. Here's what I did:


I cut four colours of tissue paper - off white, light orange, light pink and pink - into triangles and glued them onto a white pumpkin using decoupage glue. I wanted a little extra glitter on my pumpkins so I used a decoupage with a glitter finish. Once the pumpkin was completed covered with tissue paper and the glue was dry, I added glue to the pumpkin stem and covered it with fine glitter. Note: if the pumpkin is still "wet" the glitter will stick to the rest of the pumpkin too and not just the stem so be aware.


You can purchase black pumpkins or use black chalkboard paint to cover an orange pumpkin if you are interested in making one of these "chalk art" inspired pumpkins. Use white chalk markers to write words like I did or doodle a design on your pumpkin. If you are interested in writing words like mine and you don't feel like your hand writing is worthy of doing this free hand - it is possible to trace words onto the pumpkin using the same techniques I have shown you on our chalkboards in earlier posts like this oneAgain, I added gold glitter to the stem of this pumpkin.


If you want to use a number of pumpkins in a grouping for a table centrepiece, it's a good idea to have a mix of solid and patterned pumpkins. You can give the grouping height by displaying the pumpkins on a few wood slabs.


Check out our new "happy birthday" cake toppers that just arrived. This gold sparkle one was the perfect accent for this pumpkin shaped naked cake.

Happy Thanksgiving!

Oh, and just a reminder - our stores are closed on Thanksgiving Monday.


you can do it yourself - throw an anniversary party (part 2 of 3)

Monday, 20 July 2015


drink station at anniversary party by Lorrie Everitt for Creative Bag

This is part two of my diy anniversary party and today is all about the drink station.

I think that you should be able to enjoy your party so unless you plan hire someone to tend bar, a self serve drink station is my favourite way to go. 

drink station at anniversary party by Lorrie Everitt for Creative Bag

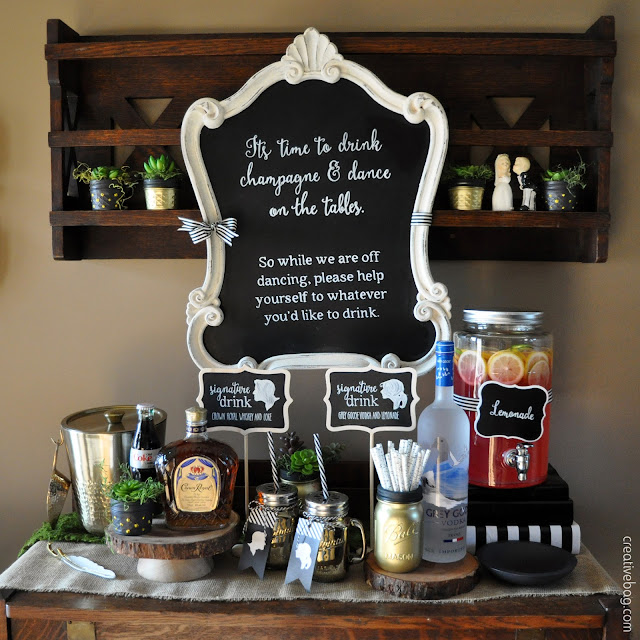
I created this blackboard sign and hung it above the drink station so that everyone would know it was a self serve bar. I glued the same ribbon I used on the sweet table to the frame.

 The art to recreate the sign is included in the printables you can download for free in my last post. You may recognize this blackboard sign from another party set up.

drink station at anniversary party by Lorrie Everitt for Creative Bag

Signature drinks are a nice way to personalize your drink station. I created the signature drink signs on larger blackboard signs on sticks.

More gold spray painted mason jars spray were added to the set up to display paper straws and succulents. I used the birch paper straws to decorate the cake pops on the sweet table so it made sense to use them again at the drink station. Another decorative detail from the sweet table set up that I incorporated into the drink set up is the use of rustic wood slabs.

Lorrie's tip: Don't set up complicated signature drinks at a self serve bar. Make it something personal that is easy for guests to mix themselves.

drink station at anniversary party by Lorrie Everitt for Creative Bag

We have an assortment of mason jar mugs with a metallic finish daisy lid and plastic straw in select stores (until quantities last). I tied gift tags from my party printables to two of the metallic mugs to add to the signature drink theme.

drink station at anniversary party by Lorrie Everitt for Creative Bag

I filled one of our drink dispensers with lemonade and placed it on top of a stack of books that I covered with wrapping paper book jackets. I placed a bowl under the spout to prevent lemonade spills on the burlap table runner and furniture.

Lorrie's tip: The lemonade chalkboard sign was attached to the ribbon on the drink dispenser using magnets. I glued a magnet on the back of the chalkboard sign and used a second magnet behind the ribbon to keep the sign in place.

drink station at anniversary party by Lorrie Everitt for Creative Bag

Our mason jar mugs are perfect for parties and they make great favors. Guests take them home and you don't have dirty dishes to wash in the morning - bonus!

We will have marquee letter signs arriving soon. Marquee signs are a great way to light up a drink station at night.

drink station at anniversary party by Lorrie Everitt for Creative Bag

Here's a closer look at the mason jar mugs. I added blackboard sticker labels for the guys and added their names using a chalk marker. For the girls I added gold glitter letter stickers to co-ordinate with my black, white & gold colour theme.

The chalkboard sign lets guests know that they can keep the glasses and reminds them that they can serve themselves!

drink station at anniversary party by Lorrie Everitt for Creative Bag

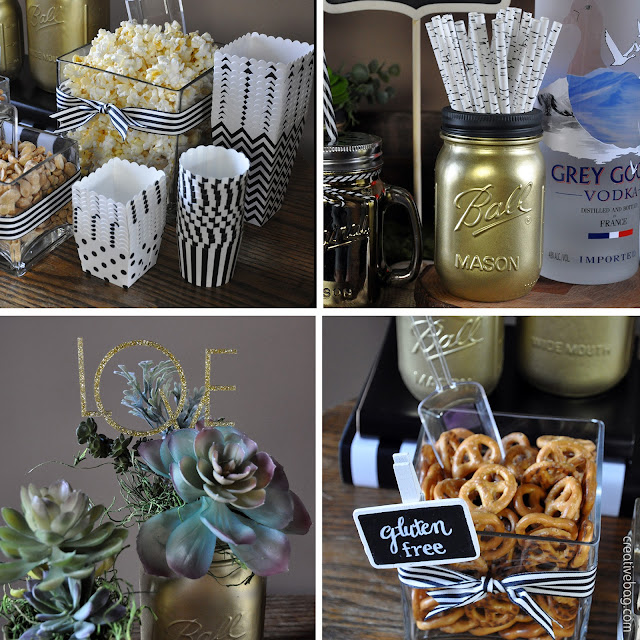
I also set up a small snack table beside the drink station with peanuts, pretzels and popcorn.

drink station at anniversary party by Lorrie Everitt for Creative Bag

drink station at anniversary party by Lorrie Everitt for Creative Bag

Square glass containers were filled with snack foods. Ribbon decorated the glass containers and small chalkboard signs with clothespins helped identify food for people with allergies. Our new line of party food containers are the perfect size for guests to fill (and refill) with snacks.

Above are some more close ups of the gold spray painted mason jars. I added this gold sparkle cake topper to the succulent floral arrangement.

Lorrie's tip: If you have room to serve lemon and lime slices to your drink bar use additional   square glass containers to display them.

drink station at anniversary party by Lorrie Everitt for Creative Bag

I hung an ornate vintage inspired frame and filled it with black and white photos. After the party you can use the frame as it is or as a way to display whatever you want.

Lorrie's tip: Convert all of your photos to black and white to co-ordinate with the colour theme. I considered spray painting the frame gold as well to work with the party colour theme but ended up leaving it white to match my home decor for after the party. 


I added black and white balloons filled with helium to the drink station. The gold mylar tassel is from this tassel kit . If you want to add a long strand of tassels to the balloons you need to have lots of small balloons (way more than three) or one giant helium filled balloon to hold up the additional weight of the tassels. 

I tied the balloons to a mason jar to keep them from floating away and so I could position the balloons wherever I wanted.


Here's one last look at the drink station. If you missed my anniversary party sweet table post you can find it here. Check back later this week for the third and last post about this diy party.


BTW - you can grab the party printables here.


day 1 - giveaways and bakery product specials ... let's get this party started!

Monday, 8 June 2015


Creative Bag contest and daily specials


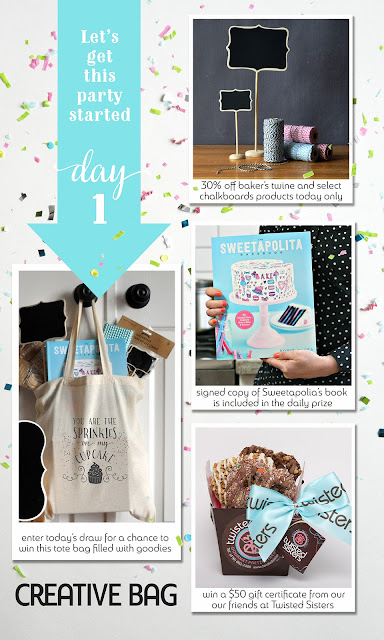
Creative Bag has launched it's new and improved website and for five days this week we're going to be doing something extra special to celebrate. 

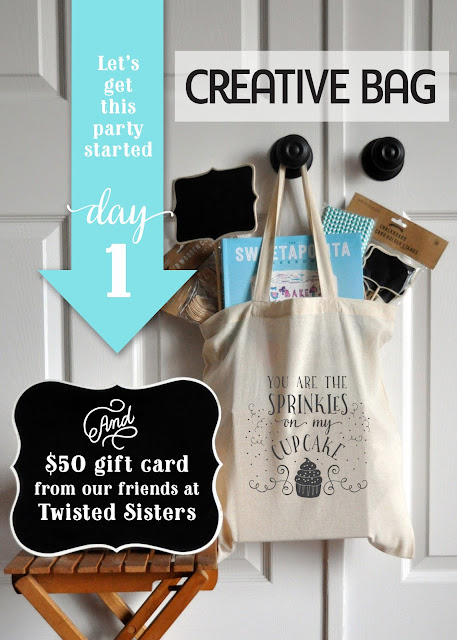
Every day you will have the opportunity to enter a new draw for a tote bag filled with themed goodies and items that have been donated by some of our clients and blogger friends.

For the next five days, we are also going to offer select products at a promotional price for a 24 hour period. The products are some of our top selling items from the theme of the day.

So let's get this party started with our first day of giveaways and product specials ...
today's theme is BAKERY.

Creative Bag contest and daily specials

Today's giveaway is a tote bag filled with the following goodies: 6 glass milk bottles, paper straws, assorted wooden cutlery, assorted wood chalkboards on sticks, a signed copy of The Sweetapolita Bakebook and a $50 gift certificate from Twisted Sisters.

day 1 - giveaways and special promotions | Creative Bag

Twisted Sisters is a local business run by sisters and best friends, Missy and Jill. Their products are sweet and salty all twisted together! Creative magic turns plain pretzel twists into crunchy, gourmet chocolate and caramel covered delicacies. The winner of the bakery prize package will receive $50 in products of their choice from Twisted Sisters.

day 1 - giveaways and special promotions | Creative Bag

The winner of the bakery prize package will also receive a signed copy of this bakebook by Canadian baker/blogger Rosie Alyea. Rosie's inspirational blog, Sweetapolita, is one of our favourite baking blogs. If you like sprinkles as much as we do, you are going to love the Sweetapolita bakebook.

day 1 - giveaways and special promotions | Creative Bag

Our product specials of the day are a few of our bake shop customers' favourite items. These items are all 30% off today only online and in our stores while quantities last:


Tomorrow is day 2!

Sign up to receive our blog posts by email. We usually only post once or twice a week on the blog. This week will be the exception and I will be blogging every day during of our 5 days of giveaways and specials so you don't miss out!