Showing posts with label Halloween. Show all posts

love you more than candy!

Thursday, 22 October 2015


Halloween falls on a Saturday this year and a lot of our customers have talked to us about their holiday entertaining plans. If you are hosting a Halloween party and still looking for some over the top entertaining ideas you're going to love the newest edition of SheEntertains by Elle Daftarian. You can view the online magazine here.
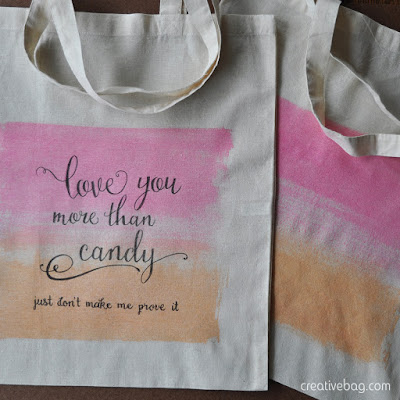
diy treat bags | Creative Bag

Featured in the magazine is a diy watercolour tutorial using our cotton tote and drawstring bags. I created these for Elle to use at a kid's Halloween party for favor bags. 
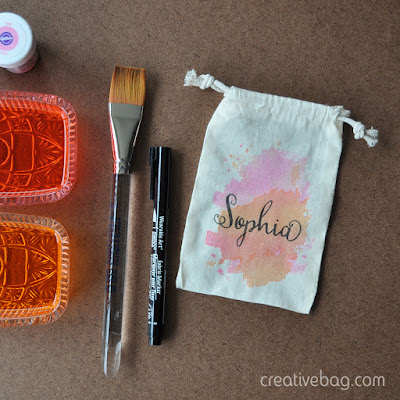
diy treat bags | Creative Bag

Although these projects were designed for a Halloween party, I think that they could be created for anytime of year because hey, who doesn't love watercolour art and candy?!
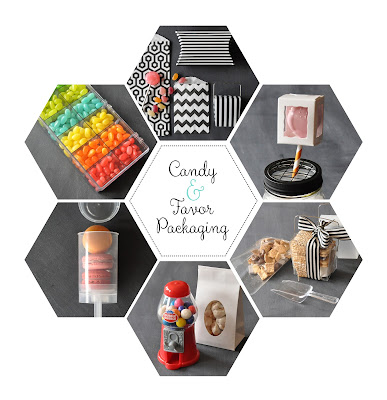
candy and favor packaging | Creative Bag
Have you or are you planning on using our candy and favor packaging for a special event? Post it on Instagram with #creativebagco so we can see what you've been up to!


fall decorating inspiration using tissue paper, chalk markers and a little bit of glitter

Thursday, 8 October 2015


October is here and it's time for fall entertaining. Are you hosting Thanksgiving dinner or planning a Halloween party or both?! Here's a couple of ideas for fall decorating with pumpkins that can easily be incorporated into your Thanksgiving decor and last right through to the end of the month. 

With a little bit of imagination, some tissue paper, glue, glitter and chalk paint and chalk markers you can diy these pumpkins in an evening. Have little ones? These are simple enough to make with the kids too!

You can use real pumpkins for these projects but let's face it, plastic pumpkins look very realistic, they can be reused year after year and they came in a large variety of sizes, shapes and colours.


I purchased some white pumpkins and decorated them with orange and pink tissue paper to co-ordinate with the colours I was using for an October birthday celebration. Here's what I did:


I cut four colours of tissue paper - off white, light orange, light pink and pink - into triangles and glued them onto a white pumpkin using decoupage glue. I wanted a little extra glitter on my pumpkins so I used a decoupage with a glitter finish. Once the pumpkin was completed covered with tissue paper and the glue was dry, I added glue to the pumpkin stem and covered it with fine glitter. Note: if the pumpkin is still "wet" the glitter will stick to the rest of the pumpkin too and not just the stem so be aware.


You can purchase black pumpkins or use black chalkboard paint to cover an orange pumpkin if you are interested in making one of these "chalk art" inspired pumpkins. Use white chalk markers to write words like I did or doodle a design on your pumpkin. If you are interested in writing words like mine and you don't feel like your hand writing is worthy of doing this free hand - it is possible to trace words onto the pumpkin using the same techniques I have shown you on our chalkboards in earlier posts like this oneAgain, I added gold glitter to the stem of this pumpkin.


If you want to use a number of pumpkins in a grouping for a table centrepiece, it's a good idea to have a mix of solid and patterned pumpkins. You can give the grouping height by displaying the pumpkins on a few wood slabs.


Check out our new "happy birthday" cake toppers that just arrived. This gold sparkle one was the perfect accent for this pumpkin shaped naked cake.

Happy Thanksgiving!

Oh, and just a reminder - our stores are closed on Thanksgiving Monday.


Halloween entertaining inspiration from the LCBO

Tuesday, 29 September 2015

Halloween entertaining ideas

The new LCBO Food and Drink magazine is out and we are totally loving the entertaining ideas for fall 2015. 

Our orange and black striped pillow boxes were used as favor packaging for a Halloween themed dinner party. The custom stickers that were added to the boxes are a clever and simple idea. 

Halloween entertaining ideas

Pick up your copy at the LCBO before they run out!


Ho Ho Holidays! Our first 2013 Christmas collection is arriving in stores now.

Wednesday, 18 September 2013

shop at creativebag.com for all of your Christmas holiday packaging supplies
It's beginning to feel like Christmas ... in our stores! Our holiday packaging products have started to arrive in our stores this week and our staff have been busy filling the shelves with lots of new items daily.

Our first holiday 2013 collection is called "Chexmas". This collection is fun and modern with a bold red & white colour focus that will have you thinking about candy canes and sweet holiday treats. I'm especially fond of the striped ribbon details on the window boxes and Euro bags.

I have so many packaging, decorating and entertaining projects on the go using our new holiday products and I can't wait to share them all with you on the blog.
shop at creativebag.com for all of your Christmas holiday packaging supplies
I hope that you will follow me on the blog so that we can  "Wrap up the Holidays" together!


By the way, I have not talked much about Halloween on the blog but we do have lots of Halloween products in the stores and online right now ... 
shop at creativebag.com for all of your Halloween packaging supplies
Whether you are looking for something scary or cute for the fall season we've got what you need to make your Halloween packaging and entertaining spooktacular.  


DIY Halloween Jack-o'{paper}-lantern

Wednesday, 17 October 2012


I really wanted to decorate a paper lantern to look like Halloween jack-o'-lantern but realized that we don't carry orange paper lanterns. At first I was disappointed and thought that I would just have to come up with another idea. I started looking at the tissue paper pompom kits and it occurred to me that I could use a package of our orange coloured tissue paper to cover a white paper lantern. And so my jack-o'{paper}-lantern project was on!
So here's what I did:
I used a medium sized paper lantern and one package of tissue paper. I cut the tissue paper into 2" wide strips.
My adhesive of choice was gel medium (modge podge or white glue will also work) and I used a foam brush to adhere the 2" tissue paper strips to the paper lantern. As you can see in the photo above, I adhered the tissue paper strips from top to bottom and worked my way around the lantern.
I found it easiest to apply the gel medium directly onto the paper lantern first and then carefully add the tissue paper using the foam brush to make sure that the tissue lays flat. Once each tissue paper strip is in place use the foam brush to apply a top coat of gel medium to the tissue paper.
Tip: I covered one half of the lantern one evening, hung it up to dry and then finished the second half the next morning.
To add the eyes and mouth to create a jack-o'-lantern I used black paint and painted directly on the dry paper lantern. You could use black paper shapes if you don't want to paint and attach the paper with gel medium or tape.
If you are looking for paper lanterns for a wedding or party and cannot find the perfect colours to match your decor -  keep in mind that you can easily change the colour using white paper lanterns, coloured tissue paper and some gel medium.
After making these Halloween paper lanterns, I started thinking about other ways to decorate our paper lanterns. Look for more paper lantern decorating ideas for theme parties to come!!!
Are you still busy working on last minute details for a Halloween party? Then this is a great time to visit our Creative Bag stores! All of our Halloween themed products have been reduced to 50% off! Hurry into any of our three retail locations before everything disappears.

bitty bag packaging inspiration for cookies

Friday, 12 October 2012

Here's a fun way to package cookies using our bitty bags. I have given all of my examples a Halloween theme but the basic concept can easily be adapted to suit any party, shower or wedding theme.

I used one of the Martha Stewart All Over the Page paper punches to create a cut out on one side of the bag! By packaging a large cookie (or a few small cookies) inside of a lip and tape bag and inserting it into the bitty bag the cookie will stay fresh longer.

This is how I created the Halloween themed moon and bat bags ...
As always, gather your supplies: paper bitty bags, lip and tape bags to fit inside the bitty bags, all over the page paper punch in shape of your choice, black ribbon, scissors, orange paper scraps and large circle paper punch, hole punch (I used the we R memory keeper's chomper).

Next you want to position the all over the page paper punch so that it is where you want your hole. Place the bottom half of the paper punch inside the bag so that you will cut a hole on one side of the bag (as shown above). The paper punch is magnetic so it stays in place while you are punching.
Now you are ready to package your cookies into the lip and seal bags. Simply peel off the protective strip and fold over the opening to close. I love these bags because you can reposition the adhesive edge if you didn't get it quite right the first time. Insert this package into the bitty bag and you are ready to decorate your bitty bags.

To make the Halloween moon and bat: Cut a large circle from a scrap piece of orange paper. Position your circle near the top of the bitty bag and off to one side. Use your hole punch to create two holes off to one side of the orange circle as shown above - making sure that you go through both layers of the bitty bag. Now you are ready to add your ribbon! Thread the ribbon through the two circles as shown above.
To make the ribbon "bat" you will need to tie a knot and cut the two ends on an angle as shown to form the bat shaped wings.
And we're done! Super easy and it would take very little time to do a batch of these for a large party.

And here's another way to decorate these enhanced bitty bags ...
This time I used a different all over the page punch shape. I decorated the top of the bag with a piece of my bag header art that I created for you to download here. I added a piece of black glitter tape at the bottom of the art as a decorative element and I used orange thread on my sewing machine to seal the bitty bag.

Here's another picture of the bitty bag with some other Halloween projects that I have shown you already ... the blackboard painted pumpkins and witches' feet cupcake decorations. The spooky glass was made by cutting black glitter tape into eye shapes. If you serve orange beverages in the glass they look like pumpkins ... milk will look like ghosts!

I think that all of these would all look great on a Halloween themed sweet table.
BTW ... Looking for paper punches, hole punches and glitter tape? They are all available in our Toronto Store in the Creative Studio section. All of these projects were demonstrated at the {free} Halloween workshop last week .. missed it? ... sign up to receive blog updates by email and you will get advance notice of the next workshop dates and project details.


{free} Halloween iron transfer download for our small fabric bags

Wednesday, 10 October 2012

Before I get started with this blog post, I just wanted to thank everyone who took the time to attend my workshop last Thursday. Traffic was terrible on all of the major highways and I know that it was difficult for some people to get to the Toronto Creative Bag store. I think that everyone that showed up had a great time - I know that I did. We did a lot of crafting, eating & talking!

I have one more {free} Halloween download for you that can be used with the iron on transfers to decorate our small canvas bags. As you can see in the photo above, I used the iron on transfers on small drawstring fabric bags and some mini fabric bags with handles.

I talked about these spooky fabric loot bags at the Halloween workshop. If you have never used our iron on transfers before I have given directions for using them in some of my previous posts.

And now, as promised, here is the download for the iron on transfer art.

You can download the art as shown above here. Remember to read the iron on transfer instructions for printing how to's. Please note that all of my art is for personal use only. No commercial use.


You can see that I used just the iron on transfers on some of the bags ...


and I embellished other bags with the iron on transfers and ribbons!
I did not want to spend time sewing the ribbon onto the bags so I used two-sided fabric tape to adhere the ribbons to the bags. We have some great two-sided fabric tape in the Toronto store in the Creative Studio space.

I have a couple of more fun Halloween projects to show you this week. Stay tuned!


Halloween inspiration using paper straws

Tuesday, 2 October 2012

My Halloween workshop is just a couple of days away and I wanted to share with you one of the projects that everyone will be making when we get together. I used paper straws and boots cut out of black cardstock to create these simple (and funny) little cupcake decorations. I have not figured out what kind of cupcakes I will be serving ... my daughter loved the red velvet cupcakes that I made to shoot this photo - but I'm thinking maybe dark chocolate or carrot cake.
Here's how I made these ...
1. I drew a boot shape on plain paper and cut it out.
2. Then I used the shape as a template with black cardstock paper. I drew around the shape once, then turned the template over and drew around it again to create left and right boot shapes.
3. Cut the two boots out of the black cardstock and set aside.
4. You will need to cut two "legs" from a paper straw. Cut the straw pieces long enough so that you can insert one end into the icing/cupcake.
5. To attach the boots to the straw, cut two slits on one end of each straw as shown above and insert boot.
By the way, these are the three {free} projects that everyone will be making at the Halloween workshop this Thursday:
1. Halloween themed loot bags using my headers  
2. black board market trays 
3. witch's feet cupcake decorations
I have lots of other packaging, decorating projects and inspiration to show you that can be used for a Halloween party or adapted for a birthday party, shower or wedding.
I am working on my workshop goody bags now. There are still have 5 seats left for this week's workshop! If you are interested in joining us let me know - quickly!!!


{free} halloween tags and bag headers download

Friday, 28 September 2012

Time for another one of my "free" downloads. This one is for Halloween and includes two different elements that will make your Halloween packaging "spook"tacular.

Here's what the download looks like:
Download the art here. Print these in colour on white cardstock for the best results. Note: This download is just for personal use. No commerical use please.
First, I created this fun little square tag. As you can see, there are four of these tags on the download.Cut them out, punch a small hole with a paper punch, add some twine and you are ready to attach the tag to just about any Halloween packaging project.

Here's what I did with some of the tags:

1. Oreo Pops. I showed you how to make these tasty treats a few months ago. For Halloween, I used orange candy melts and Halloween sprinkles. The oreo pops were packaged with small food safe candy bags. Black and white striped canvas ribbon was used to tie the candy bag closed at the top of the lollipop stick. The orange twine that I selected to attach the tag added that extra pop of colour to my packaging.
2. Marshmallows dipped in chocolate. I used the same packaging details for these marshmallow Halloween treats as I did with the Oreo pops. I showed you how to make the marshmallow treats for Valentine's Day. Again, some simple colour changes and these treats can easily be adapted to any holiday or party theme.
Tip: To create the "eyes" on the "pumpkin" marshmallow, simply cut licorice into tiny triangles.
3. Cupcakes. Here you can see that I added the Halloween tag to one of our clear cupcake holders with a dome lid. I tied the black and white striped canvas ribbon around the container and knotted the ribbon at the top. Using a small (not mini) clothespin that was decorated with black glitter tape, I was able to clip the tag to the top of the package.
Here's a side view to show you how I was able to get the clothespin to stay in place on top of the knot. The orange twine was added as a decorative element and to add some colour. We don't sell the glitter tape on line but it is available in the Creative Studio of the Toronto store.
The other item that I designed for the Halloween packaging download is this bag header. There are two of them on the download. Simply cut them out and fold them in half.
Tip: I use a bone folder to make sure that the fold looks professional.
When you are ready to add them to a bag, slip a clear flat bag inside the folded paper bag header and staple close along the bottom edges of the header.
Depending on what you put in the clear flat bags ... you can adjust how much of the bag is seen by folding any excess bag inside of the bag header before you staple the header in place. As you can see above, I used the same size of clear flat bag on all of my loot bags but they vary in length to make my packaging look professional. The back of the headers have a blank area so you can write a name on them. Which is a great idea if you are using these for loot bags at a party or on Halloween eve for family and friends.
I hope that you feel inspired to try some of these packaging ideas out for yourself. As always, all of these ideas can easily be modified to suit any holiday, party or wedding theme.

I will be demonstrating these projects and many more at the Creative Bag Halloween workshop next week on Thursday October 4, 2012. Everyone will be making one of these projects too so if you are interested in joining us just let me know because we still have a little space left.