Showing posts with label Valentine. Show all posts

Got Valentine cookies? We've got cookie packaging!

Saturday, 4 February 2017


cookie packaging | creativebag.com

Valentine's Day is just around the corner and we have seen some amazing holiday themed cookies popping on Instagram by so many of our customers. If you are packaging up cookies to sell, for gift giving, or to use as party favours, we've got lots of cookie packaging options.

cookie packaging | creativebag.com

Our bags and boxes come in a number of different sizes and colours and you can find all of the details on our website

If you are ordering cookies to use as favours for a party, we suggest that you talk to your cookie baker about what kind of favour packaging you want to use.

cookie packaging | creativebag.com

Clear bags and boxes are one of our most popular ways to package cookies.
Here's some of our most popular clear packaging options:

cookie packaging | creativebag.com

If you are packaging cookies as favours, you may not want clear packaging so be sure to check out our selection of paper and fabric bags. Our paper notion bags come in a variety of different colours, patterns and sizes. Fabric bags are available in cotton, linen, burlap/jute, muslin, lace and organza. Many of these bags are not food safe so you will want to place your cookies inside of a clear food safe bag first.

cookie packaging | creativebag.com

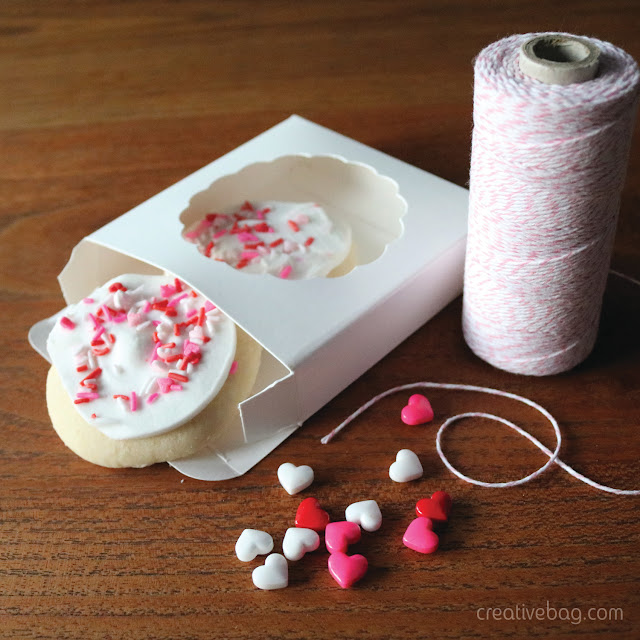
Our scallop window bakery box is a great option for cookies. At 4" x 4" x 2.5", it fits most cookies and it's available in white and kraft. Dress up these boxes with ribbon or baker's twine to make these your own.

Want to spend an afternoon with one of our favourite local bloggers? Melissa DiRenzo the creative genius behind The Sweet Escape is hosting a DIY Valentine watercolour cookie workshop in her studio on Saturday February 11th, 2017. Melissa is going to show you how she "paints" her beautiful watercolour inspired cookies and she will inspire you to package them up for gift giving using our packaging products.

valentine cookie workshop with Melissa DiRenzo from The Sweet Escape

 Find out more about Melissa's Valentine Watercolour Cookies Workshop here!


sweet packaging ideas for the ones you love

Monday, 26 January 2015

bakery packaging for valentine's day | Creative Bag

Today I'm going to share a couple of ideas for packaging baked goods for Valentine's day. 

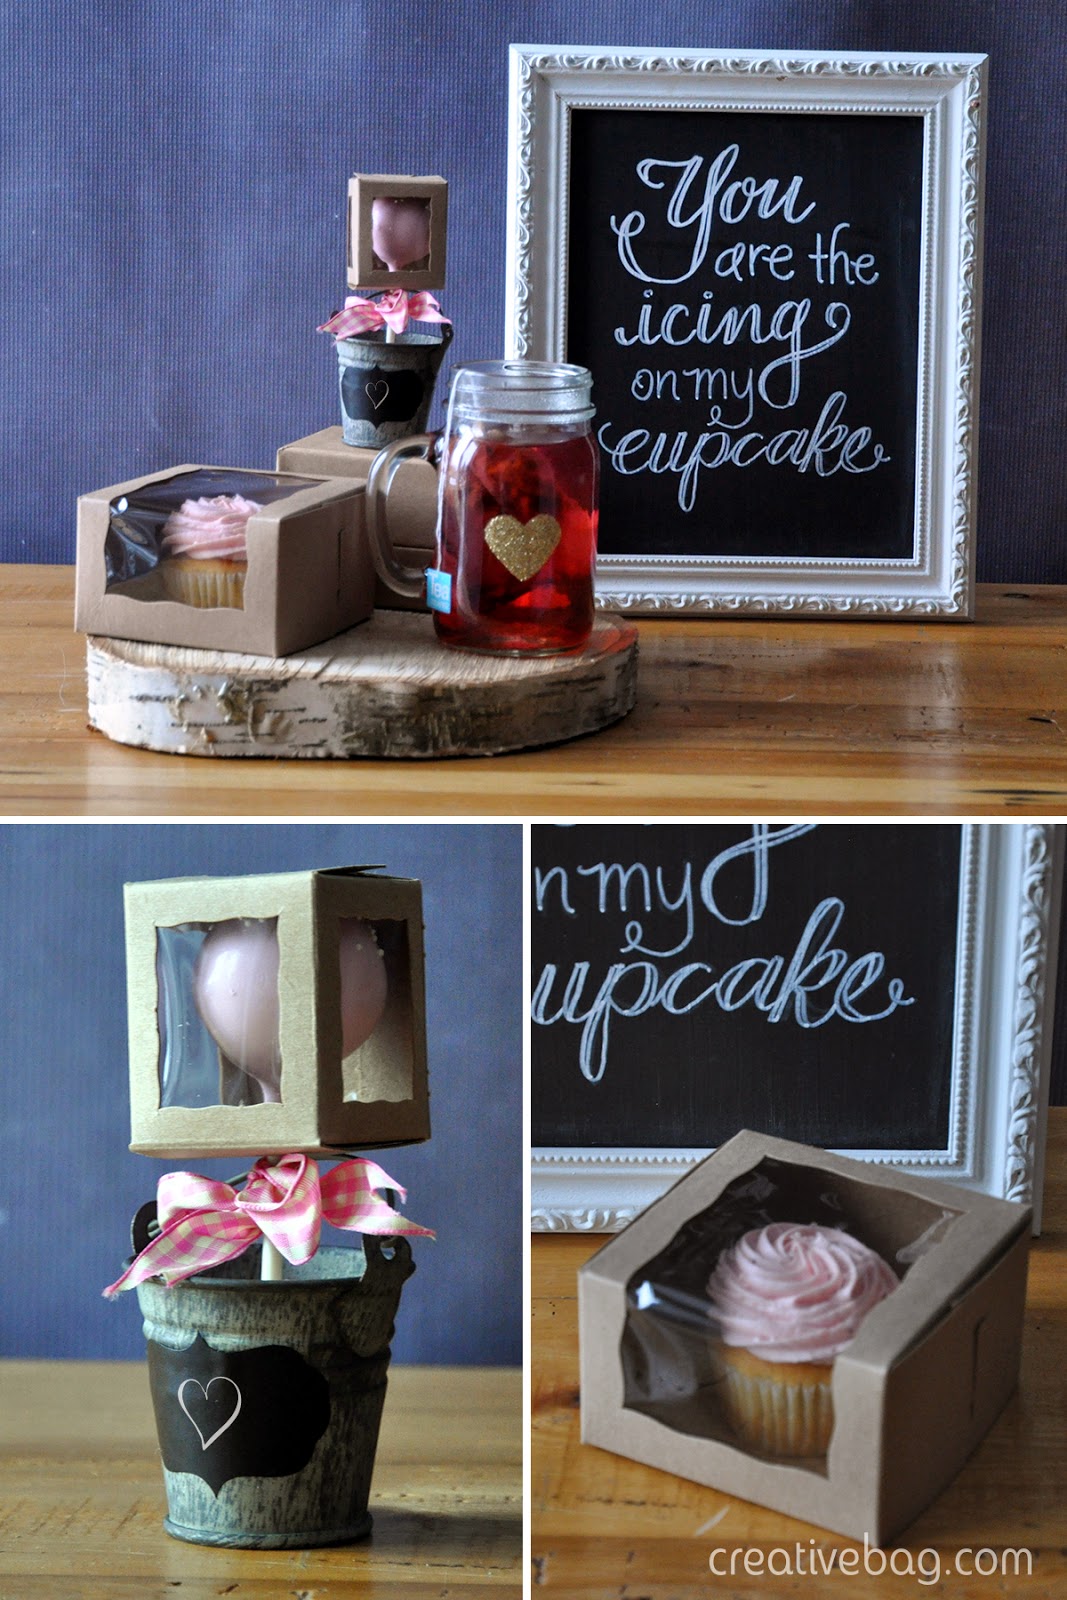
We think that you will love our new single cake pop boxes and small bakery window boxes. The scalloped edges are adorable and the clear windows allow you to show off the yummy treats inside.These boxes are available in both kraft and white.


diy for valentine's day - add glitter hearts to mason jar mugs ... dishwasher safe after 28 days | Creative Bag

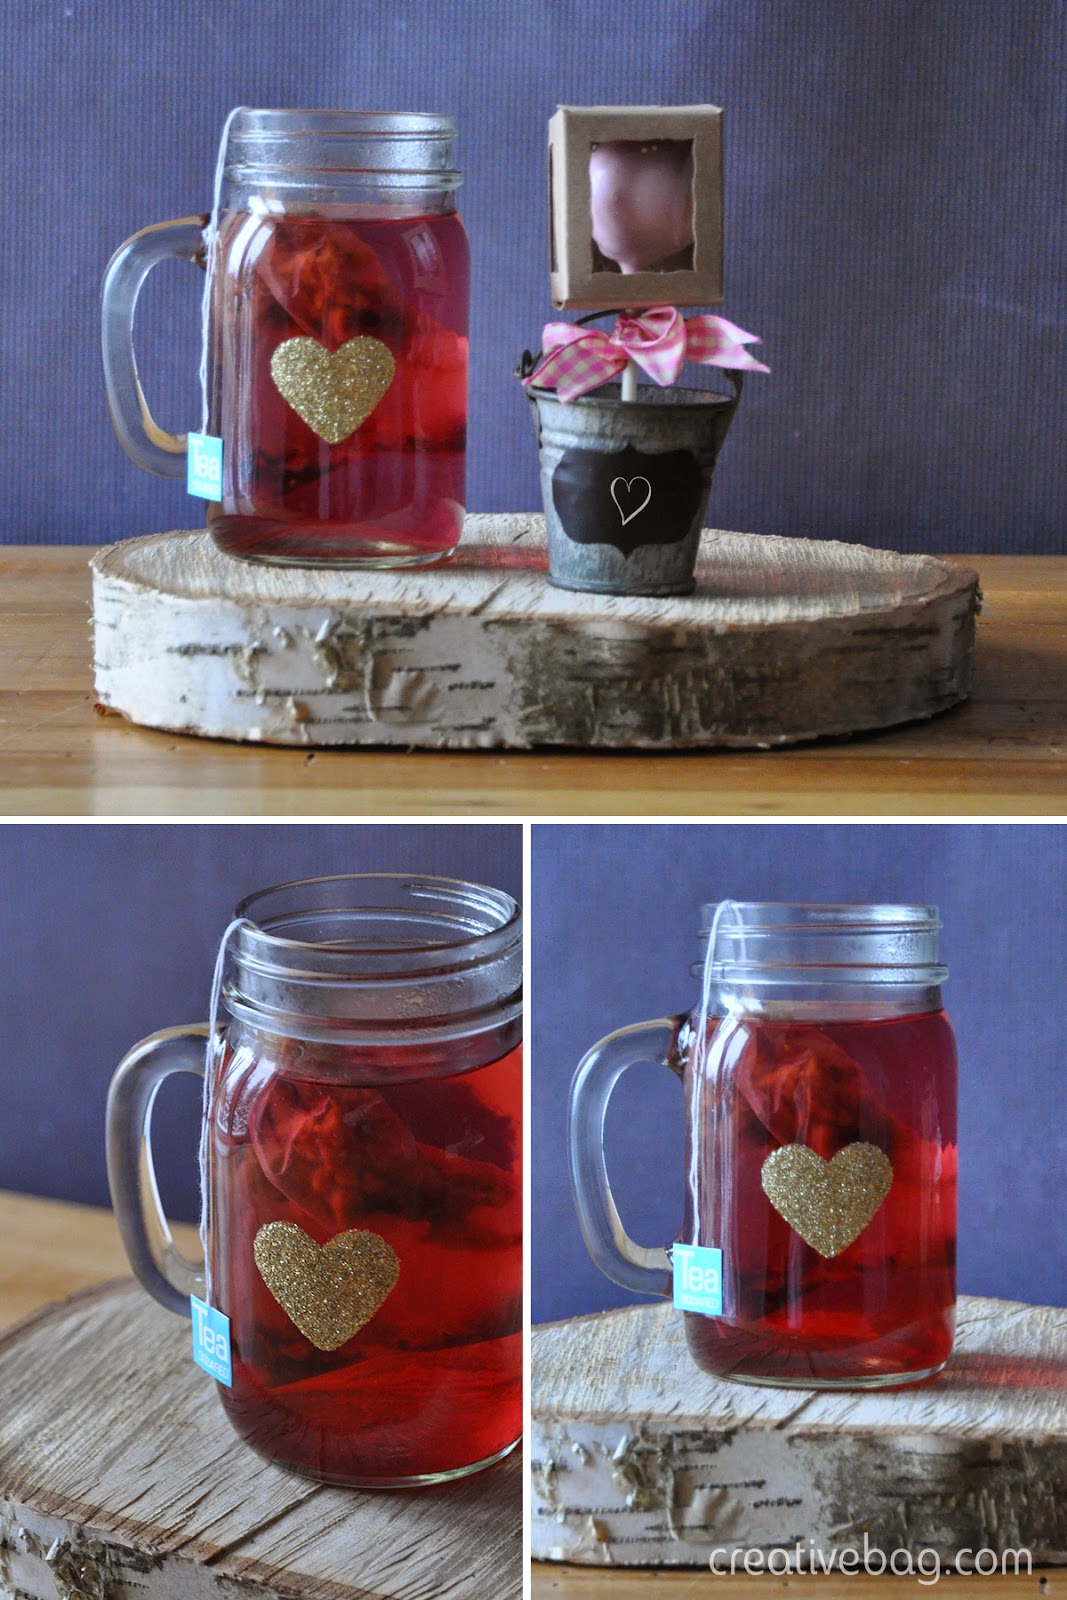
Here's a little diy inspiration using our mason jar mugs ... add a gold glitter heart! These are adorable for Valentine's Day but they would also make sweet favors for a wedding, shower or party.

You can find my complete instructions for adding glitter to glass so that it is dishwasher safe in this post

Note: You will need 28 days for the glitter to cure before it is dishwasher safe, so if you make these for a Valentine's Day gift add a note card with a date stamp to let your loved ones know when they can be used.


love is in the air

Friday, 2 January 2015

new wedding products for 2015 | creativebagwedding.com

This month at Creative Bag, we are all about "love". Valentine's Day is just around the corner and our stores have been making space for valentine and wedding themed products.

Many of the new wedding products we will be bringing into the stores for 2015 can be seen and purchased online now. Save time and money by shopping online at Creative Bag Wedding and we'll take 10% off your order when you use promo code CBW10 at the checkout.

If you or someone you know got engaged during the holidays we'd love to see you at the Total Wedding Show. We are at booth #520 from January 16th to 18th, 2015. The show is at the International Centre and parking is free

Valentine packaging | Creative Bag

Valentine packaging supplies are in stores and online right now. From candy and food packaging to boxes, bags and ribbons, we've got you covered. 

Valentine packaging products | Creative Bag

And you're going to love this ... our free shipping offer for online orders over $100 in Ontario and Quebec continues for a limited time! Click here for more information on this special offer.


Put a little {glitter} heart into your valentine packaging

Wednesday, 29 January 2014

great inspiration and tutorial using Martha Stewart decoupage and glitter on fabric favor bags and more | creativebag.com

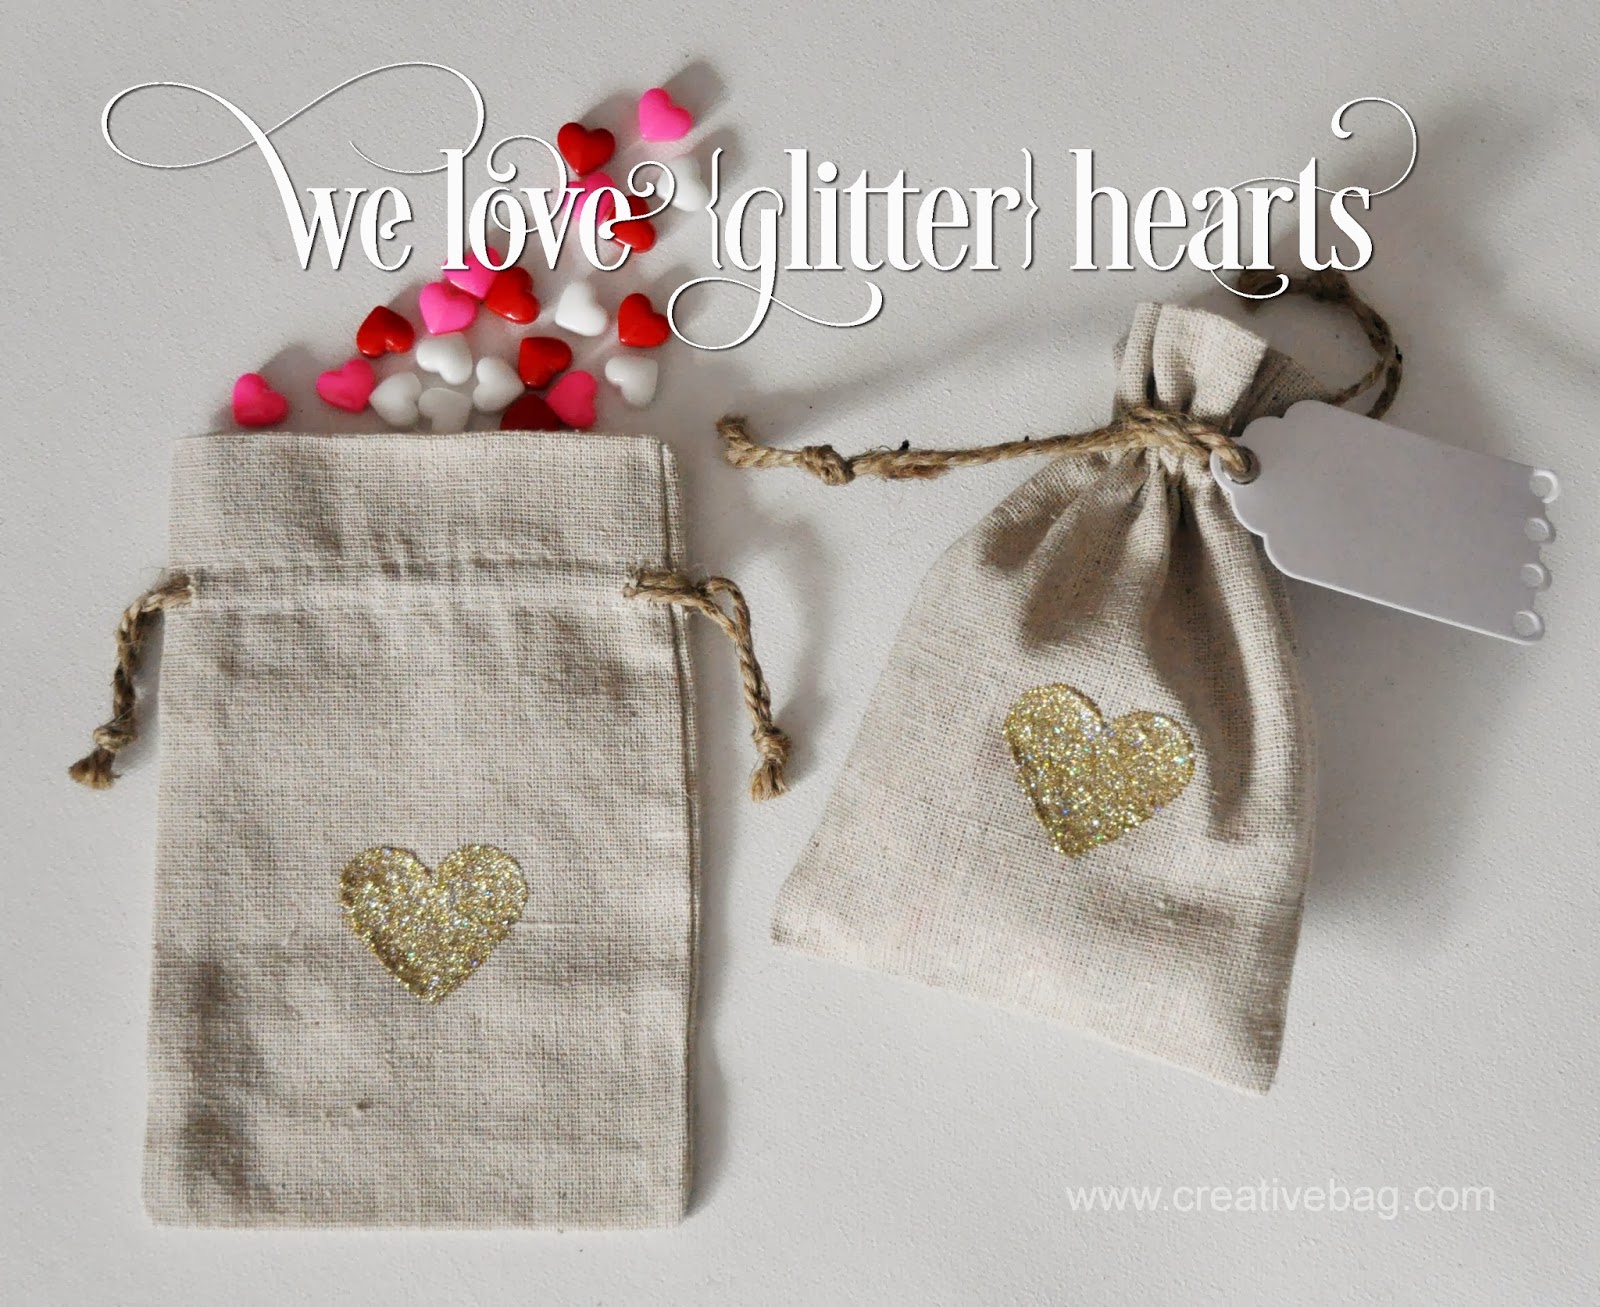
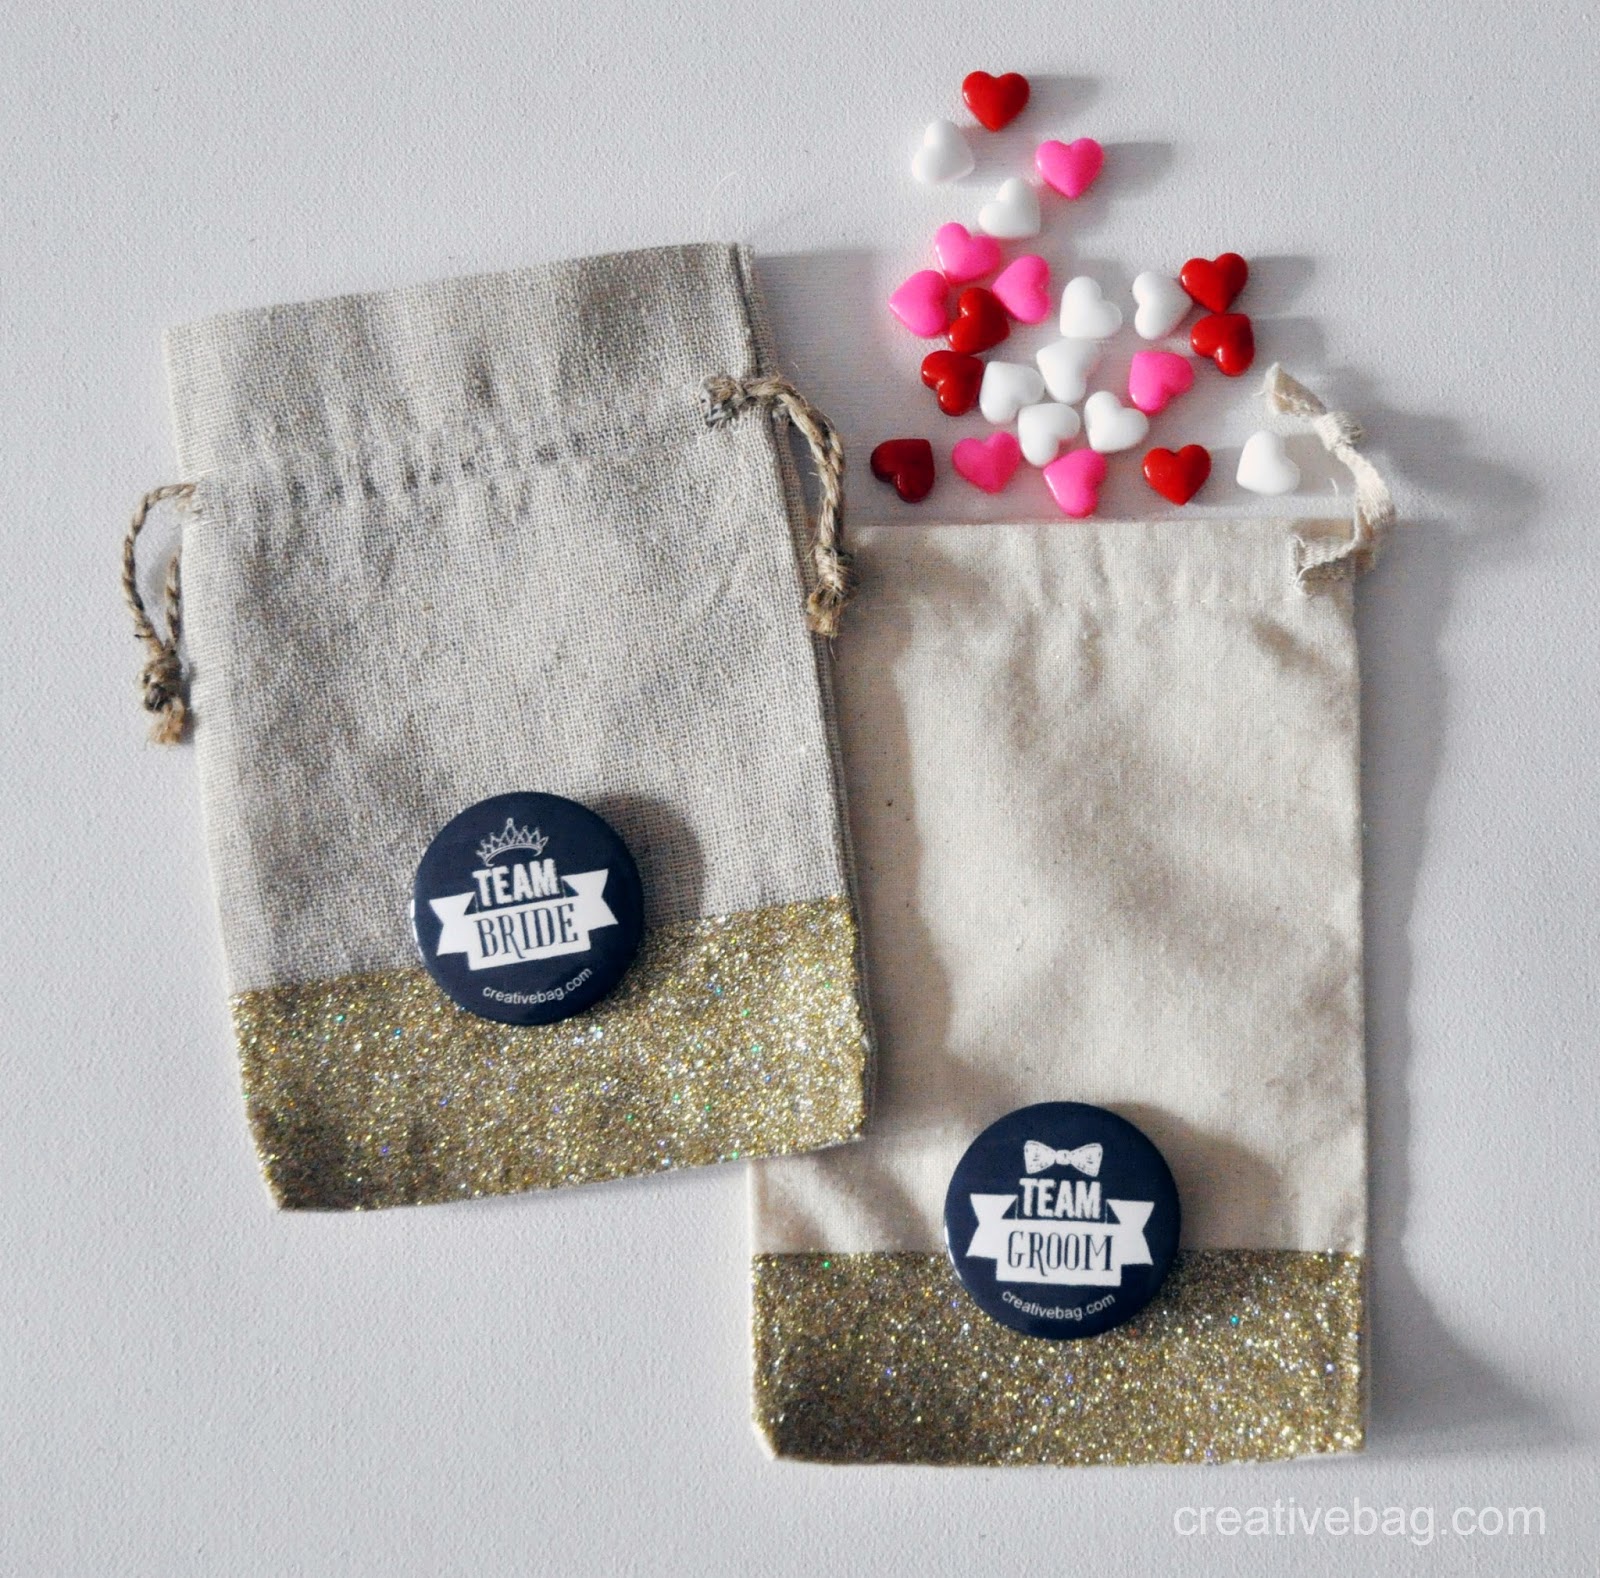
If you have been following our blog for a while, you know that I like to use our fabric bags for favor and holiday packaging. I've been playing around with the concept of adding a little sparkle to our linen and cotton bags for Valentine's Day and came up with a few ideas to share with you.  

These adorable glitter hearts are a simple way to dress up fabric bags. Make the hearts as big as you want ... use one heart like I did or add a few to create a pattern.! Just add a gift tag and you are ready to go! If you are going to use these bags for candy or food products, I recommend using a smaller sized clear candy bag to contain the food before inserting it inside of the fabric bag of your choice. 

great inspiration and tutorial using Martha Stewart decoupage and glitter on fabric favor bags and more | creativebag.com

I added a single band of glitter to the bottom of the linen and cotton bags pictured above. We were giving out these cute little buttons at the Total Wedding Show a few weeks ago and I thought that something like this would be cute on the bags with the glitter. You could use vintage buttons or brooches for a more vintage look!

great inspiration and tutorial using Martha Stewart decoupage and glitter on fabric favor bags and more | creativebag.com

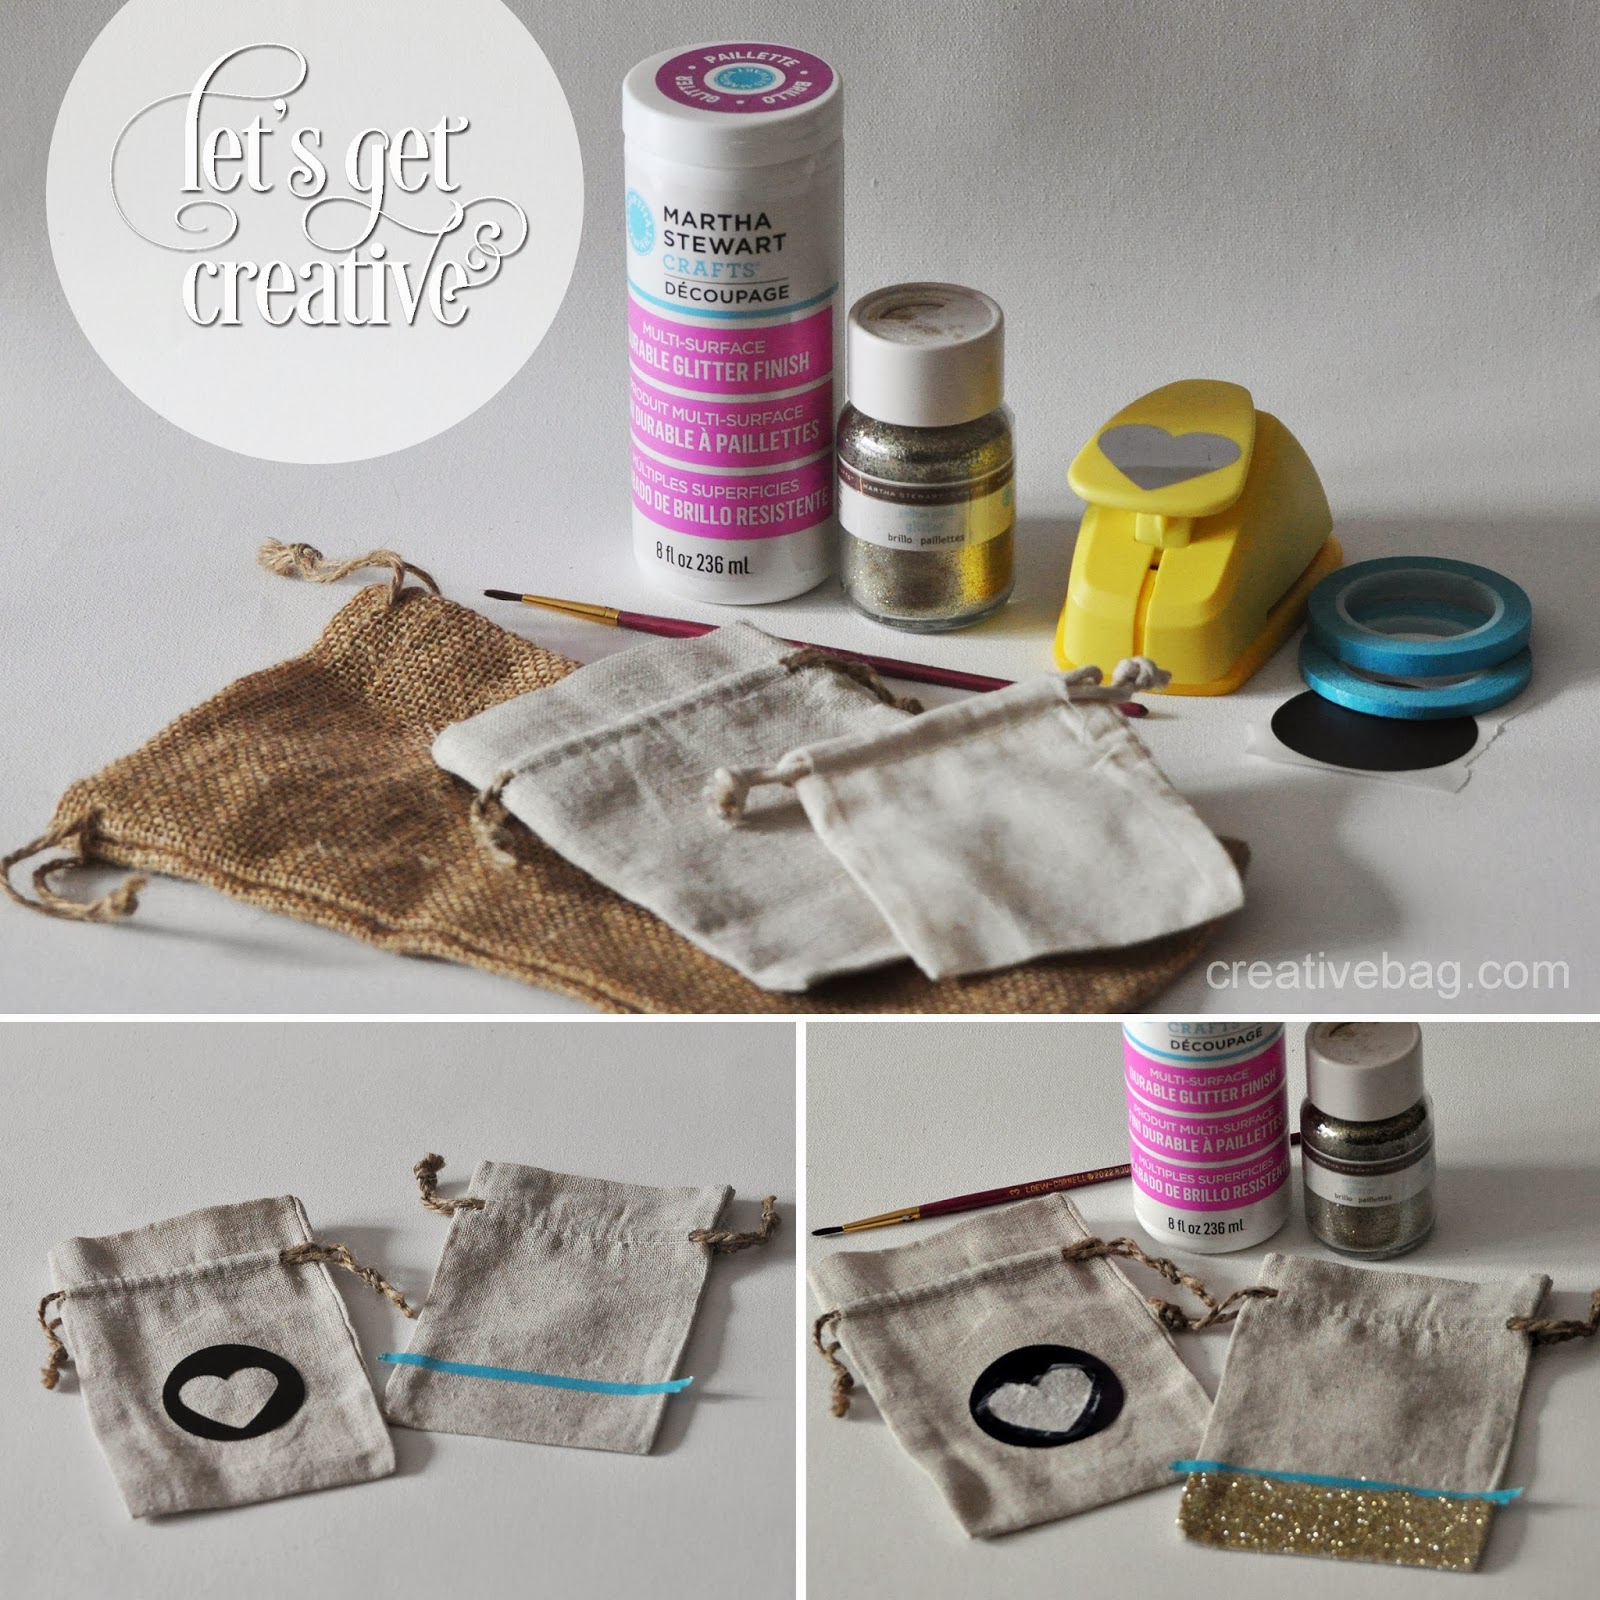
Here's how I added the glitter hearts and stripes to the bags: 
1. Gather your supplies: linen/cotton/burlap bags, Martha Stewart decoupage (multi-surface durable glitter finish), Martha Stewart glitter (in colour of your choice), paint brush, painter's tape, large sticker and paper punch (optional).
2. Tape off the area you want to add the glitter using painter's tape.To create a perfect heart, I used a heart shaped paper punch and cut the heart out of a large sticker. Make sure that your tape/sticker is tight to the fabric so that the decoupage does not bleed underneath.
3. Using a paint brush, add decoupage to area that you want to add glitter. While the decoupage is still wet, sprinkle glitter to cover area completely.
4. Immediately remove the tape/sticker and allow to dry for a few hours.
5. When completely dry, add a top coat of decoupage over the glitter to stop the glitter from flaking off. 

great inspiration and tutorial using Martha Stewart decoupage and glitter on fabric favor bags and more | creativebag.com

The great thing about this technique is that you can do it on glassware as well. I used the heart sticker that I created when making my favor bag to create the heart shape on the glass vase. The only difference with using the Martha Stewart decoupage on glass is that you want add 2 or 3 coats of decoupage over the glitter so that the glassware can be dishwasher safe (after "curing" for 28 days). These glass containers would be nice for flowers, candles or as a candy container for a sweet table!

great inspiration and tutorial using Martha Stewart decoupage and glitter on fabric favor bags and more | creativebag.com

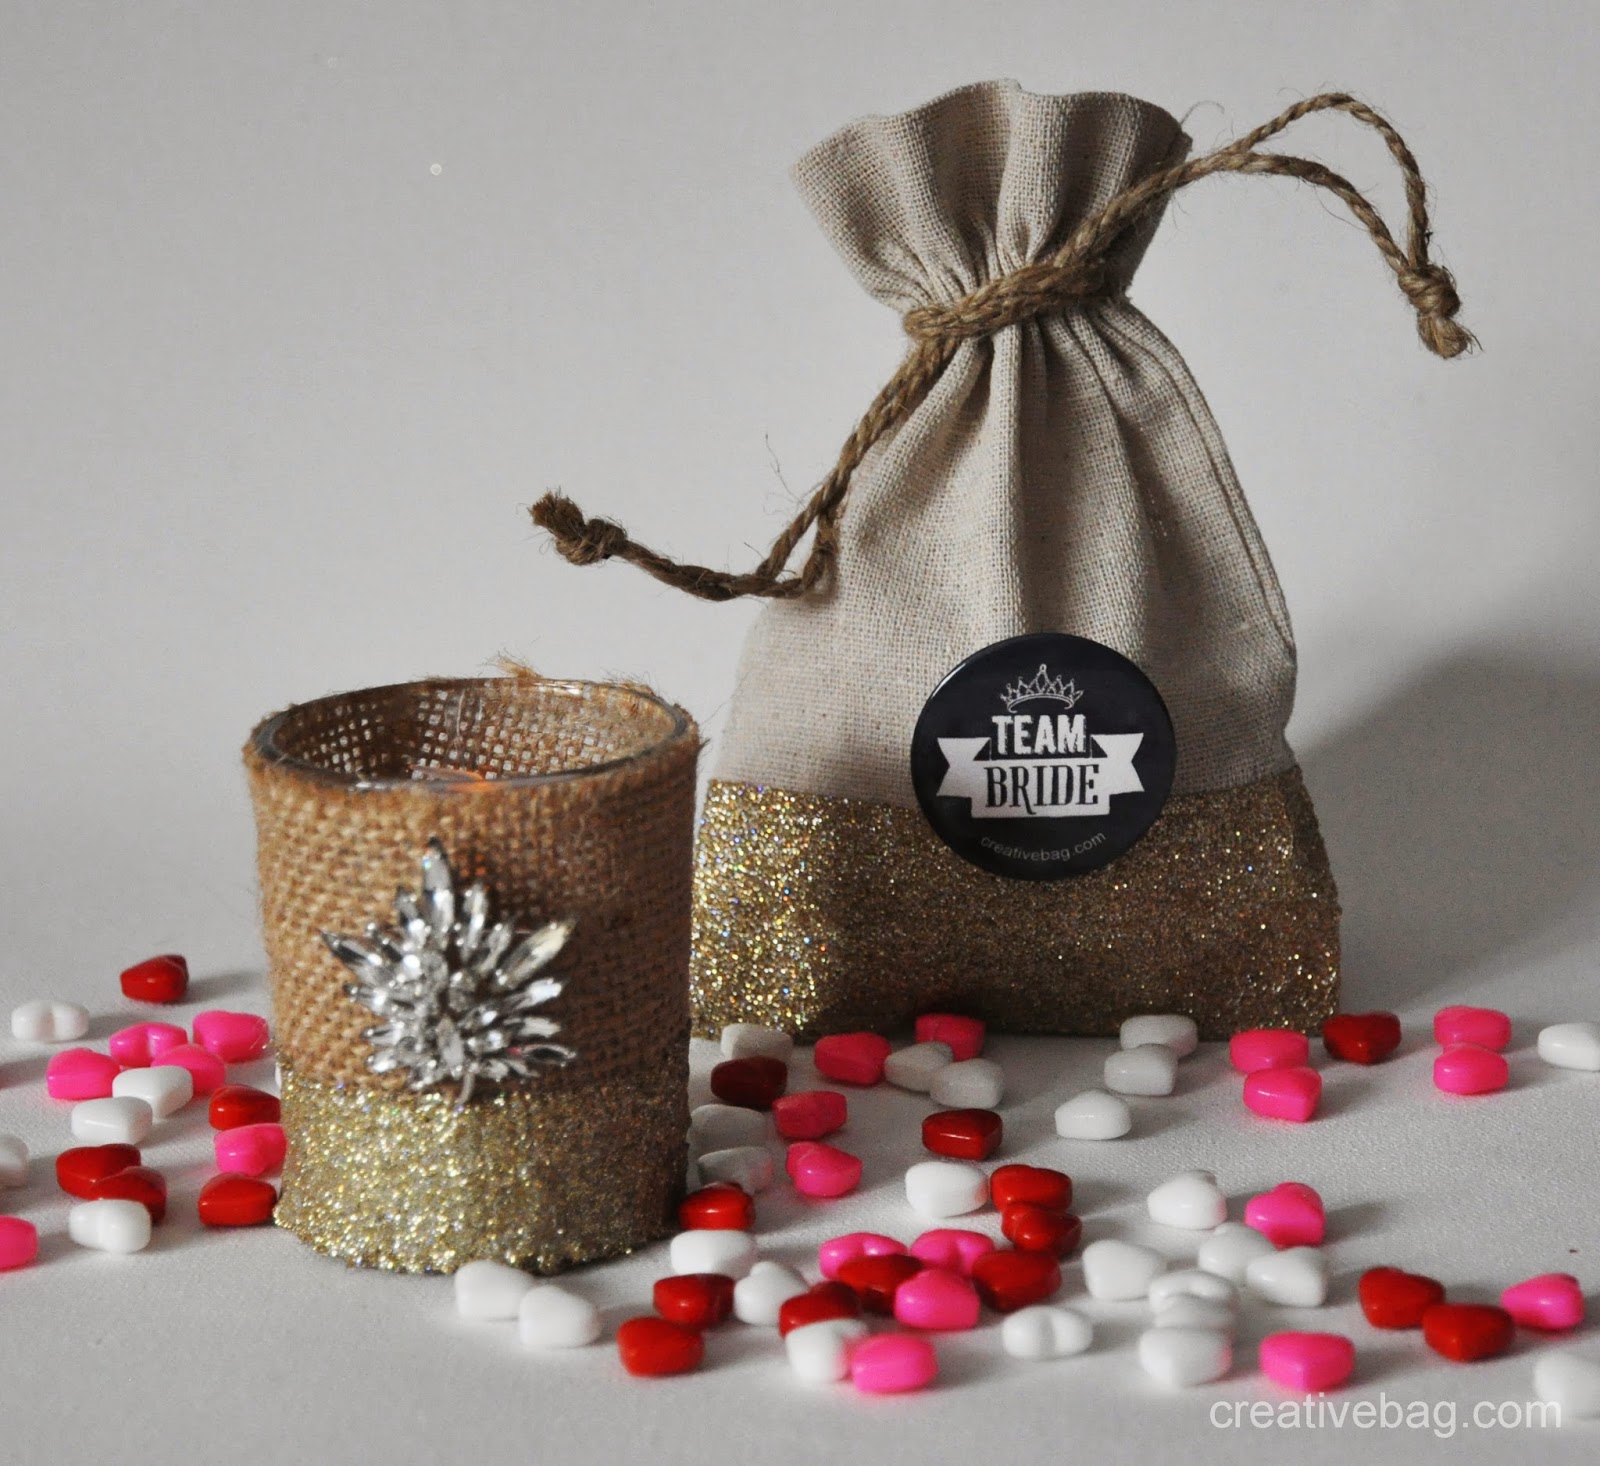
You can add glitter to burlap as I did with this David Tutera burlap candle holder. I added a vintage brooch to mine to dress up the candle holder. We have one brooch available on line right now and a few more vintage style brooches will be arriving in time for spring/summer weddings. I'll keep posted when they are available!

great inspiration and tutorial using Martha Stewart decoupage and glitter on fabric favor bags and more | creativebag.com

Here's one more look at my glittered linen favor bags. I attached my vintage brooch to it - I think that this would be lovely as a favor for a bridal shower or wedding. 


Valentine inspiration - marshmallow pop treats and gift cards using my free downloads

Wednesday, 8 February 2012

Valentine's day is next week and I thought I'd share a couple of more ideas if you are planning a Valentine celebration.

I've pinned a few of these marshmallow pop treats on my pinterest boards and I thought that it would be cool to try to make these with my daughters. They are so easy to make and you can use different colours of marshmallows, chocolate and sprinkle to customize these for any occasion or party theme.

To display these sweet treats on a lollipop stick I simply placed them in one of our glass cube vases that I filled with candy. {yum}

So here's how I made our Valentine marshmallow pop treats:
You will need some lollipop sticks, marshmallows, chocolate candy waffers and sprinkles (we used mini hearts in red, pink and white).
First you will need to insert the lollipop sticks into the marshmallows and set aside.
Melt the chocolate candy waffers as per the directions on the bag.
Carefully dip the marshmallow tops into the melted chocolate so that you cover about 1/2 of the marshmallow.
Add the decorative sprinkles to the chocolate candy coating while it is still warm.

Tip for the candy display in the glass vase: If you are making a lot of these marshmallow treats and you are using a large glass vase for presentation purposes I suggest that you bury a piece of styrofoam wrapped in wax paper into the vase and completely cover it with candies. This will save you from having to purchase a lot of candy and the styrofoam is an excellent material to keep the lollipop sticks in place.

Here's another cute idea for Valentine's day that was created by one of our customers!
Ivanka Lentle posted this project on her blog at ivankascardstudio.blogspot.com. Ivanka used my valentine flag download as an element on the gift tag of a Valentine themed loot bag. The clear candy bags are from our candy bag collection.

And here's a Valentine card that I created using some scrap elements from previous projects ...

I used one of my {free download} vintage labels from here and here, my {free download} mini chocolate wrappers from here, and scraps of scrapbooking paper (red dot print), ribbondiamond wrap from here and crystal stickers.  

I used a heart shaped punch to cut out my mini chocolate wrapper and I made the heart shiny by adding a layer of Inkssentials Glossy Accents and some clear glitter. All elements were attached to the card using two sided tape. The red machine stitching was added for a fun and unexpected detail ... I have been machine sewing on my scrapbooking and card making projects for years so it is part of my personal style.

Have you used any of our products and/or my downloads in one of your projects? Have you used our products at a party, wedding, special event? If so, I'd like to hear from you. Leave me a comment on this post with links to your blog or website. You can also email me your pictures! I would love to feature more of our talented customer's work on our blog!

{mini} Chocolate Bar Wrapper download just in time for Valentine's day!

Friday, 3 February 2012


Here's one of my favourite Valentine projects because it involves one of my favourite "food groups" - chocolate! I started designing these mini chocolate bar wrappers a number of years ago for my daughters to give as a Valentine treat to their friends at school. This year I have designed one for you and I've added a really neat way to package these little sweet treats using our cookie box with round scallop window.

You can download the art to my mini chocolate wrapper here. This download is for personal use only. No commerical use please.

To use the mini chocolate wrappers you will want to print my art on your colour ink jet or laser printer using regular white text paper. There are 12 wrappers on a page and you will want to cut each of the wrappers out using a paper cutter if you have one or with scissors.
I purchase mini Hersey's chocolate bars in bulk at the bulk food stores.
1. There is a space on the wrapper to personalize who they are from. Tip: Write on the wrappers before you attach them to the candy bars.
2. You will need two pieces of two sided tape for each wrapper. Attach the two sided tape to the wrapper as shown ... one piece on each end.
3. Leave the original Hersey's wrapper on the chocolate bar. Our wrapper will be placed on top of the original wrapper. Work out your placement of the wrapper on the chocolate bar with the label positioned as shown. Fold the wrapper in place.
4. Using the two sided tape attach one end of the wrapper to the chocolate bar and
5. then attach the second end making sure that the wrapper is tightly set in place.

To package a handful of these mini chocolate bars I used the cookie box with round scalloped window, bakery twine and some colourful sizzle. I placed 8 candy bars in each cookie box and used the sizzle to position the candy bars so they could be seen through the window. The bakery twine was tied around the cookie box and finished with a simple bow.
Because you added a name on the chocolate bar wrapper ... it will be easy to know who the gift box is from! I think that these would make great party or wedding favors too.

And now I'd like to announce our lucky winner of the roll of diamond wrap ... Nadia (of Nadia's Beautiful Mess).

Congratulations Nadia!!
Nadia is expecting a baby girl soon and wrote that she would like the pink diamond wrap to use on a couple of projects that she is planning for the baby's nursery.

Thanks everyone for taking part in our first blog giveaway. I loved hearing your comments ... so many creative ideas. I'll be doing more giveaways and free downloads so please keep checking back or sign up to receive our blog posts by email so you don't miss out!


decorate paper straws and treat sticks with our {free} flags

Friday, 20 January 2012

I was so excited when I saw the new paper straws arrive in the Toronto store the other week. I have been pinning pictures of paper straws from weddings, parties and sweet tables, so I know that I am not the only one who loves them.

One of the great things about paper straws is that it is very easy to personalize them. So with that in mind, I designed a page of pink and red flags as a free download. The colours in the flags match my pink and red vintage label downloads and would be perfect for a Valentine themed party.

As always, this download is for personal use only. No commercial use is permitted.
The flags can be used on paper straws and treat sticks ... here you can see that I added them to cakepops and displayed them on our wooden market serving trays!


Here's a quick overview on how to attach these flags to straws and treat sticks.
Print the download on heavy weight paper on your colour printer.
1. Cut the flags out and fold each flag in half.
2. Add two sided tape to the back of 1/2 of the flag as shown.
3. Peel the backing off the tape. Position the flag on the straw or treat stick and press the flag together starting at the ends and working towards the (fold) straw/stick.

Personalized paper straws and treat sticks ... a simple and creative way to make your next event "your own".  I hope that you try this out! Let me know if you use my flags - I'd love to see them in use!

valentine treat bags

Sunday, 15 January 2012

Last week I posted about how to use the free download for my vintage labels  on glass containers and vases. Today I thought that I show you some examples of how I used the same vintage labels to decorate some of the large bitty bags.

The bitty bags could be used as a treat bag at a Valentine party but the concept would also work as loot bags for a birthday party or favors for a wedding.
I used the vintage labels on the larger sized bitty bags but I wanted to show you the smaller bitty bags too because they are the perfect size for mini chocolate bars and I've designed a mini chocolate bar wrapper that I will share with you later in the week.
(a) I used the vintage label with a manilla shipping tag, ribbon and a piece of glitter tape to decorate the first large bitty bag. I used a couple of pieces of two sided tape to keep the papers in place on the bag before I sewed the bag on my sewing machine. I used pink thread so that the stitching would stand out. I used this same sewing detail on all of the bags.
(b) I didn't use the vintage labels on either of the little bitty bags but I did sew the bags to seal them up after adding my mini chocolate bars. I used scraps of papers, a metal rimmed tag and rhinestone elements to decorate a tag for this bag and attached it to the bitty bag with a small clothepin decorated with divine twine. I created the word "love" on the tag by cutting letters out of an old book.
(c) This is the other smaller bitty bag that I created. I punched a single hole in the bag above the stitching so I could attach a metal rimmed tag to the bag with a piece of divine twine.
(d) And here's a close up of the last decorated bitty bag. I covered the words on the vintage tag with a piece of glitter tape and I added a fun little feather boa. Our mini feather boas have a peel and stick backing so they are easy to attach to just about anything. I can see this bag being used as a loot bag for little girl's party.

I'll be back later this week with another free download!