Showing posts with label recipe. Show all posts

S'more favor packaging inspiration and a new way to make these sweet treats using chocolate melts

Friday, 4 July 2014


diy s'more favor packaging by Lorrie Everitt | Creative Bag

Are you planning to use s'more favors for a wedding, party or event this summer? I've come up with a few more packaging ideas using our clear take out boxes and another way to create these yummy treats.

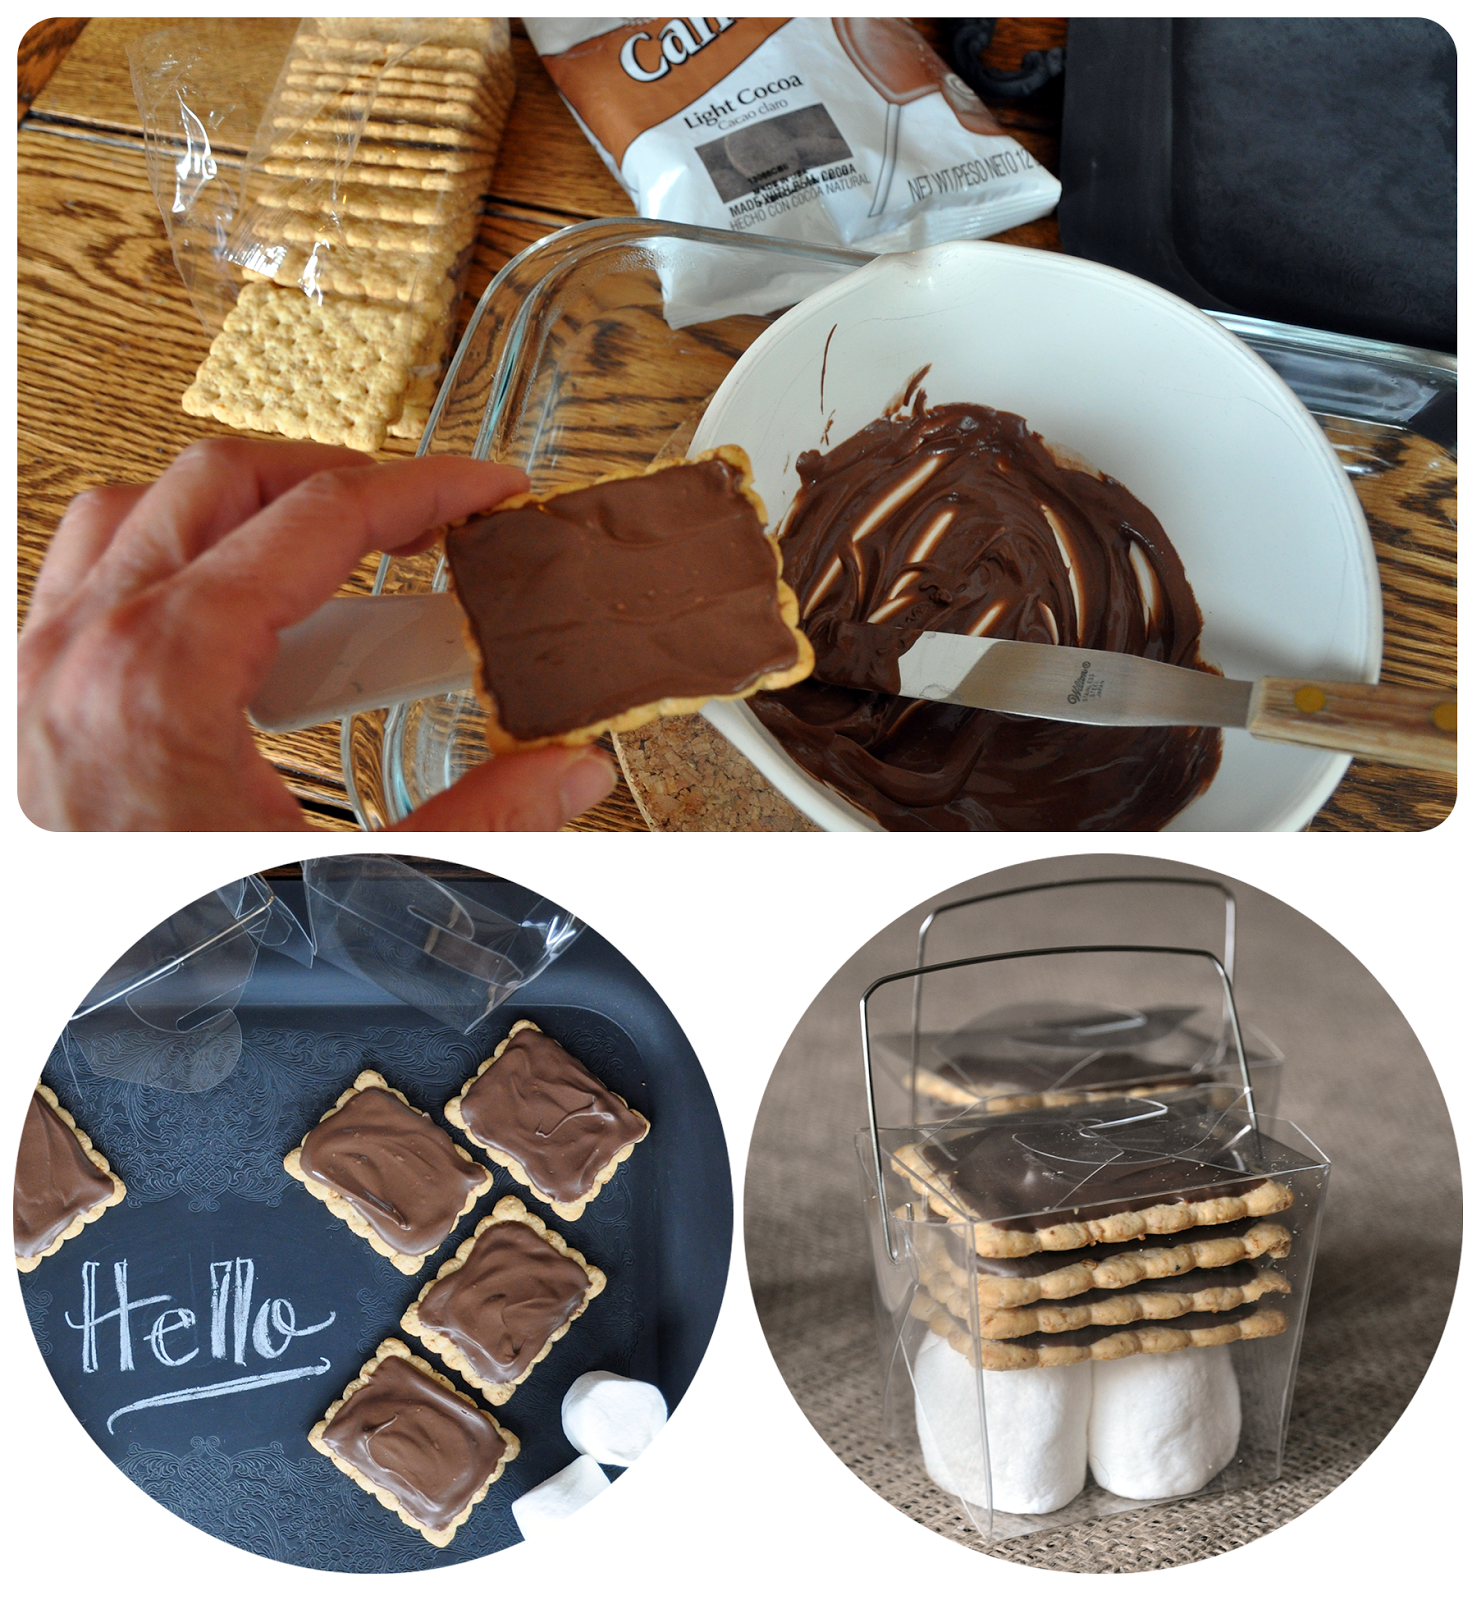
After arriving home with a bag full of melted chocolate bars (never leave chocolate bars in your purse in July), I came up with the idea of using chocolate melts instead of chocolate bars for a new twist on these fun favors. I was really happy with the results and I'm going to share how to make these with you today. 
diy s'more favors | Creative Bag

Here's what you need to make the s'mores: 
Wilton light cocoa chocolate flavoured candy melts, graham crackers, marshmallows.

Heat up candy melts in the microwave following the instructions on the package. Once the candy has melted spread it onto your graham crackers with an icing knife or frosting spatula. Allow the candy to harden completely before you start to stack the graham crackers in the take out boxes. 

I used Wilton light cocoa candy melts to create more "traditional looking" s'mores but you could certainly do this using any colour of candy melts for a fun twist to this classic treat. Want to make these even more unique? Try making homemade marshmallows! Just remember to cut them so they will fit the bottom of the take out boxes. You can find a great recipe here at Petite & Sweet.

To package the s' mores in our small clear 8oz take out boxes:
Place two regular size marshmallows in the bottom of each box followed by four candy coated graham crackers. 

diy s'more favors | Creative Bag

I thought I'd share how these look with the chocolate coated graham crackers (on the right) and  chocolate bar pieces (on the left). Either way the box looks full and the treats are yummy!

And now for my favourite part ... the packaging. We have so many great ribbons, chalkboard elements and embellishments that it was hard to stop at four but here's some ideas to get you started if you are thinking about making s'more favors. 

diy s'more favors | Creative Bag

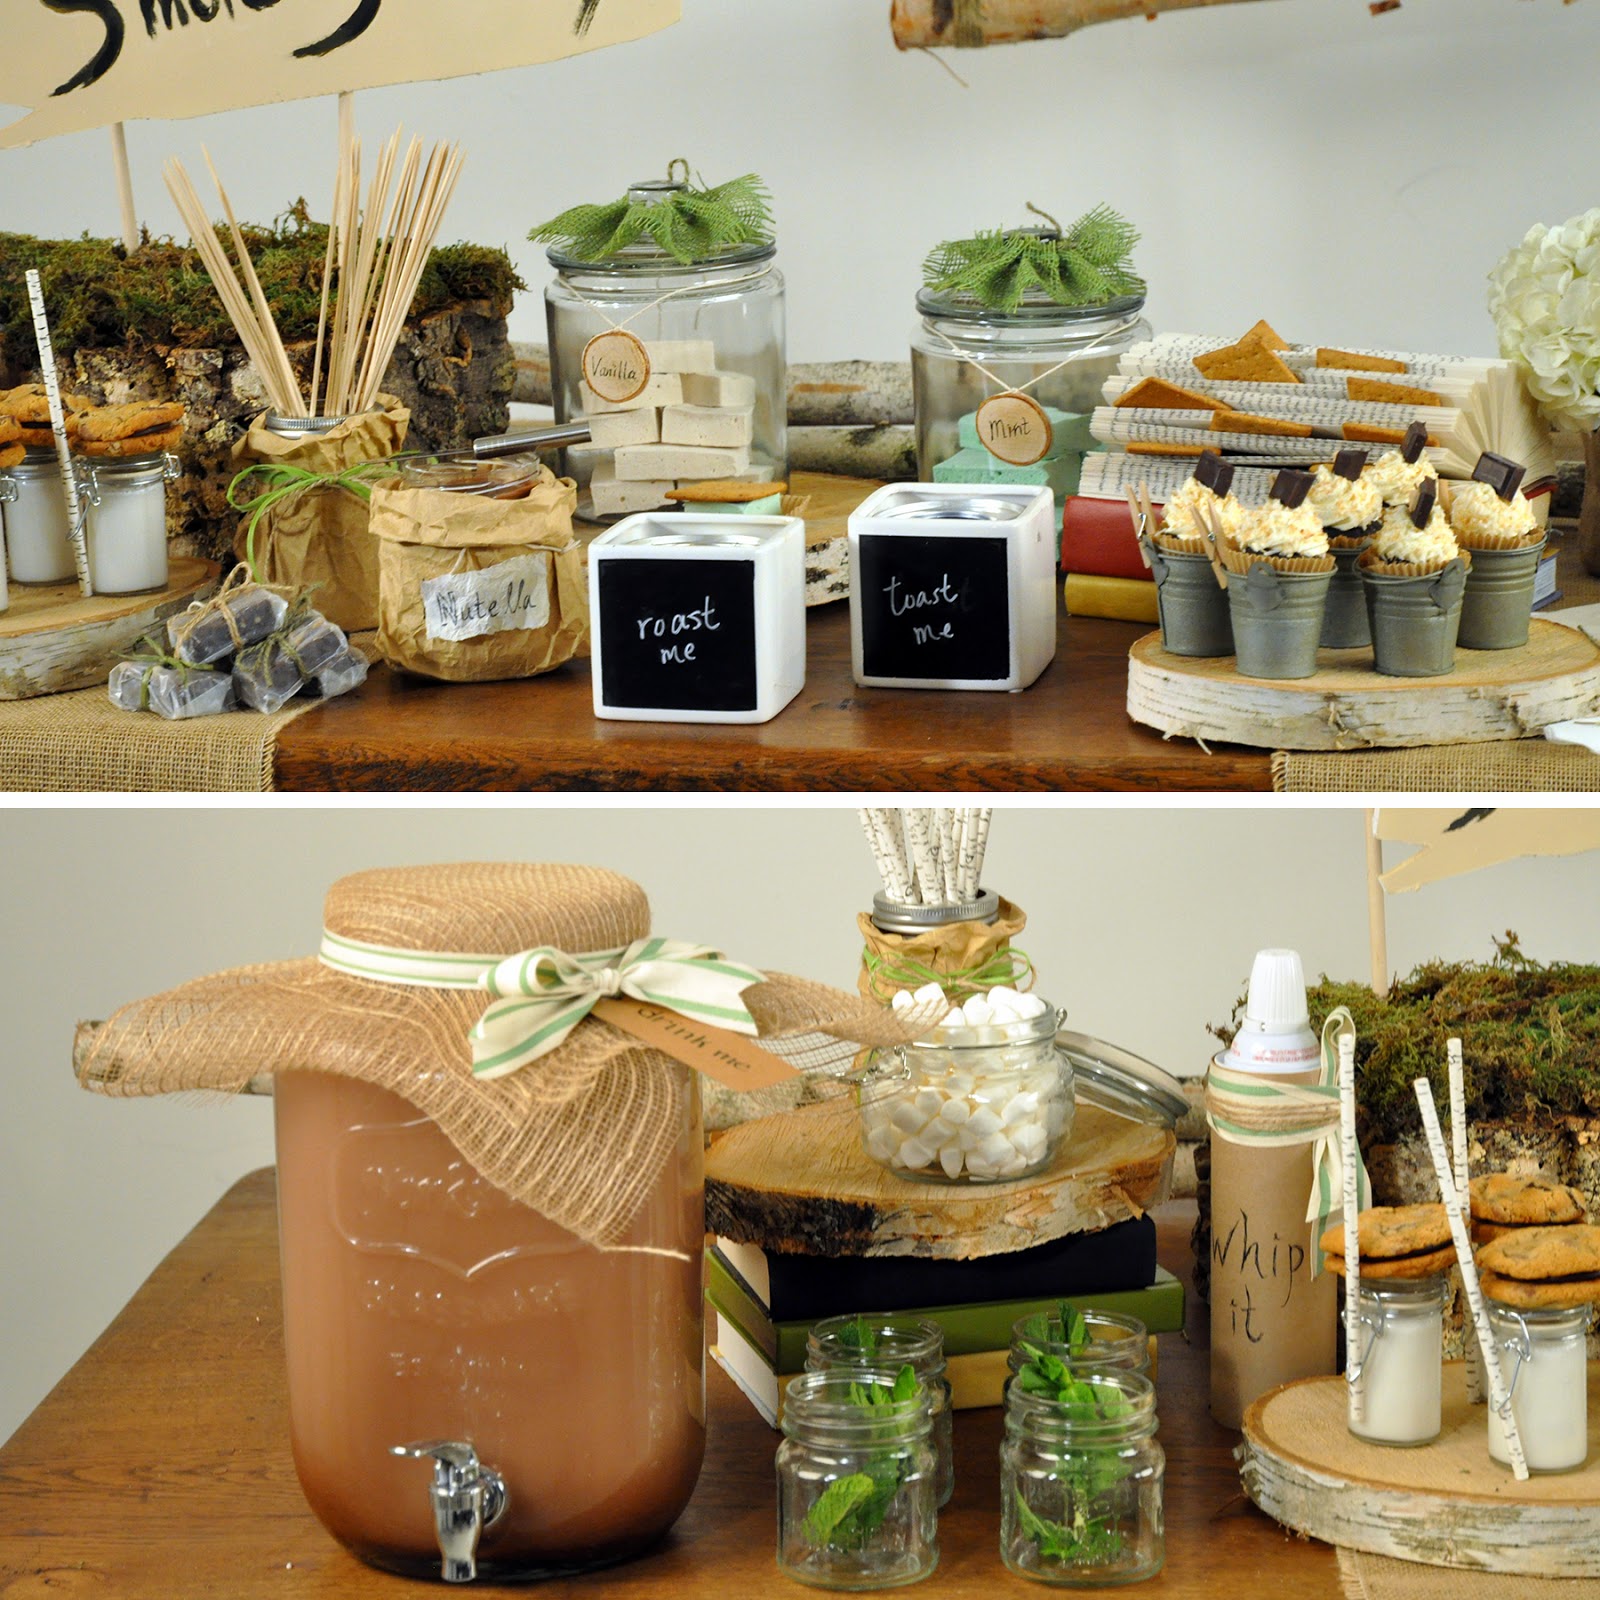
Burlap ribbon, lace ribbon and chalkboards with clothespin backs were used in this sample. Simply tie the lace ribbon over the burlap ribbon to keep it in place. Chalk markers are simple to use ... I created the extra details on this one by using two different sizes of chalk markers.

diy s'more favors | Creative Bag

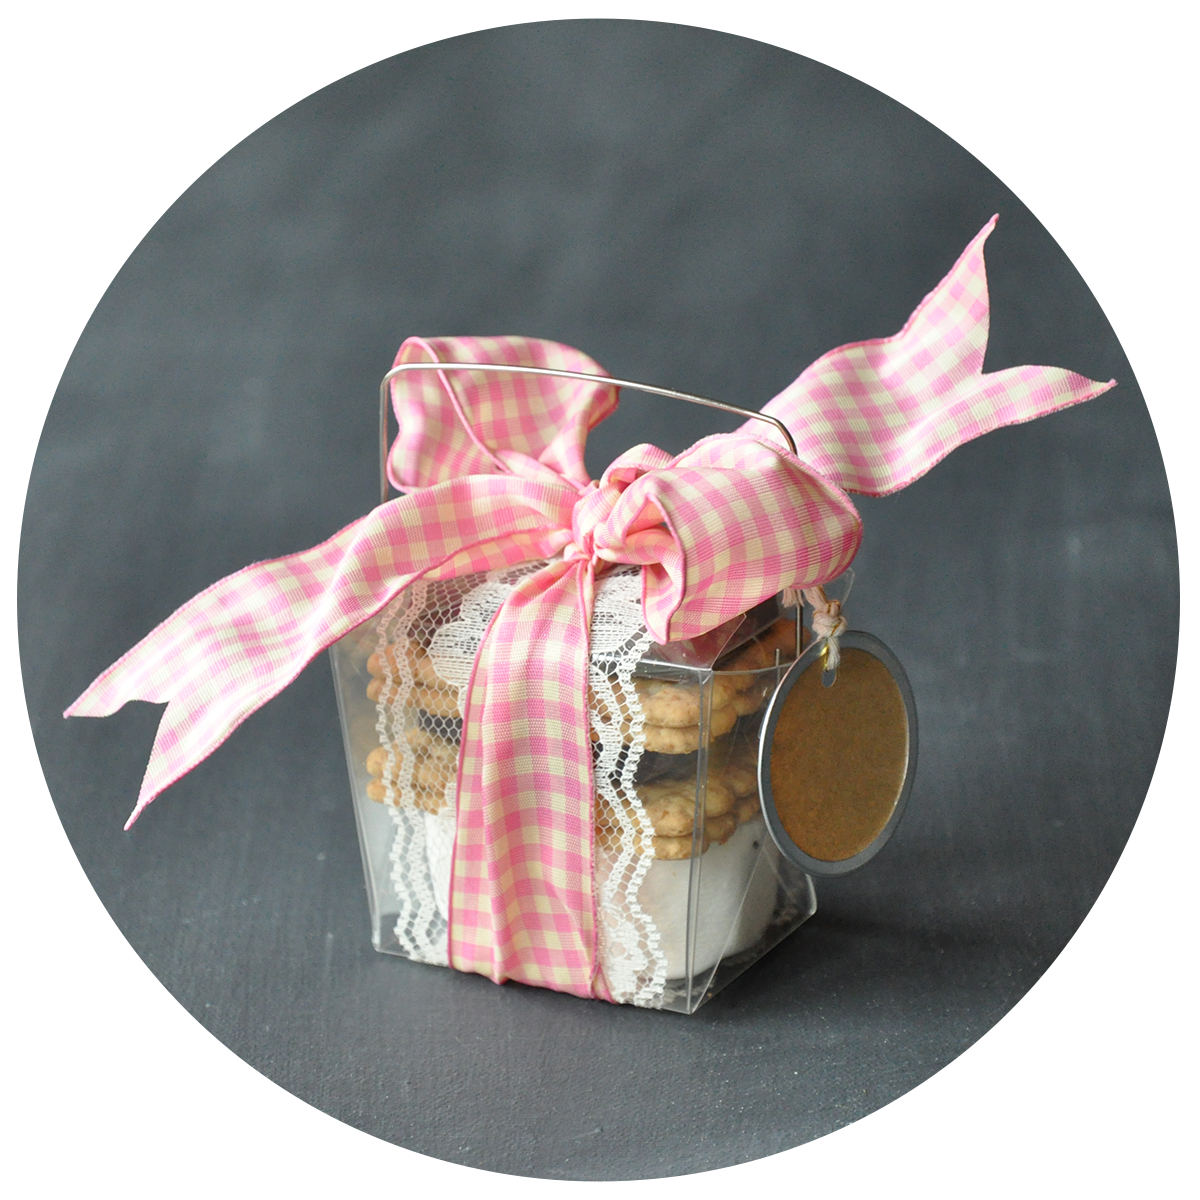
 Lace ribbon, wired ribbon in a pretty gingham print, metal rimmed tags and baker's twine were used to create this pretty packaging. The wired ribbon makes it easy to create bows that will keep their shape.

diy s'more favors | Creative Bag

 Striped ribbon and chalk labels make packaging these s'more favors a breeze. 
Tip: If you want to use chalk markers on the chalk labels write on the labels BEFORE you stick them on the box and WAIT for the chalk marker to dry completely.

diy s'more favors | Creative Bag

Organic cotton striped ribbon, linen flowers on twine and die cut feather gift tags. I added some glitter to the tip of the paper feather gift tag because every girl likes a little sparkle now and then. I showed you how to add glitter here.

diy s'more favors | Creative Bag

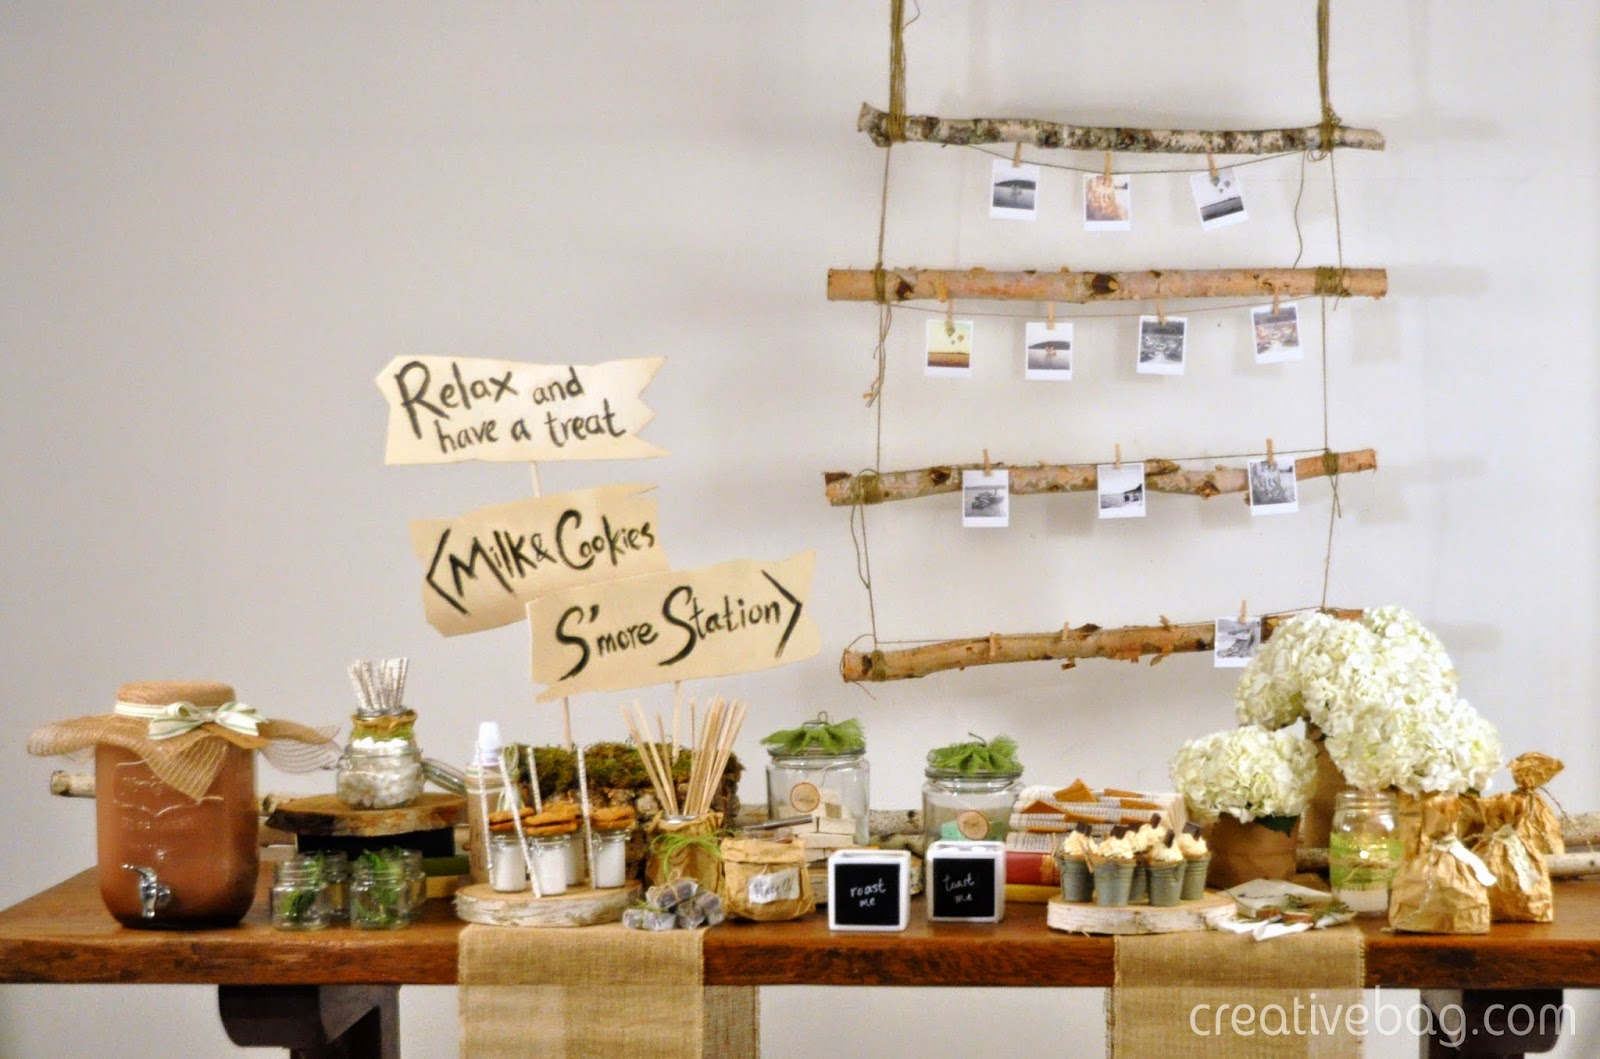
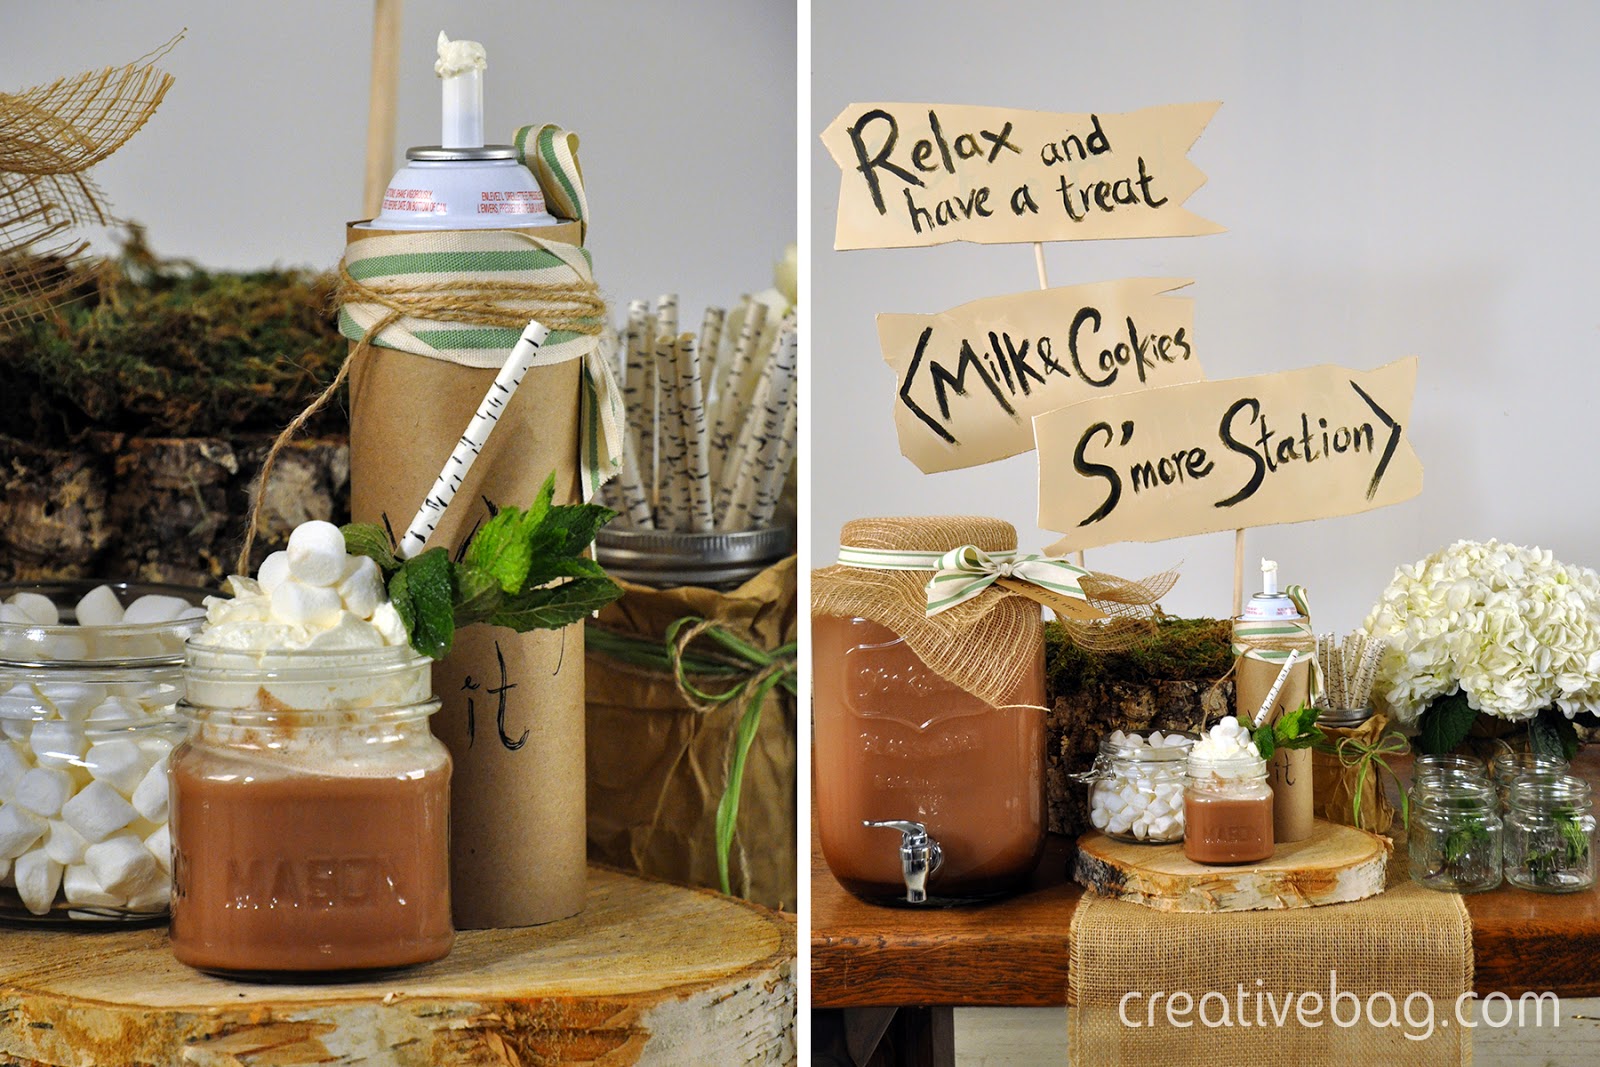
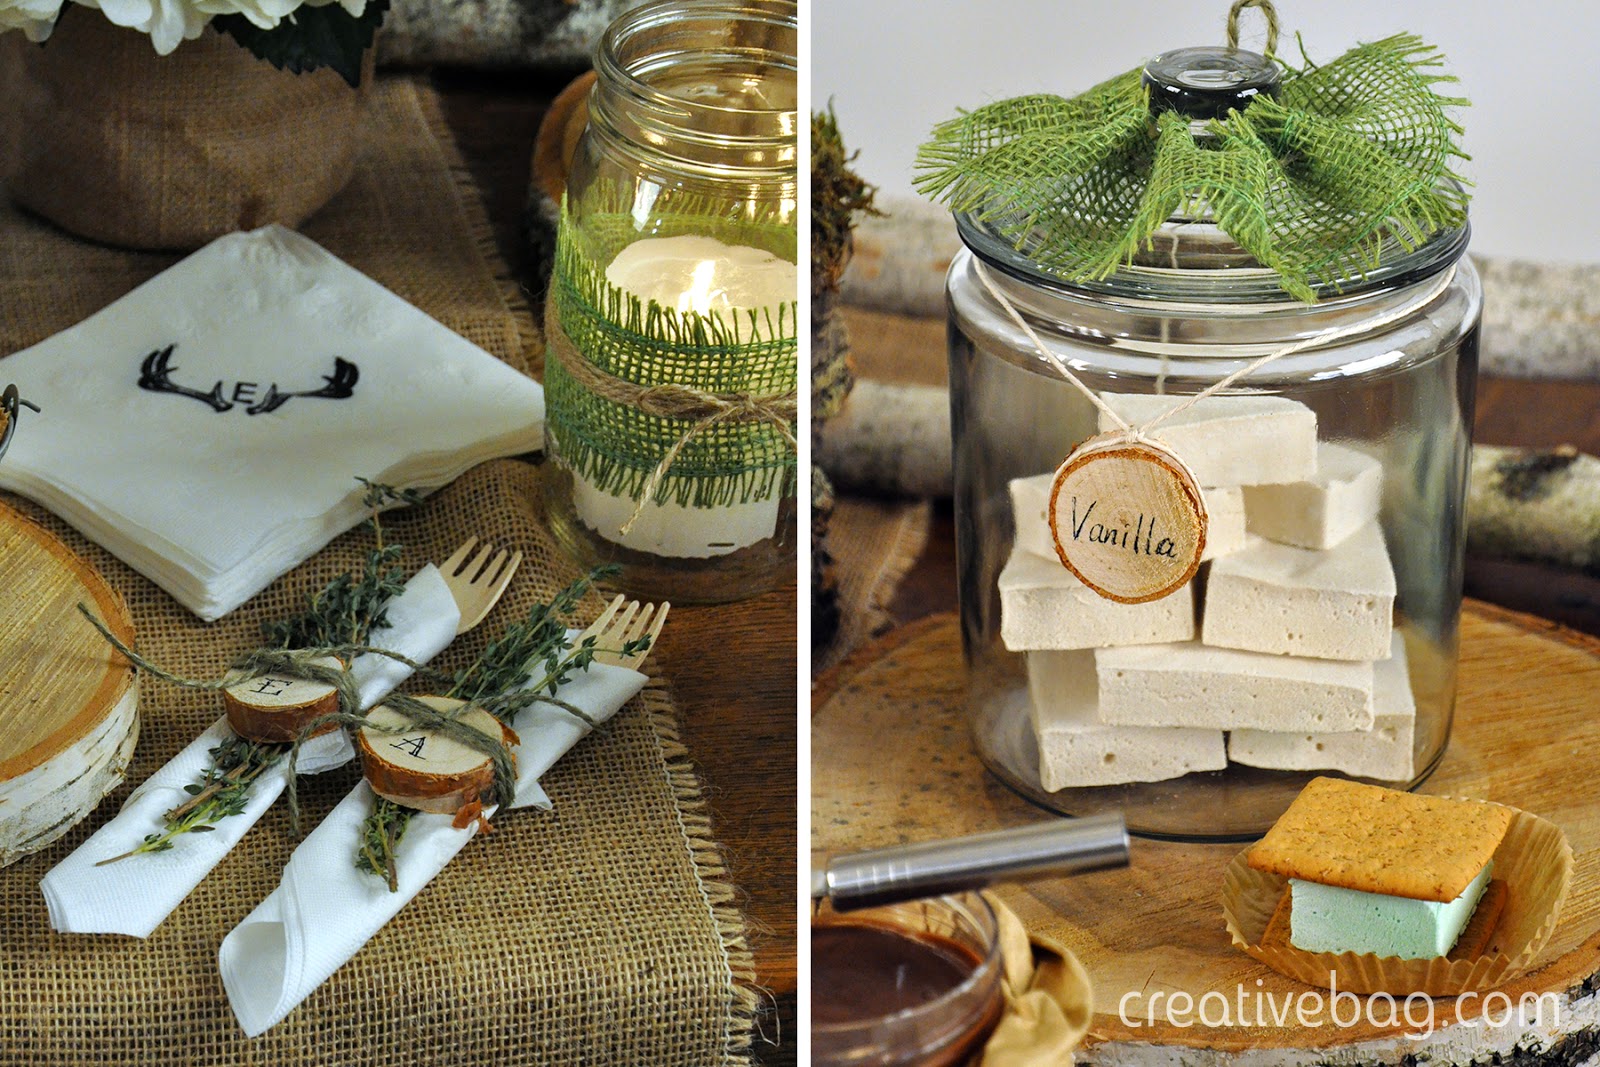
I think that this favor would be sweet for an party at the cottage this summer along with our birch covered vases (available in stores only) and chalkboard signs. What do you think?


Just for the guys ... sweet table inspiration on YouTube

Friday, 13 June 2014


just for the guys ... sweet table inspiration on YouTube

I've got another YouTube sweet table video to share with you today .... and this one is themed just for the guys! 

I know that it difficult to find party inspiration for the (older) boys so when Elle and her team at Petite and Sweet were telling me about the two different concepts that they were thinking about for the guy's sweet tables I thought that they would be awesome.

You are going to love the two signature drinks created by Petite and Sweet's Beverage Expert, Sabrina Greer.

The first concept reminded me of the tv show "Mad Men"
Mad Men sweet table inspiration | Creative Bag and Petite & Sweet
Learn how to make a signature drink, fold a napkin into a shirt and download some great printables to create fun photo booth props. Use our vintage disposable cameras for this retro set up. Our moustache flasks make a great gift or party favor.

If your man is a little more sporty ... the second half of the video has lot of incredible ideas that would work for a sport or tailgate themed party that will have them talking long after the event is over.
Tailgate party sweet table inspiration | Creative Bag and Petite & Sweet

This set up has another signature drink and so many clever food ideas. There are more free printables and lots of sporty diy projects. Paint our wood serving trays and add details to make them look like a football field, baseball diamond or putting green. Tie ribbon in your "team" colours to white boxes to create popcorn favors. A few pieces of white tape turn our mason jars mugs into "footballs". 

You can check out the YouTube video here ... 


Have a great Father's Day weekend.

Rustic Woodland Sweet Table on YouTube

Thursday, 15 May 2014

Rustic Outdoor Party on YouTube | Petite & Sweet and Creative Bag


Petite & Sweet has just released another YouTube video on their Petite and Sweet TV channel. As I have already told you before, we are working with Elle Daftarian on the YouTube video series. 

The rustic woodland theme has been one of my favourite themes for a wedding, party or special event for a very long time. It's comfortable and you can dress it up or dress it down with your details. I think that you will be inspired by all of the projects that Elle and her team created for this video.

Rustic Outdoor Party ideas | Petite & Sweet | Creative Bag

Rustic Outdoor Party ideas | Petite & Sweet | Creative Bag

Rustic Outdoor Party ideas | Petite & Sweet | Creative Bag

So many great ideas ... don't you agree?! Here's some of the details and product information ...

Rustic Outdoor Party ideas | Petite & Sweet | Creative Bag

Elle's signature drink recipe for iced hot chocolate can be found on the Petite & Sweet blog. Our square 8oz mason jars and birch bark straws are perfect for this rustic outdoor theme. We just received a new assortment of mason jar mugs and beverage containers that are perfect for an outdoor rustic party.

Rustic Outdoor Party ideas | Petite & Sweet | Creative Bag

The s'more bar is genius. I love how Elle used homemade marshmallows and you can find her recipe for making these here. Watch the video to find out more about how to recreate one of these yourself. Burlap table runners can be found here.

Rustic Outdoor Party ideas | Petite & Sweet | Creative Bag

Our paper bags were used for so many projects in the video. Simply mist the bags with a little bit of water and while the paper is still damp you can crinkle the bags to fit tightly around jars. Use the same technique for the favor bags. Elle filled these bags with popcorn and nuts - yum!

Rustic Outdoor Party ideas | Petite & Sweet | Creative Bag

Our wood slice medallions are inexpensive and easy to incorporate into so many projects . Here you can see they were used as escort cards with cutlery bundles and as food labels on the s'more bar.  We do sell custom napkins, but if you want a more casual diy look, you can make your own using our custom stamps and permanent ink on plain napkins. Find these glass containers and more here.

Rustic Outdoor Party ideas | Petite & Sweet | Creative Bag

Here's a couple more unique ideas on the video. Use jute twine and mini clothes pegs  with birch branches to create a photo display. This idea could be recreated for a wedding - hang escort cards to start and ask guests to replace their card with a polaroid photo of themself. Vintage books are used to hold a display of graham crackers ... use waxed paper in between the pages to make the book a little more "food safe".

Rustic Outdoor Party ideas | Petite & Sweet | Creative Bag

I have always liked the idea of serving bite size portions at a sweet table. These cookie and milk "shooters" are adorable! Follow these links for glass containers, birch bark paper straws and striped paper straws. Our mini metal buckets can be spray painted if you don't like the rustic finish. Use a regular sized cupcake liner inside the bucket and add a mini cupcake. Use mini clothes pegs to add a tag to each bucket if you want to use these as favors. 

Here's the video ... I hope that you will "Like" it! 


gifts in a jar with {free} recipe/label downloads and packaging ideas

Tuesday, 20 November 2012

I like using jars to package gifts and I thought that I would share with you two of my favourite recipes for jars. One recipe is for cookies and the other is for hot chocolate. Who doesn't love cookies and hot chocolate?! I also created two free digital downloads for the jar labels so that you can package your gifts in a jar like mine.


The first recipe is for M&M cookies. I layered all of the ingredients in the 4 cup jar as per the recipe directions. The label that I attached to the front of the jar with baker's twine contains the directions for making the cookie dough and baking details. 

I used some of our printed holiday tissue to decorate the top of the jar ... simply cut the tissue paper into circles, place over the jar top and secure with a ribbon. I used two layers of tissue paper on my jar. 


You will want to print these labels on white cardstock for best results.


The other recipe in a jar is for 
a peppermint hot chocolate mix. 
I made them to fit into a small 1 pint jar but if you want to make this in a larger jar just increase the recipe to fit the jar size. 

I created a label for the hot chocolate that could be inserted into the jar top to fit between the ring and top insert. 
The label has directions for how to make the hot chocolate. I printed the label on kraft cardstock but you could print it on white cardstock if you want a different look for your packaging. 
I also created the art a second way with a kraft paper look so that you could print it on white cardstock if you are unable to find kraft to print on. (We have kraft cardstock in the Creative Studio at the Toronto store only)

I tied a beautiful May Arts ribbon onto the jar lid and attached a felt acorn ornament for fun ... it's like getting two gifts in one. We have lots of beautiful felted holiday ornaments in our stores. 

If you want to give your labels an antique/vintage look like mine use distress inks on the edge of the labels after you have cut them out. I used Tim Holtz vintage photo on mine and used the blending tool to give a soft aged effect. I will be demonstrating this technique at my workshop this Thursday. 


I got excited when I realized that our 1 pint jars would fit perfectly inside this holiday gift box from our Carneeval collection. I created a fun bow for the top of the gift box from ribbons, jute, burlap and silk ribbons, Here's how I made the bow ...
I used ribbon scraps to create this bow ... if I was making a bunch of these for wedding or party favors I would purchase an assortment of ribbons and twines in different textures and widths. I cut wider ribbons in half to give some of the ribbons a vintage, worn look and used a large jingle bell for the centre. Gather all of your supplies and cut the ribbons to between 6" to 7". 

I tied jute around my gift box four times and tie a knot at the top. You will want to leave the ends of the jute long so that you can tie the ribbons to the top of the box. 

Layer your ribbon scraps in a circle like you see above. Mix up the layers so that the ribbon textures and colours are not all bunched together. 
Next I used a clear twist tie and gathered the ribbons in the middle. Place the ribbons on top of the box and use the jute to secure the ribbons to the box. Tie the jute right over the twist tie to hide the twist tie.

I squished the ribbons to make them stand up a bit and cover the top of the box. It's kind of like working hair product into your hair to give it volume!! You have to tease the ribbons a bit to get them to look right. Using baker's twine or jute, attach the jingle bell to the middle of the top few layers of ribbons. You can add a gift tag to the top by simply looping a string tied to the tag around the bell. 

I will be demonstrating these bows at the December 6th "wrap it up" workshop at our Toronto store.  

I have lots more holiday projects and packaging ideas to come ... sign up to receive my blog posts by email so that you don't miss the fun!

entertaining inspiration using wood serving boats

Tuesday, 21 August 2012

I took home some of our popular wood serving boats and bamboo skewers last week to use for some weekend entertaining and here's some of the ways that I used them.

Friday night: Cookie cutter sandwiches and chips made a great late in the day snack while the we hung around the pool with friends after work.

Saturday: The kids had a mid morning snack with mini pancake muffins I purchased at the grocery store. I added some cream cheese and fresh fruit to make these as yummy to look at as they were to eat.

Saturday: Chicken sliders with pretzels for lunch. Gotta love mini sliders ... they are so easy to store in the freezer and when you present them in these wood serving boats they make last minute entertaining a breeze.

Sunday: Another mid day snack for the kids! Peanut butter cookie cutter sandwiches with banana slices and strawberries. Have a nut allergy? Use a spreadable cheese instead!

I loved how natural the serving boats look and although they are disposable, I was easily able to wipe them out and reuse them if they were originally used to contain food items like chips and candies that were not messy.

The wood serving boats looked fabulous with our mason jars (available in stores only), daisy mason jar lids and paper straws. Adults seem to like using the mini mason jar glasses just as much as the kids.

Just in case you are wondering how I made the cookie cutter sandwiches ... here's my tricks and tips ...

I used a star cookie cutter but you can use any shape you want. Just keep in mind the size of your serving tray. I usually prep all of my food first. Any veggies to be used as garnishes on the bamboo skewers are washed and set off to the side in small bowls. I usually cut all of the sandwich elements (bread, cheese, etc) separately so I don't waste any food. (Who am I kidding? The kids and I eat all of the food scraps while we are preparing these!!) Assemble each sandwich as you wish using the cut out shapes.

One tip that I do have is that many cold meats don't cut well unless the meat is thick ... so I will cut the cold meats in between two slices of bread as shown in photo "two" above. Keep in mind that you don't have to use the cookie cutter for every layer of your sandwich. Bacon and a little bit of lettuce would look great sticking out of a "turkey, cheese, bacon, tomato and lettuce sandwich" ... Yum!!

Another tip: If you are using spreadable foods such as peanut butter, jam, etc add them to the cookie cutter bread shapes instead of making the sandwich and trying to cut it out like I did with the cold meats. It will save you time cleaning the cookie cutters in between each cut.

To make the veggie garnishes on the bamboo skewers I try to arrange the veggies so that the veggies stay in place on the skewers. You can see that I "tied" a piece of carrot (I used a veggie peeler to create the long thin pieces of carrot) between the cucumber and grape tomato. The cucumber slice kept the carrot from falling down.

To make the bamboo skewers stand up straight on a cookie cutter sandwich, you need to make sure that the sandwich is thick or the stick will fall over from the weight of the veggies. I usually make my cookie cutter sandwiches triple deckers.


everything tastes better on a {lollipop} stick

Friday, 3 August 2012

My daughters have always told me that "everything tastes better on a stick". When I saw a picture featuring Oreo cookie pops on Pinterest a while ago, I knew that I would have to try to make them with the girls.
We made our Oreo cookie pops as a treat to take to a friend's cottage the other weekend so I also had to come up with a way to display them. I started with an acrylic glass and filled it with styrofoam to hold the lollipop sticks straight. Then I added some paper sizzle to hide the styrofoam. I also tied a ribbon to one of the lollipop sticks to add a pop of colour. I can easily see these displayed at a food bar or at a birthday party.
Here's how I made the Oreo cookie pops:
I used the Double Stuf Oreo Cookies, our lollipop sticks, chocolate candy wafers and sprinkles.
1. Carefully insert the lollipop sticks into the white centre of the Oreo cookies and set aside.
2. Melt the chocolate candy wafers as per the product instructions and dip the top half of the cookie into the melted chocolate to coat.
3. Add coloured sprinkles before the chocolate hardens.
4. Set aside to dry.
Note: I only dipped the chocolate to cover about 1/2 of the cookie so that we could see the Oreo cookie logo. I also thought that it would be easier to set the cookies down to dry if they were not completely covered in chocolate (see photo below). You could cover the whole cookie if you want or use a different colour of candy wafer to tie into your party colour theme.

Hopefully, you will agree with me that "Oreo cookies taste better on a stick"!

Salad in a Jar ... our new jars and bottles have arrived!

Monday, 2 April 2012

We have just received lots of new bottles and jars our stores and I'm so happy that they are finally here. I have been wanting to use some of the glass bottles for some parties that I'm planning and I'll show you more of them in the next few weeks.

I recently saw a picture of a salad in a jar on the cover of a magazine while I was grocery shopping and as soon as I saw the 12oz eco mason jars on the shelves I knew that I had to put together a salad recipe of my own. The "aspenware" wood forks and baker's twine are also available in our stores as well.


I think that these would be great for a party.
I can see these lined up on a picnic table at the cottage for a family get together ... so much cooler than a bowl of salad and paper plates!

Valentine inspiration - marshmallow pop treats and gift cards using my free downloads

Wednesday, 8 February 2012

Valentine's day is next week and I thought I'd share a couple of more ideas if you are planning a Valentine celebration.

I've pinned a few of these marshmallow pop treats on my pinterest boards and I thought that it would be cool to try to make these with my daughters. They are so easy to make and you can use different colours of marshmallows, chocolate and sprinkle to customize these for any occasion or party theme.

To display these sweet treats on a lollipop stick I simply placed them in one of our glass cube vases that I filled with candy. {yum}

So here's how I made our Valentine marshmallow pop treats:
You will need some lollipop sticks, marshmallows, chocolate candy waffers and sprinkles (we used mini hearts in red, pink and white).
First you will need to insert the lollipop sticks into the marshmallows and set aside.
Melt the chocolate candy waffers as per the directions on the bag.
Carefully dip the marshmallow tops into the melted chocolate so that you cover about 1/2 of the marshmallow.
Add the decorative sprinkles to the chocolate candy coating while it is still warm.

Tip for the candy display in the glass vase: If you are making a lot of these marshmallow treats and you are using a large glass vase for presentation purposes I suggest that you bury a piece of styrofoam wrapped in wax paper into the vase and completely cover it with candies. This will save you from having to purchase a lot of candy and the styrofoam is an excellent material to keep the lollipop sticks in place.

Here's another cute idea for Valentine's day that was created by one of our customers!
Ivanka Lentle posted this project on her blog at ivankascardstudio.blogspot.com. Ivanka used my valentine flag download as an element on the gift tag of a Valentine themed loot bag. The clear candy bags are from our candy bag collection.

And here's a Valentine card that I created using some scrap elements from previous projects ...

I used one of my {free download} vintage labels from here and here, my {free download} mini chocolate wrappers from here, and scraps of scrapbooking paper (red dot print), ribbondiamond wrap from here and crystal stickers.  

I used a heart shaped punch to cut out my mini chocolate wrapper and I made the heart shiny by adding a layer of Inkssentials Glossy Accents and some clear glitter. All elements were attached to the card using two sided tape. The red machine stitching was added for a fun and unexpected detail ... I have been machine sewing on my scrapbooking and card making projects for years so it is part of my personal style.

Have you used any of our products and/or my downloads in one of your projects? Have you used our products at a party, wedding, special event? If so, I'd like to hear from you. Leave me a comment on this post with links to your blog or website. You can also email me your pictures! I would love to feature more of our talented customer's work on our blog!